1. 前言 因为工作中要使用Android Camera2 api,但因为Camera2比较复杂,网上资料也比较乱,有一定入门门槛,所以花了几天时间系统研究了下,并在CSDN上记录了下,希望能帮助到更
因为工作中要使用Android Camera2 api,但因为Camera2比较复杂,网上资料也比较乱,有一定入门门槛,所以花了几天时间系统研究了下,并在CSDN上记录了下,希望能帮助到更多的小伙伴。
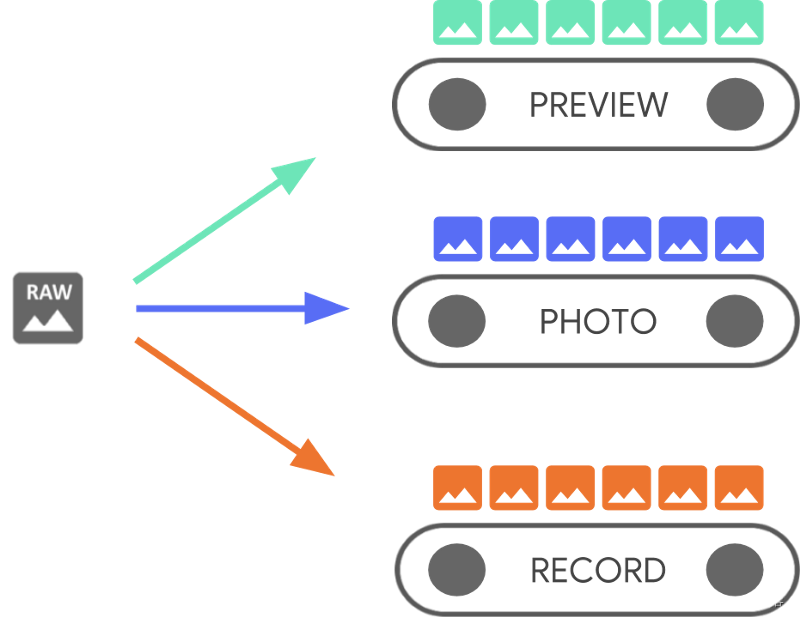
Camera2 API的包名是android.hardware.camera2,是Android 5.0后推出的一套调用摄像头设备的接口,用来替换原有的Camera。Camera2 API采用管道式的设计,使数据流从摄像头流向Surface,使用Camera2 API实现拍照录制视频功能时,主要涉及到以下几个类:
CameraManager : Camera设备的管理类,通过该对象可以查询设备的Camera设备信息,得到CameraDevice对象CameraDevice:CameraDevice提供了Camera设备相关的一系列固定参数,例如基础的设置和输出格式等。这些信息包含在CameraCharacteristic类中,可以通过getCameraCharacteristics(String)获得该类对象。CaptureSession : 在Camera API中,如何需要从Camera设备中获取视频或图片流,首先需要使用输出的Surface和CameraDevice创建一个CameraCaptureSessionCaptureRequest : 该类中定义了一个Camera设备获取帧数据所需要的参数,可以通过CameraDevice的工厂方法创建一个Request Builder,用于获取CaptureRequestCaptureResult : 当处理完一个请求后,会返回一个TotalCaptureResult对象,其中包含Camera设备执行该次Request所使用的参数以及自身状态。一个Android设备可以有多个摄像头。每个摄像头都是一个摄像头设备,摄像头设备可以同时输出多个流。
在AndroidManifest.xml中声明权限
<uses-permission android:name="android.permission.INTERNET" /><uses-permission android:name="android.permission.WRITE_EXTERNAL_STORAGE" /><uses-permission android:name="android.permission.READ_EXTERNAL_STORAGE" /><uses-permission android:name="android.permission.RECORD_AUDIO" /><uses-permission android:name="android.permission.CAMERA" />ActivityCompat.requestPermissions( this@MainActivity, arrayOf( Manifest.permission.CAMERA, Manifest.permission.WRITE_EXTERNAL_STORAGE, Manifest.permission.RECORD_AUDIO ), 123 )获取摄像头列表需要使用到CameraManager,通过cameraManager.cameraIdList可以获取到摄像头列表
private val cameraManager = context.getSystemService(Context.CAMERA_SERVICE) as CameraManager// 获取所有摄像头的CameraIDfun getCameraIds(): Array<String> { return cameraManager.cameraIdList}通过该方法可以获取摄像头的方位,判定是前摄还是后摄
fun getCameraOrientationString(cameraId: String): String { val characteristics = cameraManager.getCameraCharacteristics(cameraId) val lensFacing = characteristics.get(CameraCharacteristics.LENS_FACING)!! return when (lensFacing) { CameraCharacteristics.LENS_FACING_BACK -> "后摄(Back)" CameraCharacteristics.LENS_FACING_FRONT -> "前摄(Front)" CameraCharacteristics.LENS_FACING_EXTERNAL -> "外置(External)" else -> "Unknown" }}还有一个简易的判断方式,一般情况下
cameraId为0是后摄,cameraId为1是前摄。
我们来获取一下试试
val cameraIds = viewModel.getCameraIds()cameraIds.forEach{ cameraId -> val orientation = viewModel.getCameraOrientationString(cameraId) Log.i(TAG,"cameraId : $cameraId - $orientation")}运行后可以发现打印了日志
cameraId : 0 - 后摄(Back)cameraId : 1 - 前摄(Front)来修改一下XML布局
<FrameLayout xmlns:android="Http://schemas.android.com/apk/res/android" android:layout_width="match_parent" android:layout_height="match_parent" android:background="@color/black" xmlns:app="http://schemas.android.com/apk/res-auto"> <SurfaceView android:id="@+id/surface_view" android:layout_width="match_parent" android:layout_height="match_parent" app:layout_constraintLeft_toLeftOf="parent" app:layout_constraintRight_toRightOf="parent" app:layout_constraintTop_toTopOf="parent" app:layout_constraintBottom_toBottomOf="parent" /> <Button app:layout_constraintRight_toRightOf="parent" app:layout_constraintLeft_toLeftOf="parent" app:layout_constraintBottom_toBottomOf="parent" android:id="@+id/btn_take_picture" android:layout_width="wrap_content" android:layout_height="wrap_content" android:layout_gravity="bottom|center" android:layout_marginBottom="64dp" android:text="拍照"/>FrameLayout>//后摄 : 0 ,前摄 : 1private val cameraId = "0"private val TAG = CameraActivity::class.java.simpleNameprivate lateinit var cameraDevice: CameraDeviceprivate val cameraThread = HandlerThread("CameraThread").apply { start() }private val cameraHandler = Handler(cameraThread.looper)private val cameraManager: CameraManager by lazy { getSystemService(Context.CAMERA_SERVICE) as CameraManager}private val characteristics: CameraCharacteristics by lazy { cameraManager.getCameraCharacteristics(cameraId)}private lateinit var session: CameraCaptureSession添加SurfaceView回调,并在SurfaceView创建的时候,去初始化相机
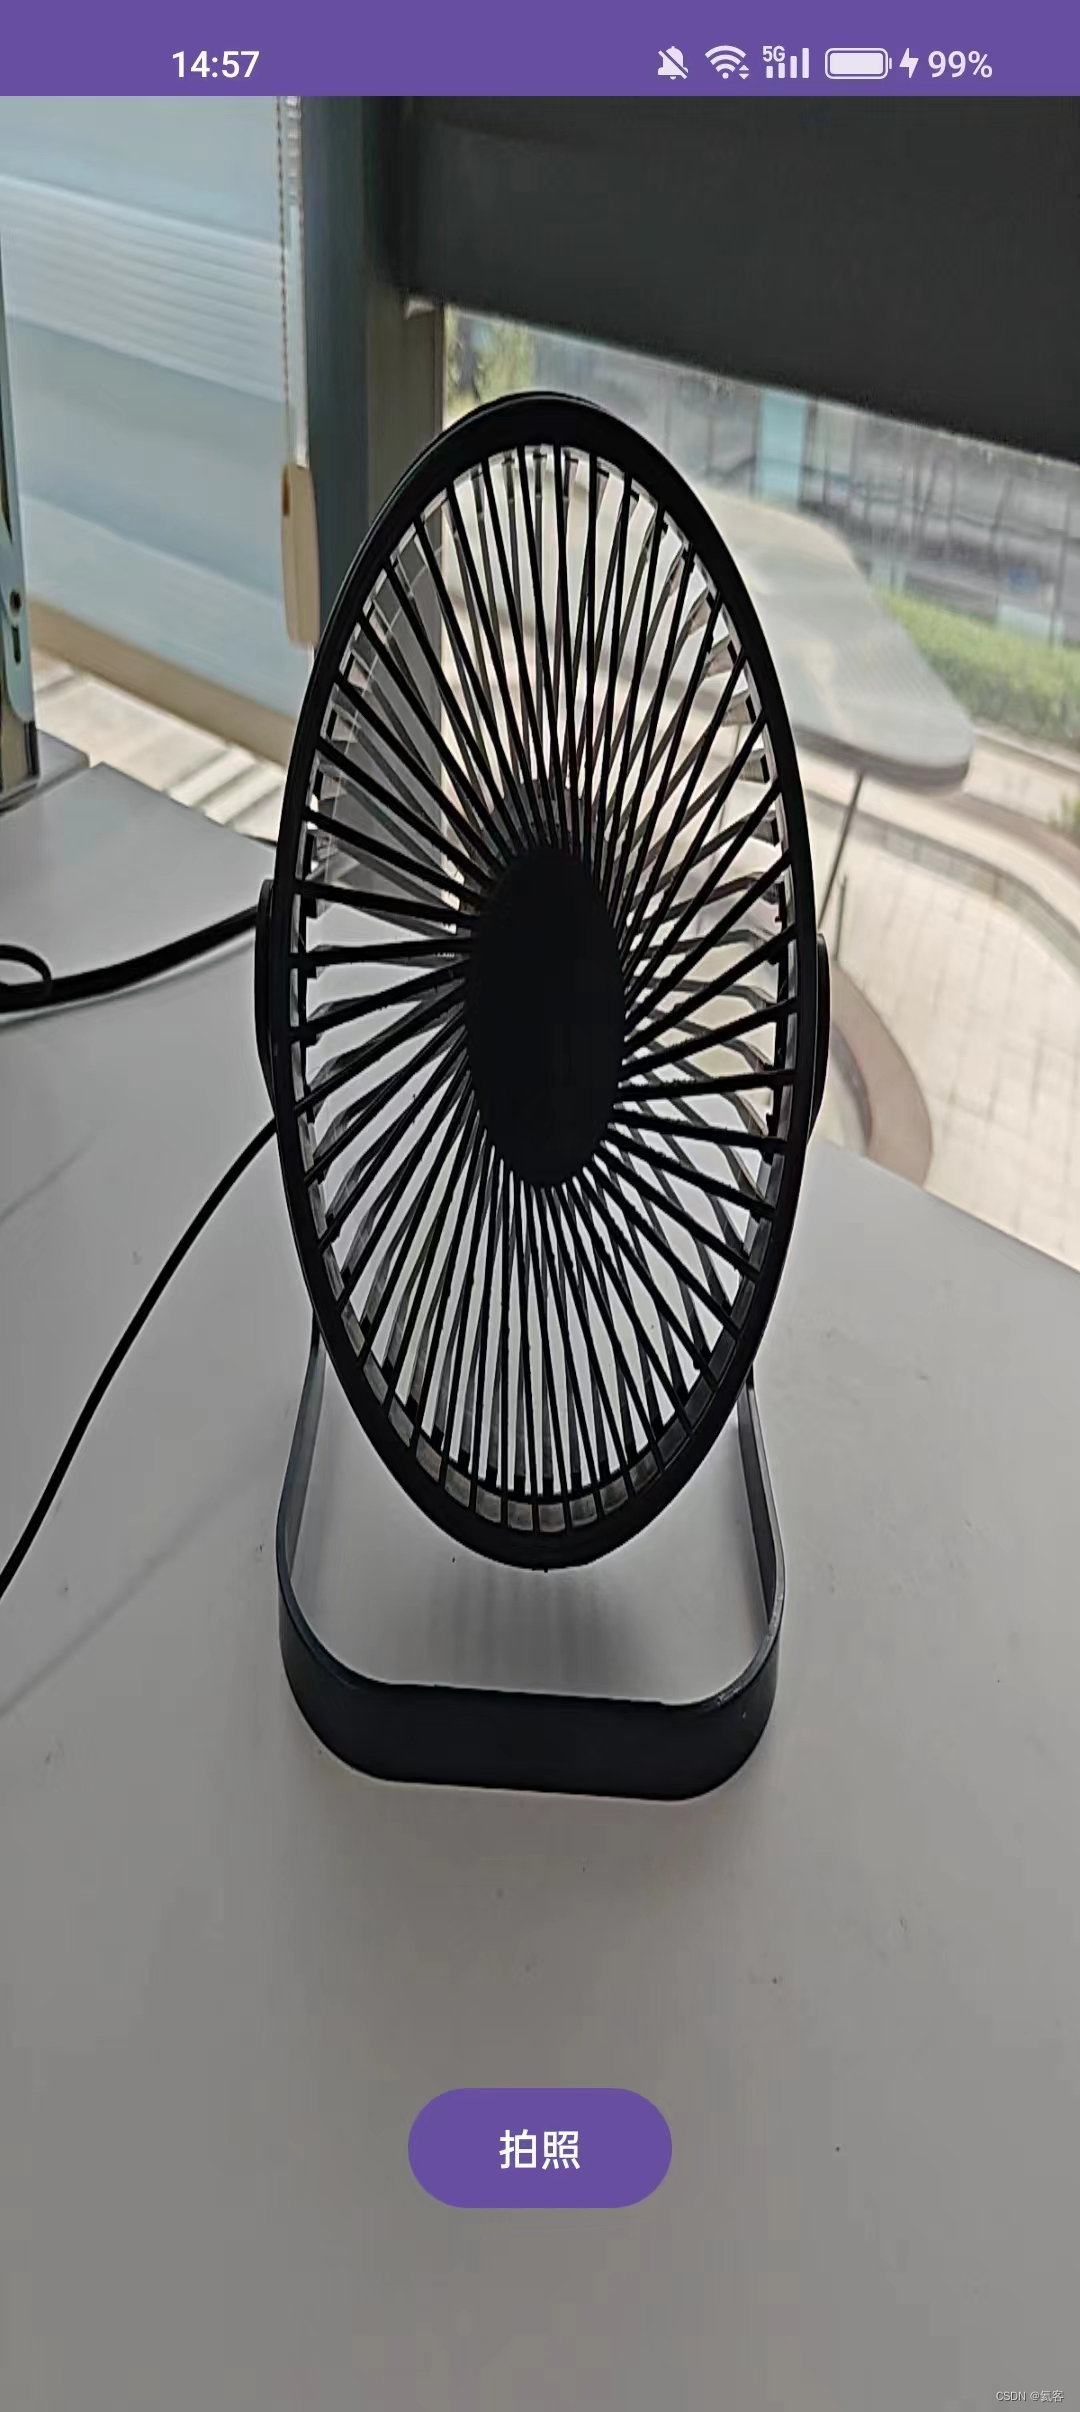
override fun onCreate(savedInstanceState: Bundle?) {super.onCreate(savedInstanceState)binding = ActivityCameraBinding.inflate(layoutInflater)setContentView(binding.root)binding.surfaceView.holder.addCallback(object : SurfaceHolder.Callback { override fun surfaceChanged(holder: SurfaceHolder,fORMat: Int, width: Int,height: Int) = Unit override fun surfaceDestroyed(holder: SurfaceHolder) = Unit override fun surfaceCreated(holder: SurfaceHolder) { //为了确保设置了大小,需要在主线程中初始化camera binding.root.post { openCamera(cameraId) } }})}@SuppressLint("MissingPermission")private fun openCamera(cameraId: String) { cameraManager.openCamera(cameraId, object : CameraDevice.StateCallback() { override fun onOpened(camera: CameraDevice) {cameraDevice = camerastartPreview() } override fun onDisconnected(camera: CameraDevice) { this@CameraActivity.finish() } override fun onError(camera: CameraDevice, error: Int) { Toast.makeText(application, "openCamera Failed:$error", Toast.LENGTH_SHORT).show() } }, cameraHandler)}private fun startPreview() {//因为摄像头设备可以同时输出多个流,所以可以传入多个surface val targets = listOf(binding.surfaceView.holder.surface ) cameraDevice.createCaptureSession(targets, object : CameraCaptureSession.StateCallback() { override fun onConfigured(captureSession: CameraCaptureSession) { //赋值session session = captureSession val captureRequest = cameraDevice.createCaptureRequest( CameraDevice.TEMPLATE_PREVIEW ).apply { addTarget(binding.surfaceView.holder.surface) } //这将不断地实时发送视频流,直到会话断开或调用session.stoprepeat() session.setRepeatingRequest(captureRequest.build(), null, cameraHandler) } override fun onConfigureFailed(session: CameraCaptureSession) { Toast.makeText(application,"session configuration failed",Toast.LENGTH_SHORT).show() } }, cameraHandler)}可以看到预览画面是出来了,但是比例不对,有拉伸形变,下面我们会来解决这个问题
新建AutoFitSurfaceView继承自SurfaceView,这个类可以调整为我们指定的宽高比,在显示画面的时候进行中心裁剪。
class AutoFitSurfaceView @JVMOverloads constructor( context: Context, attrs: AttributeSet? = null, defStyle: Int = 0) : SurfaceView(context, attrs, defStyle) { private var aspectRatio = 0f fun setAspectRatio(width: Int, height: Int) { require(width > 0 && height > 0) { "Size cannot be negative" } aspectRatio = width.toFloat() / height.toFloat() holder.setFixedSize(width, height) requestLayout() } override fun onMeasure(widthMeasureSpec: Int, heightMeasureSpec: Int) { super.onMeasure(widthMeasureSpec, heightMeasureSpec) val width = MeasureSpec.getSize(widthMeasureSpec) val height = MeasureSpec.getSize(heightMeasureSpec) if (aspectRatio == 0f) { setMeasuredDimension(width, height) } else { // Performs center-crop transformation of the camera frames val newWidth: Int val newHeight: Int val actualRatio = if (width > height) aspectRatio else 1f / aspectRatio if (width < height * actualRatio) { newHeight = height newWidth = (height * actualRatio).roundToInt() } else { newWidth = width newHeight = (width / actualRatio).roundToInt() } Log.d(TAG, "Measured dimensions set: $newWidth x $newHeight") setMeasuredDimension(newWidth, newHeight) } } compaNIOn object { private val TAG = AutoFitSurfaceView::class.java.simpleName }}XML布局中将SurfaceView替换为AutoFitSurfaceView<FrameLayout xmlns:android="http://schemas.android.com/apk/res/android" android:layout_width="match_parent" android:layout_height="match_parent" android:background="@color/black" xmlns:app="http://schemas.android.com/apk/res-auto"> <com.heiko.mycamera2test.AutoFitSurfaceView android:id="@+id/surface_view" android:layout_width="match_parent" app:layout_constraintLeft_toLeftOf="parent" app:layout_constraintRight_toRightOf="parent" app:layout_constraintTop_toTopOf="parent" app:layout_constraintBottom_toBottomOf="parent" android:layout_height="match_parent" /> <Button app:layout_constraintRight_toRightOf="parent" app:layout_constraintLeft_toLeftOf="parent" app:layout_constraintBottom_toBottomOf="parent" android:id="@+id/btn_take_picture" android:layout_width="wrap_content" android:layout_height="wrap_content" android:layout_gravity="bottom|center" android:layout_marginBottom="64dp" android:text="拍照"/>FrameLayout>注意这里根布局不能使用
ConstraintLayout,否则宽高比还是会出现问题
新建SmartSize类,这个类通过比较显示的SurfaceView和摄像头支持的分辨率,匹配出最大支持的预览大小
import android.graphics.Pointimport android.hardware.camera2.CameraCharacteristicsimport android.hardware.camera2.params.StreamConfigurationMapimport android.util.Sizeimport android.view.Displayimport java.lang.Math.maximport java.lang.Math.minclass SmartSize(width: Int, height: Int) { var size = Size(width, height) var long = max(size.width, size.height) var short = min(size.width, size.height) override fun toString() = "SmartSize(${long}x${short})"}val SIZE_1080P: SmartSize = SmartSize(1920, 1080)fun getDisplaySmartSize(display: Display): SmartSize { val outPoint = Point() display.getRealSize(outPoint) return SmartSize(outPoint.x, outPoint.y)}fun <T>getPreviewOutputSize( display: Display, characteristics: CameraCharacteristics, targetClass: Class<T>, format: Int? = null): Size { // Find which is smaller: screen or 1080p val screenSize = getDisplaySmartSize(display) val hdScreen = screenSize.long >= SIZE_1080P.long || screenSize.short >= SIZE_1080P.short val maxSize = if (hdScreen) SIZE_1080P else screenSize // If image format is provided, use it to determine supported sizes; else use target class val config = characteristics.get( CameraCharacteristics.SCALER_STREAM_CONFIGURATION_MAP)!! if (format == null) assert(StreamConfigurationMap.isOutputSupportedFor(targetClass)) else assert(config.isOutputSupportedFor(format)) val allSizes = if (format == null) config.getOutputSizes(targetClass) else config.getOutputSizes(format) // Get available sizes and sort them by area from largest to smallest val validSizes = allSizes .sortedWith(compareBy { it.height * it.width }) .map { SmartSize(it.width, it.height) }.reversed() // Then, get the largest output size that is smaller or equal than our max size return validSizes.first { it.long <= maxSize.long && it.short <= maxSize.short }.size}我们在原本调用openCamera()方法之前的地方,先去设置一下宽高比setAspectRatio()
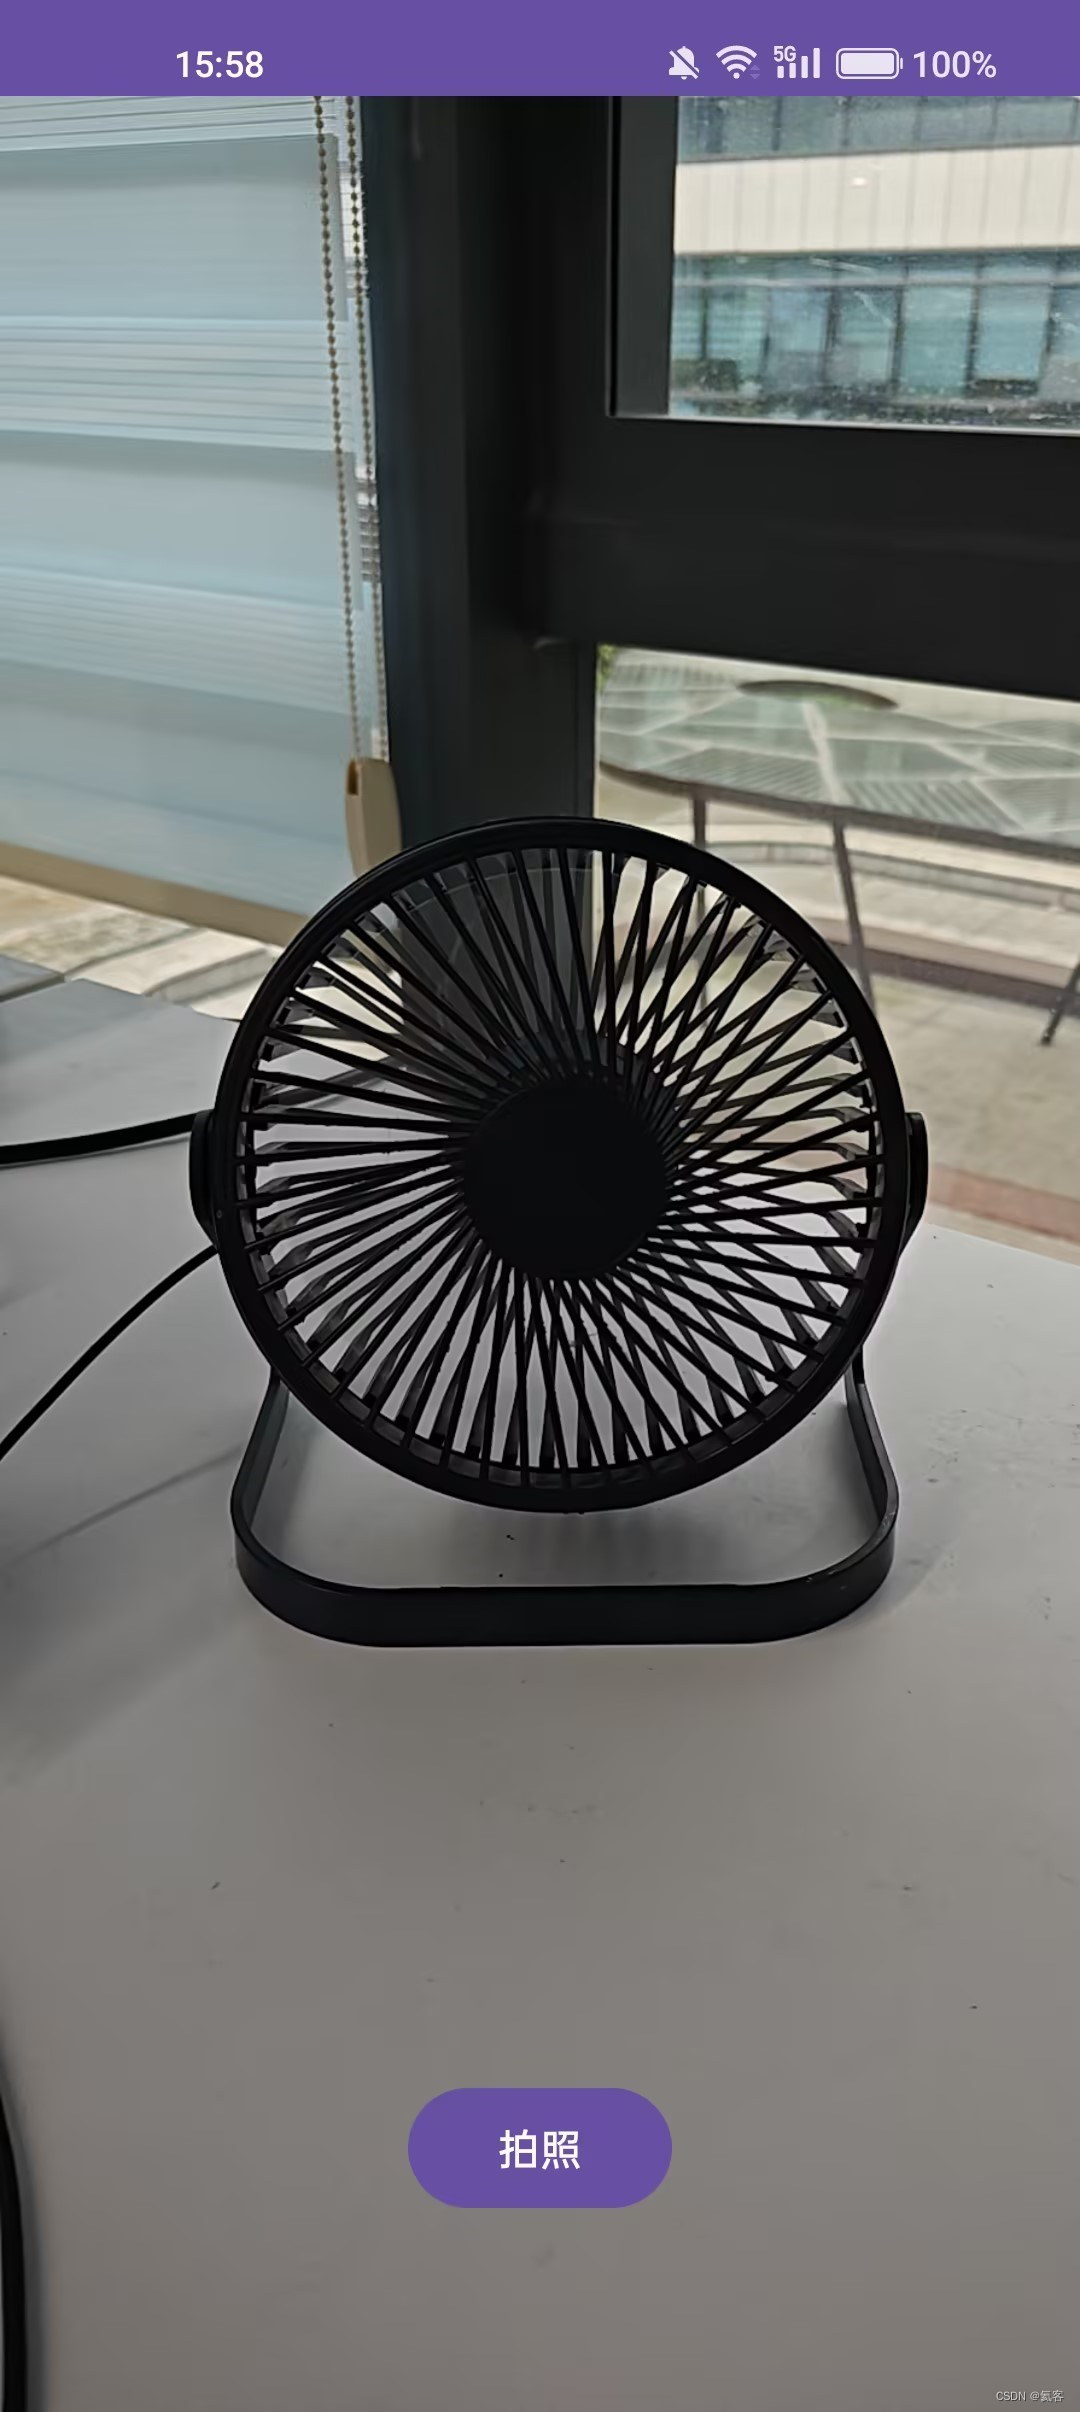
binding.surfaceView.holder.addCallback(object : SurfaceHolder.Callback { //...省略了代码.... override fun surfaceCreated(holder: SurfaceHolder) { //设置宽高比 setAspectRatio() //为了确保设置了大小,需要在主线程中初始化camera binding.root.post { openCamera2(cameraId) } }})private fun setAspectRatio() {val previewSize = getPreviewOutputSize( binding.surfaceView.display, characteristics, SurfaceHolder::class.java)Log.d(TAG, "Selected preview size: $previewSize")binding.surfaceView.setAspectRatio(previewSize.width, previewSize.height)}可以看到,现在比例显示正常了
在Activity销毁的时候,我们也要去销毁相机,代码如下
override fun onStop() { super.onStop() try { cameraDevice.close() } catch (exc: Throwable) { Log.e(TAG, "Error closing camera", exc) }}override fun onDestroy() { super.onDestroy() cameraThread.quitSafely() //imageReaderThread.quitSafely()}下载地址 : Android Camera2 Demo - 实现相机预览、拍照、录制视频功能
更多Camera2相关文章,请看
十分钟实现 Android Camera2 相机预览_氦客的博客-CSDN博客
十分钟实现 Android Camera2 相机拍照_氦客的博客-CSDN博客
十分钟实现 Android Camera2 视频录制_氦客的博客-CSDN博客
Android 使用CameraX实现预览/拍照/录制视频/图片分析/对焦/缩放/切换摄像头等操作_氦客的博客-CSDN博客
Android 从零开发一个简易的相机App_android开发简易app_氦客的博客-CSDN博客
本文参考文章
[Android进阶] 使用Camera2 API实现一个相机预览页面
实现预览 | Android 开发者 | Android Developers (google.cn)
来源地址:https://blog.csdn.net/EthanCo/article/details/131371887
--结束END--
本文标题: 十分钟实现 Android Camera2 相机预览
本文链接: https://www.lsjlt.com/news/463932.html(转载时请注明来源链接)
有问题或投稿请发送至: 邮箱/279061341@qq.com QQ/279061341
2024-01-21
2023-10-28
2023-10-28
2023-10-27
2023-10-27
2023-10-27
2023-10-27
回答
回答
回答
回答
回答
回答
回答
回答
回答
回答


官方手机版

微信公众号

商务合作

0