Python 官方文档:入门教程 => 点击学习
目录一、前言二、日志配置三、核心容器 支持@Nullable四、核心容器支持函数式风格五、支持整合 JUnit5一、前言 1.整个 spring5 框架的代码基于 Java8 ,运行
1.整个 spring5 框架的代码基于 Java8 ,运行时兼容 jdk9,许多不建议使用的类和方 法在代码库中删除
2.Spring 5框架自带了通用的日志封装
Spring5 已经移除 Log4jConfigListener,官方建议使用 Log4j2
jar包
<!-- 日志 -->
        <!-- https://mvnrepository.com/artifact/org.apache.logging.log4j/log4j-core -->
        <dependency>
            <groupId>org.apache.logging.log4j</groupId>
            <artifactId>log4j-core</artifactId>
            <version>2.14.1</version>
        </dependency>

        <!-- Https://mvnrepository.com/artifact/org.apache.logging.log4j/log4j-api -->
        <dependency>
            <groupId>org.apache.logging.log4j</groupId>
            <artifactId>log4j-api</artifactId>
            <version>2.14.1</version>
        </dependency>
        <!-- https://mvnrepository.com/artifact/org.apache.logging.log4j/log4j-slf4j-impl -->
        <dependency>
            <groupId>org.apache.logging.log4j</groupId>
            <artifactId>log4j-slf4j-impl</artifactId>
            <version>2.14.1</version>
            <!--<scope>test</scope>-->
        </dependency>
        <!-- https://mvnrepository.com/artifact/org.slf4j/slf4j-api -->
        <dependency>
            <groupId>org.slf4j</groupId>
            <artifactId>slf4j-api</artifactId>
            <version>1.7.30</version>
        </dependency>
log4j2.xml配置文件
<?xml version= "1.0"  encoding= "UTF-8" ?>
<!--日志级别以及优先级排序: OFF > FATAL > ERROR > WARN > INFO > DEBUG > TRACE > ALL -->
<!--Configuration 后面的 status 用于设置 log4j2 自身内部的信息输出,可以不设置, 当设置成 trace 时,可以看到
    log4j2 内部各种详细输出 -->
<configuration status="INFO">
    <!--先定义所有的 appender -->
    <appenders>
        <!--输出日志信息到控制台 -->
        <console name="Console" target="SYSTEM_OUT">
            <!--控制日志输出的格式 -->
            <PatternLayout
                pattern="%d{yyyy-MM-dd HH:mm:ss.SSS} [%t] %-5level %logger{36} - %msg%n" />
        </console>
    </appenders>
    <!--然后定义 logger,只有定义 logger 并引入的 appender,appender 才会生效 -->
    <!--root:用于指定项目的根日志,如果没有单独指定 Logger,则会使用 root 作为 默认的日志输出 -->
    <loggers>
        <root level="info">
            <appender-ref ref="Console" />
        </root>
    </loggers>
</configuration>
手动日志输出
public class UserLog {

    private static final Logger log=LoggerFactory.getLogger(UserLog.class);

    public static void main(String[] args) {
        log.info("手动控制日志输出1");
        log.warn("手动控制日志输出2");
        System.out.println("测试日志");
    }
}
@Nullable 注解可以使用在方法上面,属性上面,参数上面,表示方法返回可以为空,属性值可以为空,参数值可以为空
1.注解用在方法上面,方法返回值可以为空
2.注解使用在方法参数里面,方法参数可以为空
3.注解使用在属性上面,属性值可以为
函数式风格 GenericApplicationContext
//函数式风格创建对象,交给 spring 进行管理
    @Test
    public void test4() {
        //1 创建 GenericApplicationContext 对象
        GenericApplicationContext context =  new GenericApplicationContext();
        //2 调用 context 的方法对象注册
        context.refresh();
        context.reGISterBean( "user1",User. class,() ->  new User());
        //3 获取在 spring 注册的对象
        // User user = (User)context.getBean("com.atguigu.spring5.test.User");
        User user = (User)context.getBean( "user1");
        System. out .println(user);
    }
1.整合JUnit4
jar包
<dependency>
            <groupId>org.springframework</groupId>
            <artifactId>spring-test</artifactId>
            <version>5.3.6</version>
        <!--    <scope>test</scope> -->
        </dependency>
import org.junit.Test;
import org.junit.runner.RunWith;
import org.springframework.beans.factory.annotation.Autowired;
import org.springframework.test.context.ContextConfiguration;
import org.springframework.test.context.junit4.SpringJUnit4ClassRunner;

import cn.zj.service.UserService;

@RunWith(SpringJUnit4ClassRunner.class)
@ContextConfiguration("classpath:bean1.xml") // 加载配置文件
public class JTest4 {
    @Autowired
    private UserService userService;

    @Test
    public void test1() {
        userService.accountMoney();
    }
}
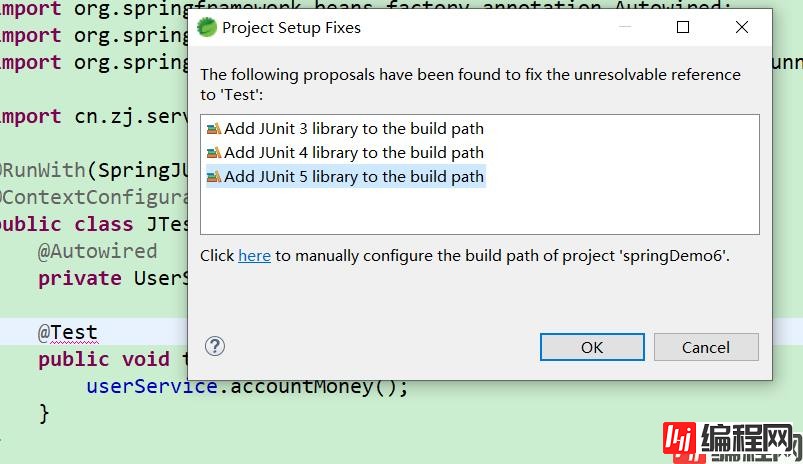
2.整合JUnit5
jar包引入
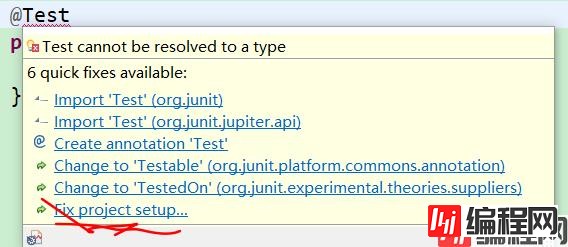
import org.junit.jupiter.api.Test;
import org.springframework.beans.factory.annotation.Autowired;
import org.springframework.test.context.junit.jupiter.SpringJUnitConfig;

import cn.zj.service.UserService;

//@ExtendWith(SpringExtension.class)
//@ContextConfiguration("classpath:bean1.xml")
@SpringJUnitConfig(locations="classpath:bean1.xml")
//复合注解替代上面两个注解完成整合
public class JTest5 {

    @Autowired
    private UserService userService;

    @Test
    public void test1() {
        userService.accountMoney();
    }
}
到此这篇关于Java基础之spring5新功能学习的文章就介绍到这了,更多相关spring5新功能内容请搜索编程网以前的文章或继续浏览下面的相关文章希望大家以后多多支持编程网!
--结束END--
本文标题: Java基础之spring5新功能学习
本文链接: https://www.lsjlt.com/news/125354.html(转载时请注明来源链接)
有问题或投稿请发送至: 邮箱/279061341@qq.com QQ/279061341
下载Word文档到电脑,方便收藏和打印~
2024-03-01
2024-03-01
2024-03-01
2024-02-29
2024-02-29
2024-02-29
2024-02-29
2024-02-29
2024-02-29
2024-02-29
回答
回答
回答
回答
回答
回答
回答
回答
回答
回答


官方手机版

微信公众号

商务合作


0