Python 官方文档:入门教程 => 点击学习
目录1.整合mybatis操作1.1.配置模式1.2.注解模式1.3.混合模式1.整合MyBatis操作 前面一篇提到了SpringBoot整合基础的数据源JDBC、Druid操作,
前面一篇提到了SpringBoot整合基础的数据源JDBC、Druid操作,实际项目中更常用的还是MyBatis框架,而springBoot整合MyBatis进行CRUD也非常方便。
下面从配置模式、注解模式、混合模式三个方面进行说明MyBatis与SpringBoot的整合。
MyBatis配置模式是指使用mybatis配置文件的方式与SpringBoot进行整合,相对应的就有mybatis-config.xml(用于配置驼峰命名,也可以省略这个文件)、XxxMapper.xml文件。
主要步骤为:
在application.yaml中指定Mapper配置文件的位置,以及指定全局配置文件的信息 (建议;配置在mybatis.configuration中,可以省略mybatis-config.xml文件)
下面是具体整合配置步骤:
①引入相关依赖pom.xml配置:
pom.xml
<dependencies>
        <dependency>
            <groupId>org.springframework.boot</groupId>
            <artifactId>spring-boot-starter-WEB</artifactId>
        </dependency>

        <!--整合mybatis-->
        <dependency>
            <groupId>org.mybatis.spring.boot</groupId>
            <artifactId>mybatis-spring-boot-starter</artifactId>
            <version>2.1.4</version>
        </dependency>
        <dependency>
            <groupId>Mysql</groupId>
            <artifactId>mysql-connector-java</artifactId>
            <scope>runtime</scope>
        </dependency>
        <dependency>
            <groupId>org.springframework.boot</groupId>
            <artifactId>spring-boot-devtools</artifactId>
            <scope>runtime</scope>
            <optional>true</optional>
        </dependency>
        <dependency>
            <groupId>org.projectlombok</groupId>
            <artifactId>lombok</artifactId>
            <optional>true</optional>
        </dependency>
        <dependency>
            <groupId>org.springframework.boot</groupId>
            <artifactId>spring-boot-starter-test</artifactId>
            <scope>test</scope>
        </dependency>
    </dependencies>

    <build>
        <plugins>
            <plugin>
                <groupId>org.springframework.boot</groupId>
                <artifactId>spring-boot-Maven-plugin</artifactId>
                <configuration>
                    <excludes>
                        <exclude>
                            <groupId>org.projectlombok</groupId>
                            <artifactId>lombok</artifactId>
                        </exclude>
                    </excludes>
                </configuration>
            </plugin>
        </plugins>
    </build>
②编写对应Mapper接口:
@Mapper  //这个注解表示了这个类是一个mybatis的mapper接口类
@Repository
public interface UserMapper {
    //@Select("select * from user")
    List<User> findAllUsers();

    //@Insert("insert into user(id, username, passWord) values (#{id}, #{username}, #{password})")
    void insert(User user);

    //@Update("update user set username = #{username}, password = #{password} where id = #{id}")
    void update(User user);

    //@Delete("delete from user where id = #{id}")
    void deleteById(Integer id);
}③在resources下创建对应的mapper文件,对应domain类,数据库表单如下:
User类:
@Data
public class User {
    private Integer id;
    private String username;
    private String password;
}数据库user表:

UserMapper.xml文件:
<?xml version="1.0" encoding="UTF-8" ?>
<!DOCTYPE mapper PUBLIC "-//mybatis.org//DTD Mapper 3.0//EN" "Http://mybatis.org/dtd/mybatis-3-mapper.dtd">
<!--namespace表示当前mapper的唯一标识:一般使用domain的全路径名+Mapper来命名-->
<mapper namespace="com.fengye.springboot_mybatis.mapper.UserMapper">
    <!--id:方法表示,一般配置对应的方法;
        resultType:表示该方法有返回,返回需要封装到对应实体的类型-->
    <select id="findAllUsers" resultType="com.fengye.springboot_mybatis.entity.User">
        select * from user
    </select>

    <insert id="insert" parameterType="com.fengye.springboot_mybatis.entity.User">
        insert into user(id, username, password) values (#{id}, #{username}, #{password})
    </insert>

    <update id="update" parameterType="com.fengye.springboot_mybatis.entity.User">
        update user set username = #{username}, password = #{password} where id = #{id}
    </update>

    <delete id="deleteById" parameterType="Integer">
        delete from user where id = #{id}
    </delete>
</mapper>
④对应配置application.yml文件:
application.yml
server:
  port: 8083

spring:
  datasource:
    username: root
    password: admin
    #假如时区报错,增加时区配置serverTimezone=UTC
    url: jdbc:mysql://localhost:3306/mybatis02_0322?serverTimezone=UTC&useUnicode=true&characterEncoding=utf-8
    driver-class-name: com.mysql.cj.jdbc.Driver

mybatis:
  #config-location: classpath:mybatis/mybatis-config.xml  使用了configuration注解则无需再指定mybatis-config.xml文件
  mapper-locations: classpath:mybatis/mapper
    @Insert("insert into city(name, state, country) values (#{name}, #{state}, #{country})")
    @Options(useGeneratedKeys = true, keyProperty = "id")
    public void insert(City city);

    @Update("update city set name = #{name}, state = #{state}, country = #{country} where id = #{id}")
    public void update(City city);

    @Delete("delete from city where id = #{id}")
    public void deleteById(Long id);
}
③编写Service层、Controller层:
Service相关:
public interface CityService {
    City findCityById(Long id);

    void insert(City city);

    void update(City city);

    void deleteById(Long id);
}


@Service
public class CityServiceImpl implements CityService {
    @Autowired
    private CityMapper cityMapper;

    @Override
    public City findCityById(Long id) {
        return cityMapper.getCityById(id);
    }

    @Override
    public void insert(City city) {
        cityMapper.insert(city);
    }

    @Override
    public void update(City city) {
        cityMapper.update(city);
    }

    @Override
    public void deleteById(Long id) {
        cityMapper.deleteById(id);
    }
}
Controller相关:
@RestController
@RequestMapping("/city/api")
public class CityController {
    @Autowired
    private CityService cityService;

    @RequestMapping("/findCityById/{id}")
    public City findCityById(@PathVariable("id") Long id){
        return cityService.findCityById(id);
    }

    @PostMapping("/insert")
    public String insert(City city){
        cityService.insert(city);
        return "insert ok";
    }

    @PostMapping("/update")
    public String update(City city){
        cityService.update(city);
        return "update ok";
    }

    @GetMapping("/delete/{id}")
    public String delete(@PathVariable("id") Long id){
        cityService.deleteById(id);
        return "delete ok";
    }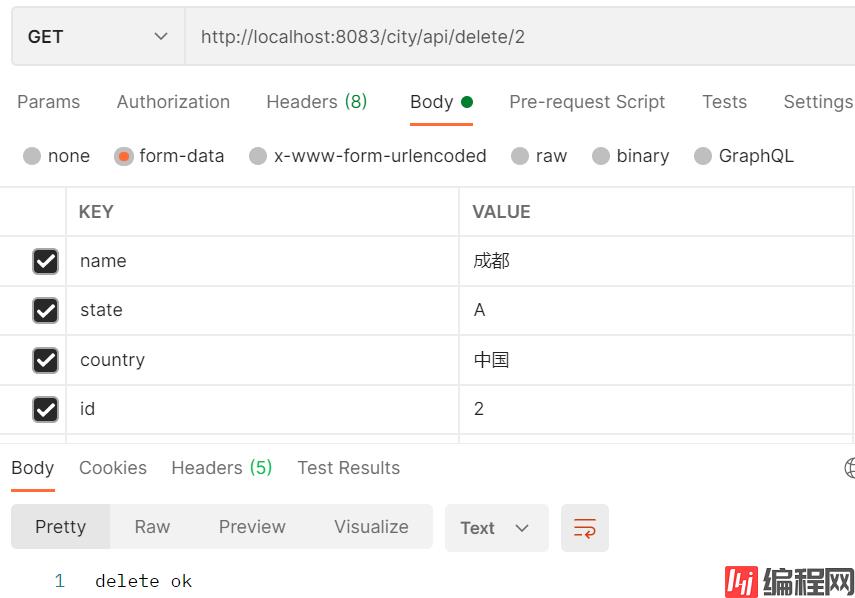
}④对应使用Postman接口进行测试:
简单模拟接口POST/GET请求即可:
在实际项目开发中涉及很多复杂业务及连表查询SQL,可以配合使用注解与配置模式,达到最佳实践的目的。
实际项目操作步骤:
具体配置如下:
@SpringBootApplication
//主启动类上标注,在XxxMapper中可以省略@Mapper注解
@MapperScan("com.fengye.springboot_mybatis.mapper")
public class SpringbootMybatisApplication {
    public static void main(String[] args) {
        SpringApplication.run(SpringbootMybatisApplication.class, args);
    }

}


@Repository
public interface CityMapper {
    @Select("select * from city where id = #{id}")
    public City getCityById(Long id);


    @Insert("insert into city(name, state, country) values (#{name}, #{state}, #{country})")
    @Options(useGeneratedKeys = true, keyProperty = "id")
    public void insert(City city);

    @Update("update city set name = #{name}, state = #{state}, country = #{country} where id = #{id}")
    public void update(City city);

    @Delete("delete from city where id = #{id}")
    public void deleteById(Long id);
}
本博客参考写作文档:
SpringBoot2核心技术与响应式编程
博客涉及代码示例均已上传至GitHub地址:
SpringBootStudy
到此这篇关于SpringBoot整合MyBatis超详细教程的文章就介绍到这了,更多相关SpringBoot整合MyBatis内容请搜索编程网以前的文章或继续浏览下面的相关文章希望大家以后多多支持编程网!
--结束END--
本文标题: SpringBoot整合MyBatis超详细教程
本文链接: https://www.lsjlt.com/news/125729.html(转载时请注明来源链接)
有问题或投稿请发送至: 邮箱/279061341@qq.com QQ/279061341
下载Word文档到电脑,方便收藏和打印~
2024-03-01
2024-03-01
2024-03-01
2024-02-29
2024-02-29
2024-02-29
2024-02-29
2024-02-29
2024-02-29
2024-02-29
回答
回答
回答
回答
回答
回答
回答
回答
回答
回答


官方手机版

微信公众号

商务合作


0