虚拟机软件:vmware workstation 镜像:deepin-desktop-commUnity-1002-amd64.iso 提前创建安装目录:D:\linux\deep
镜像:deepin-desktop-commUnity-1002-amd64.iso
提前创建安装目录:D:\linux\deepin-20
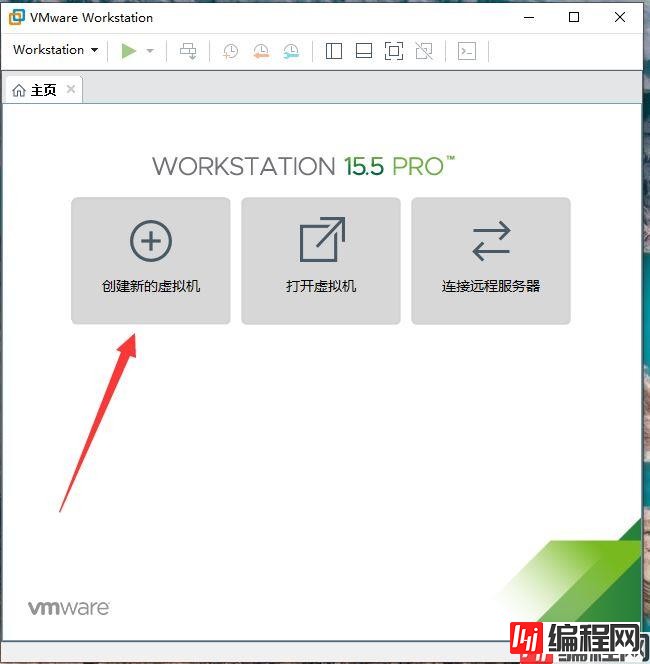
1、打开安装好的vmware workstation,点击创建新的虚拟机
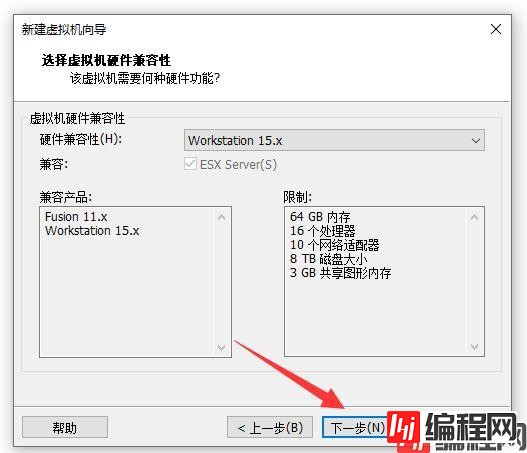
2、

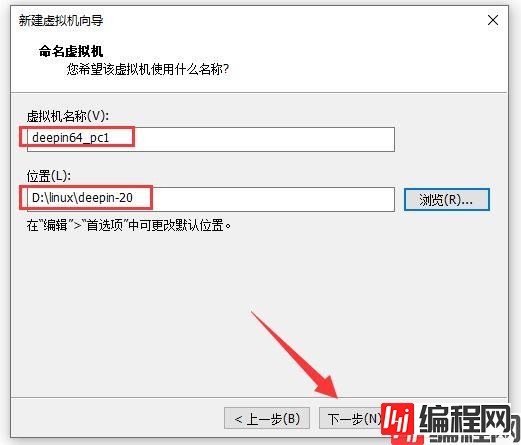
3、
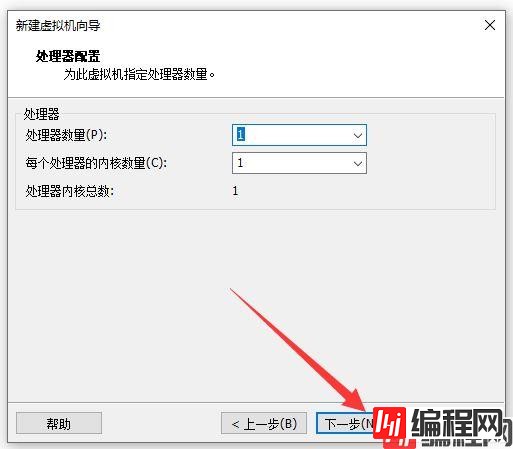
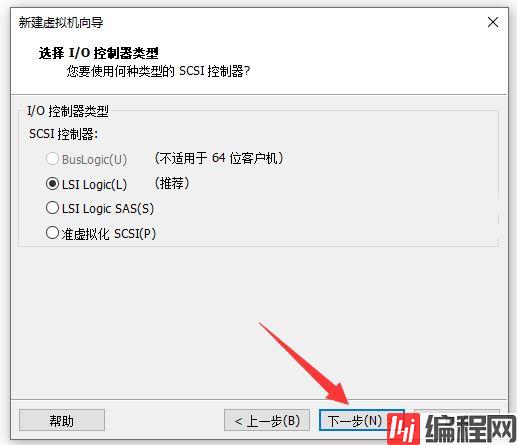
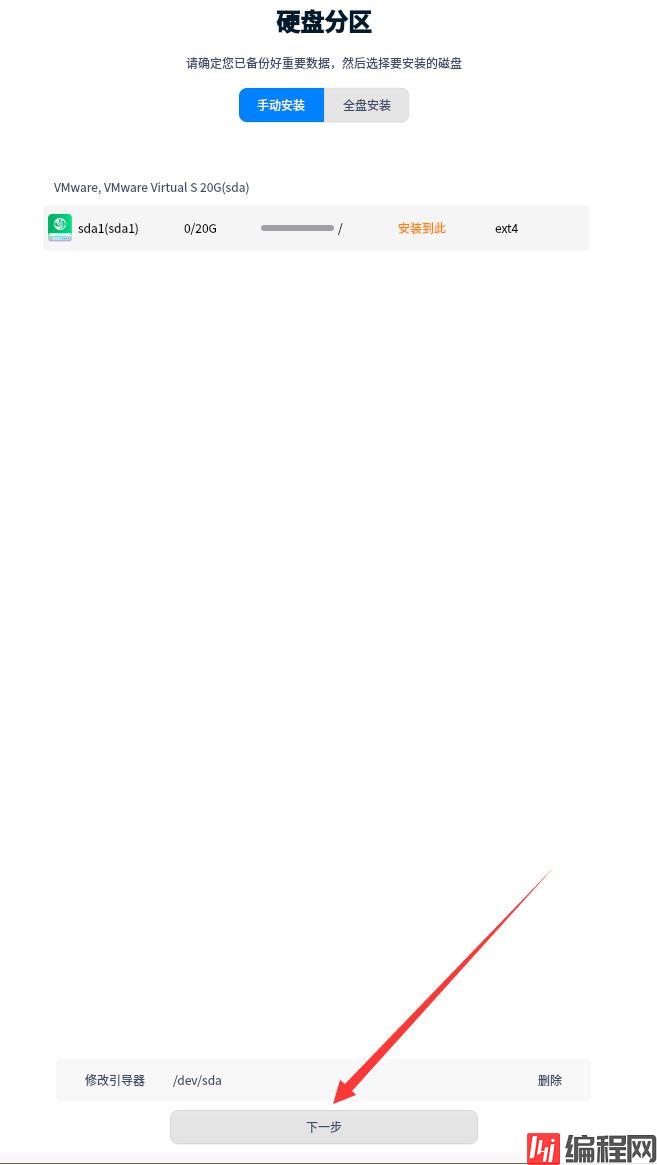
4、

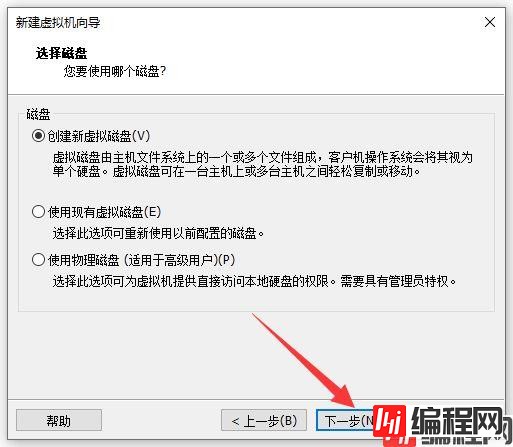
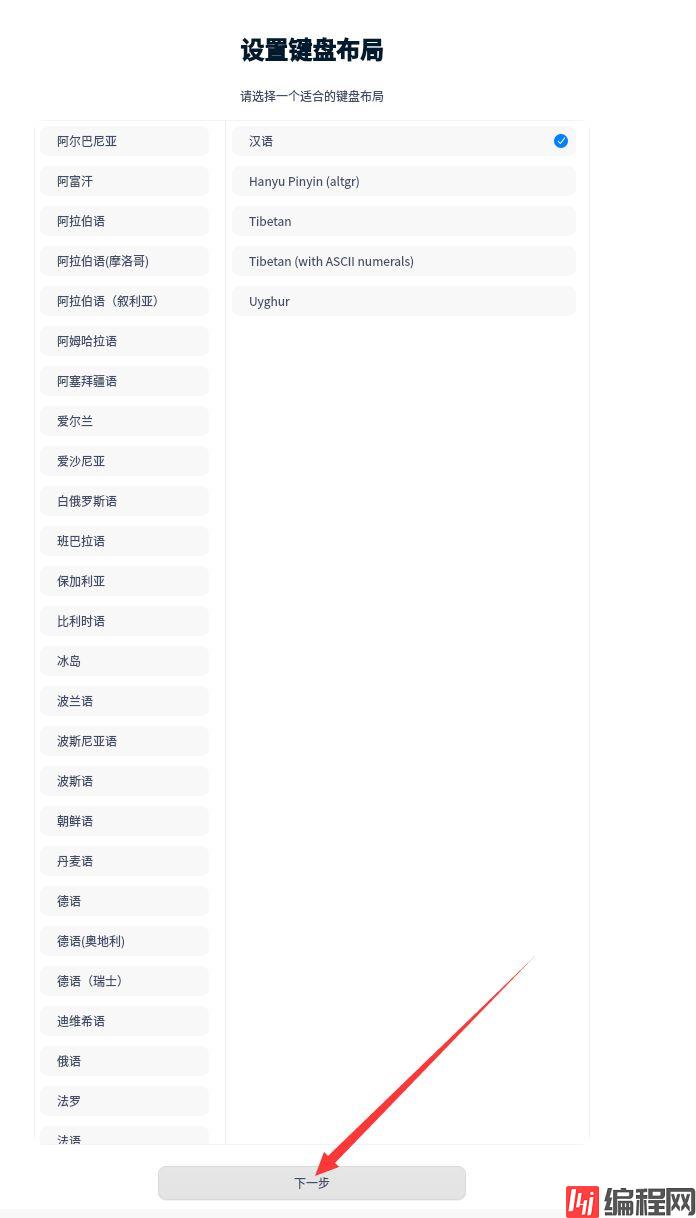
5、

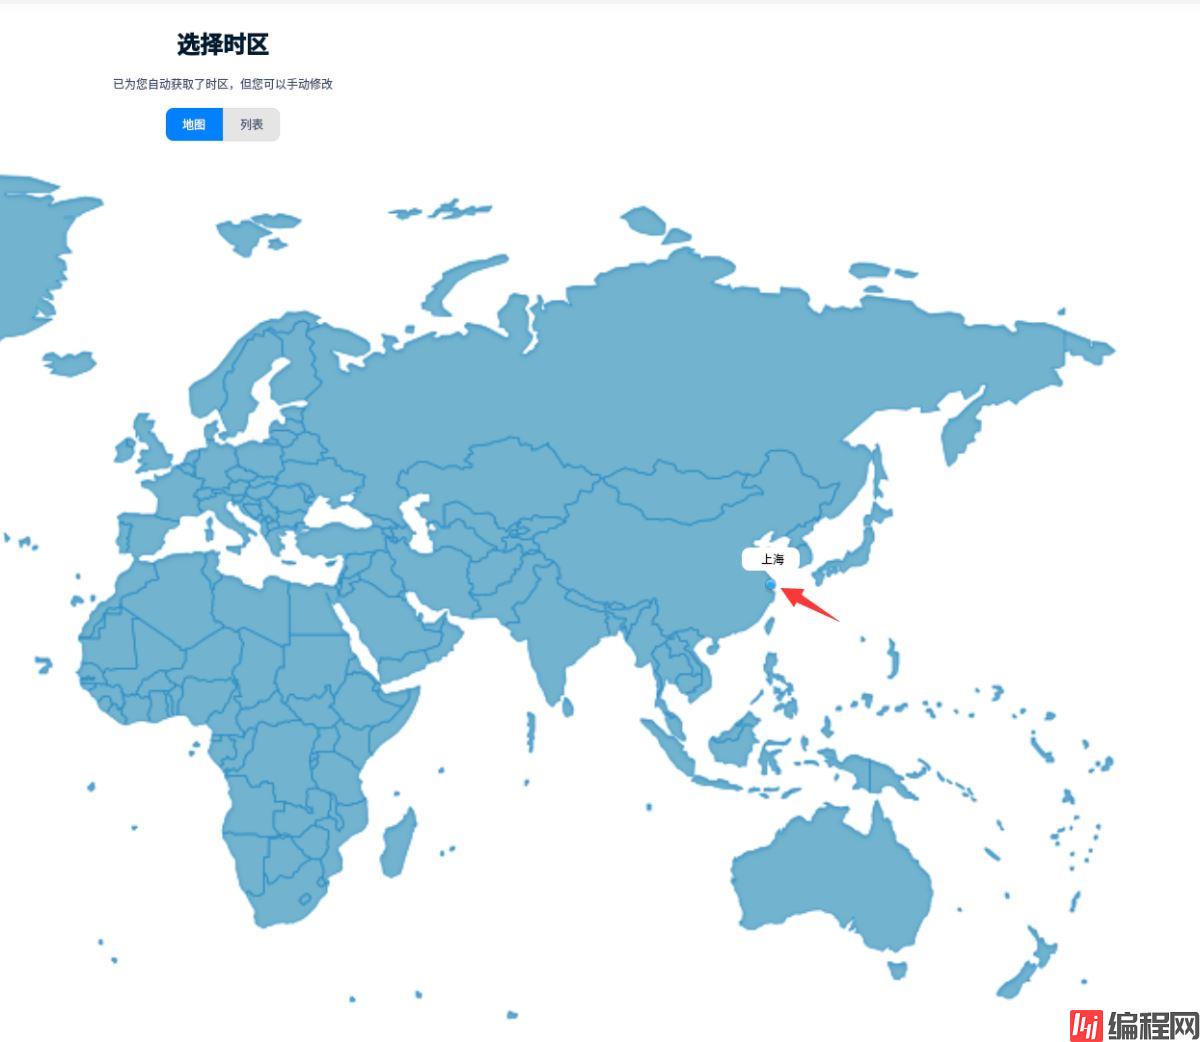
6、
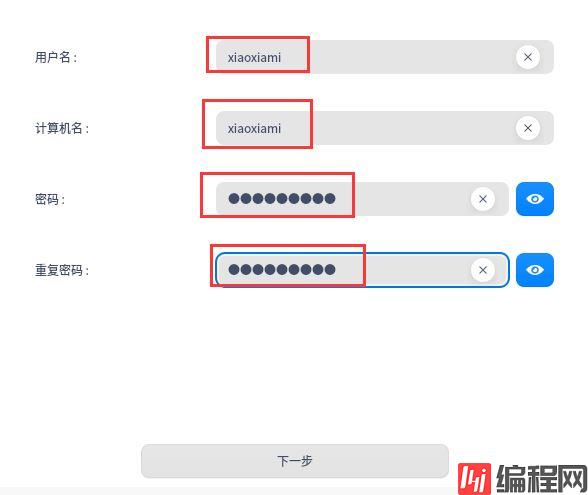
7、
8、

9、

10、
11、

12、
13、

14、

15、

16、
17、
18、

19、

20、

21、

22、

23、

24、

25、

26、
27、

28、

29、
30、
31、
32、
33、

34、

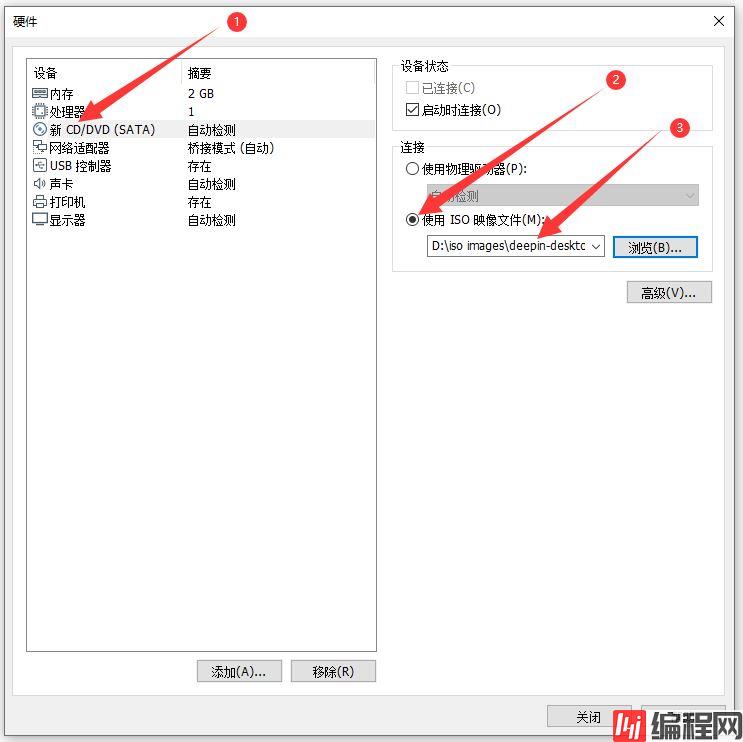
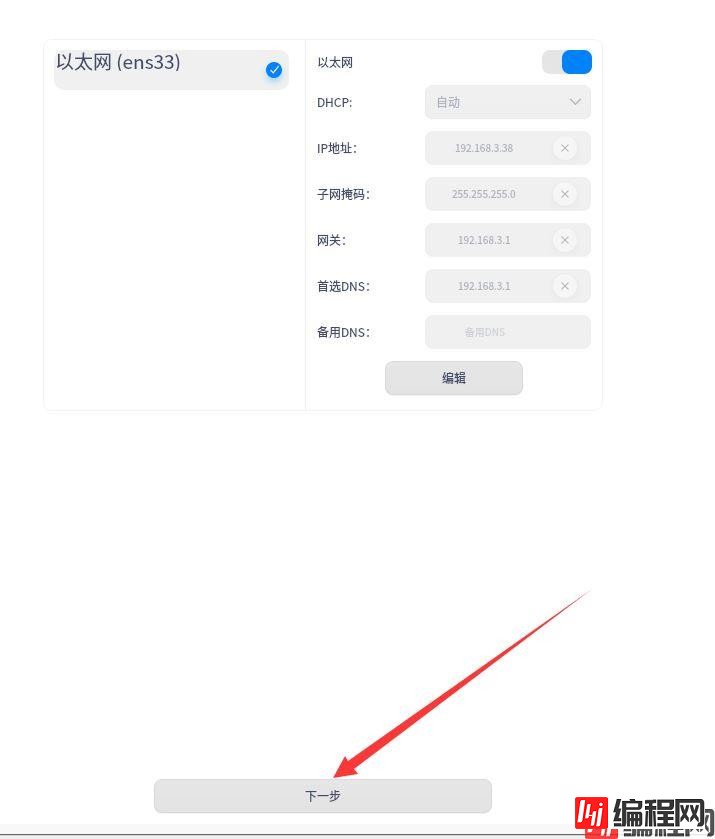
35、一路下一步,直到完成

36、安装已经完成

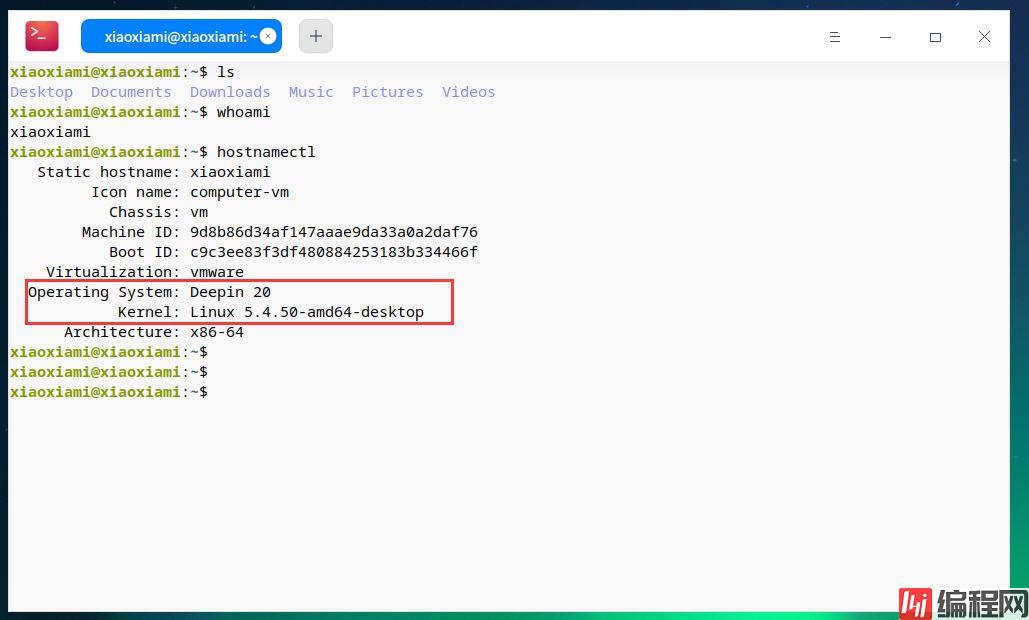
37、测试终端、检查系统

38、

39、
40、测试网络
xiaoxiami@xiaoxiami:~$ ifconfig | head -n 3  ## ip
ens33: flags=4163<UP,BROADCAST,RUNNING,MULTICAST>  mtu 1500
        inet 192.168.3.38  netmask 255.255.255.0  broadcast 192.168.3.255
        inet6 fe80::4794:f67e:65fc:ef81  prefixlen 64  scopeid 0x20<link>
xiaoxiami@xiaoxiami:~$ ping www.baidu.com
PING www.a.shifen.com (39.156.66.14) 56(84) bytes of data.
64 bytes from 39.156.66.14 (39.156.66.14): icmp_seq=1 ttl=51 time=11.0 ms
64 bytes from 39.156.66.14 (39.156.66.14): icmp_seq=2 ttl=51 time=10.9 ms
64 bytes from 39.156.66.14 (39.156.66.14): icmp_seq=3 ttl=51 time=11.1 ms
^C
--- www.a.shifen.com ping statistics ---
3 packets transmitted, 3 received, 0% packet loss, time 21ms
rtt min/avg/max/mdev = 10.919/11.002/11.071/0.136 ms
xiaoxiami@xiaoxiami:~$ ^C
xiaoxiami@xiaoxiami:~$ ping 192.168.3.4
PING 192.168.3.4 (192.168.3.4) 56(84) bytes of data.
64 bytes from 192.168.3.4: icmp_seq=1 ttl=128 time=0.229 ms
64 bytes from 192.168.3.4: icmp_seq=2 ttl=128 time=0.173 ms
64 bytes from 192.168.3.4: icmp_seq=3 ttl=128 time=0.186 ms
^C
--- 192.168.3.4 ping statistics ---
3 packets transmitted, 3 received, 0% packet loss, time 56ms
rtt min/avg/max/mdev = 0.173/0.196/0.229/0.023 ms
网络连通。
到此这篇关于vmware虚拟机安装deepin20全过程的文章就介绍到这了,更多相关vmware虚拟机安装deepin20内容请搜索编程网以前的文章或继续浏览下面的相关文章希望大家以后多多支持编程网!
--结束END--
本文标题: vmware虚拟机安装deepin20最全详细过程
本文链接: https://www.lsjlt.com/news/131966.html(转载时请注明来源链接)
有问题或投稿请发送至: 邮箱/279061341@qq.com QQ/279061341
下载Word文档到电脑,方便收藏和打印~
2024-05-13
2024-05-13
2024-05-11
2024-05-11
2024-05-10
2024-05-07
2024-04-30
2024-04-30
2024-04-30
2024-04-29
回答
回答
回答
回答
回答
回答
回答
回答
回答
回答


官方手机版

微信公众号

商务合作


0