Python 官方文档:入门教程 => 点击学习
目录spring security登录成功后跳转回登录前的页面需求如下代码如下Springsecurity 配置文件和登录跳转项目结构直接上springsecurity配置文件自定义
我刚好碰到了这么一个需求,正好自己也刚开始学spring security,但是我百度了一下,发现都讲的好麻烦,其实大概了解完之后,亲自实践一下发现,操作非常简单。
在未登录的情况下访问某些页面被拦截,跳转到登录页面,然后现在需要登录成功之后跳转到登录之前的页面。
要解决这个问题,就需要明白一点,就是我被拦截前的请求去哪里了?
答案是有个requestCache的东西保存了你的这些信息,那么知道了这一点,后面的东西就简单了,登录成功之后的处理从这东西里面把之前的请求取出来就好了。
.successhandler(new AuthenticationSuccessHandler() {
            @Override
            public void onAuthenticationSuccess(httpservletRequest request, HttpServletResponse response,
                    Authentication authentication) throws IOException, ServletException {
              response.setContentType("application/JSON;charset=utf-8");

              RequestCache cache = new HttpSessionRequestCache();
              SavedRequest savedRequest = cache.getRequest(request, response);
              String url = savedRequest.getRedirectUrl();
              response.sendRedirect(url);
            }
})好久没碰springsecurity了,最近在做一个小东西的时候,部署遇到了跳转问题,所以写篇文章记录一下。
项目的其中一个需求是登录,账号也是固定的,所以直接在配置文件中处理。springsecurity具体的配置网上一大堆,这边就不展开说了。
<?xml version="1.0" encoding="UTF-8"?>
<beans:beans xmlns="http://www.springframework.org/schema/security"
	xmlns:beans="http://www.springframework.org/schema/beans" xmlns:xsi="http://www.w3.org/2001/XMLSchema-instance"
	xsi:schemaLocation="http://www.springframework.org/schema/beans http://www.springframework.org/schema/beans/spring-beans.xsd
						http://www.springframework.org/schema/security http://www.springframework.org/schema/security/spring-security.xsd">
	<!--配置不用拦截的资源-->
	<http pattern="/*.html" security="none"></http>
	<http pattern="/CSS/**" security="none"></http>
	<http pattern="/img/**" security="none"></http>
	<http pattern="/js/**" security="none"></http>
	<http pattern="/plugins/**" security="none"></http>
	<!-- 页面的拦截规则 -->
	<http use-expressions="false">
		<intercept-url pattern="/**" access="ROLE_ADMIN"/>
		<form-login login-page="/login.html" default-target-url="/admin/index_user.html" authentication-failure-url="/error_page.html" />
		<csrf disabled="true"/>
		<headers>
			<frame-options policy="SAMEORIGIN"/>
		</headers>
		<loGout logout-url="/logout"/>
	</http>

	<!--配置登录的账号和密码-->
	<authentication-manager>
		<authentication-provider>
			<user-service>
				<user name="admin" passWord="123456" authorities="ROLE_ADMIN"/>
			</user-service>
		</authentication-provider>
	</authentication-manager>
</beans:beans>
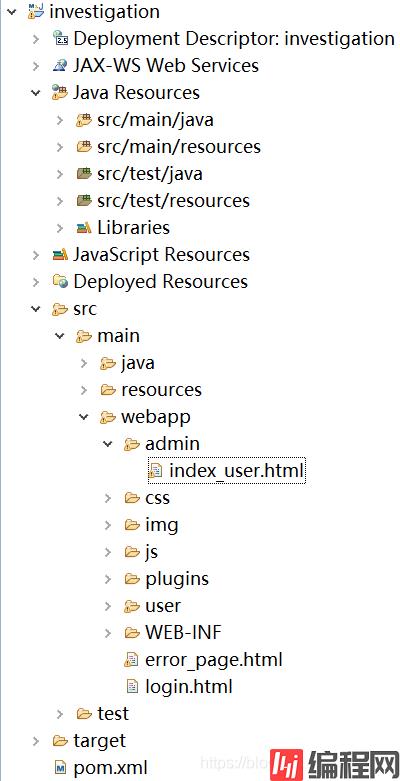
form-login标签用来配置自定义的登录页面,项目里配置的是login.html,default-target-url是用来配置登录成功以后,需要跳转的页面,这里配置的是/admin/index_user.html,因为index_user.html在WEBapp下的admin目录里面。
如下:
<form class="sui-form" action="/login" method="post" id="loginform">
<div class="input-prepend"><span class="add-on loginname"></span>
<input id="prependedInput" type="text" name="username" placeholder="用户名" class="span2 input-xfat">
</div>
<div class="input-prepend"><span class="add-on loginpwd"></span>
<input id="prependedInput" type="password" name="password" placeholder="密码" class="span2 input-xfat">
</div>
<div class="logined">
<a class="sui-btn btn-block btn-xlarge btn-danger" onclick="doucment:loginform.submit()" target="_blank">登 录</a>
</div>
</form>
完成。
eclipse调试成功后,导出war包,部署到Tomcat里面。
浏览器输入 http://localhost:8080/investigation/,直接跳转到登录页面

一切正常。然后在下面的登录框中输入账号:admin,密码:123456,点击登录,页面就显示404,提示为找不到/login。

查了半天,发现在登录页login.html里面form的action属性里添加项目路径investigation,然后重新运行服务器,就能成功跳转。
<form class="sui-form" action="/investigation/login" method="post" id="loginform"><!--此处action需要加上工程的路径-->
<div class="input-prepend"><span class="add-on loginname"></span>
<input id="prependedInput" type="text" name="username" placeholder="用户名" class="span2 input-xfat">
</div>
<div class="input-prepend"><span class="add-on loginpwd"></span>
<input id="prependedInput" type="password" name="password" placeholder="密码" class="span2 input-xfat">
</div>
<div class="logined">
<a class="sui-btn btn-block btn-xlarge btn-danger" onclick="doucment:loginform.submit()" target="_blank">登 录</a>
</div>
</form>

在真正部署的时候,修改tomcat的配置文件里面默认的访问路径即可,不需要在上面的action里面改。
以上为个人经验,希望能给大家一个参考,也希望大家多多支持编程网。
--结束END--
本文标题: spring security登录成功后跳转回登录前的页面
本文链接: https://www.lsjlt.com/news/135927.html(转载时请注明来源链接)
有问题或投稿请发送至: 邮箱/279061341@qq.com QQ/279061341
下载Word文档到电脑,方便收藏和打印~
2024-03-01
2024-03-01
2024-03-01
2024-02-29
2024-02-29
2024-02-29
2024-02-29
2024-02-29
2024-02-29
2024-02-29
回答
回答
回答
回答
回答
回答
回答
回答
回答
回答


官方手机版

微信公众号

商务合作


0