本文是用来介绍Android Studio创建注册页面跳转登录页面的界面设计以及跳转功能地实现,完整结构见文章结尾。 用户注册界面 <?xml version="1.0" e
本文是用来介绍Android Studio创建注册页面跳转登录页面的界面设计以及跳转功能地实现,完整结构见文章结尾。

<?xml version="1.0" encoding="utf-8"?>
<androidx.constraintlayout.widget.ConstraintLayout xmlns:android="Http://schemas.android.com/apk/res/android"
    xmlns:app="http://schemas.android.com/apk/res-auto"
    xmlns:tools="http://schemas.android.com/tools"
    android:id="@+id/CL"
    android:layout_width="match_parent"
    android:layout_height="match_parent"
    tools:context=".MainActivity">
<!---->

<!---->
    <TextView
        android:id="@+id/textView"
        android:layout_width="wrap_content"
        android:layout_height="wrap_content"
        android:layout_marginLeft="30dp"
        android:layout_marginTop="30dp"
        android:text="用户名:"
        app:layout_constraintBottom_toBottomOf="parent"
        app:layout_constraintHorizontal_bias="0.047"
        app:layout_constraintLeft_toLeftOf="parent"
        app:layout_constraintRight_toRightOf="parent"
        app:layout_constraintTop_toTopOf="parent"
        app:layout_constraintVertical_bias="0.064" />

    <EditText
        android:id="@+id/et1"
        android:layout_width="wrap_content"
        android:layout_height="wrap_content"
        android:layout_marginStart="16dp"
        android:layout_marginLeft="16dp"
        android:layout_marginTop="72dp"
        android:ems="10"
        android:hint="请输入你的用户名"
        android:inputType="textPersonName"
        app:layout_constraintStart_toEndOf="@+id/textView"
        app:layout_constraintTop_toTopOf="parent" />

    <TextView
        android:id="@+id/textView2"
        android:layout_width="wrap_content"
        android:layout_height="wrap_content"
        android:layout_marginStart="56dp"
        android:layout_marginLeft="56dp"
        android:layout_marginTop="28dp"
        android:text="密码:"
        app:layout_constraintStart_toStartOf="parent"
        app:layout_constraintTop_toBottomOf="@+id/et1" />

    <EditText
        android:id="@+id/et2"
        android:layout_width="wrap_content"
        android:layout_height="wrap_content"
        android:layout_marginStart="20dp"
        android:layout_marginLeft="20dp"
        android:layout_marginTop="30dp"
        android:ems="10"
        android:hint="请输入你的密码"
        android:inputType="textPassWord"
        app:layout_constraintStart_toEndOf="@+id/textView2"
        app:layout_constraintTop_toBottomOf="@+id/et1" />

    <TextView
        android:id="@+id/textView3"
        android:layout_width="wrap_content"
        android:layout_height="wrap_content"
        android:layout_marginStart="28dp"
        android:layout_marginLeft="28dp"
        android:layout_marginTop="24dp"
        android:text="性别"
        app:layout_constraintStart_toStartOf="parent"
        app:layout_constraintTop_toBottomOf="@+id/et2" />

    <RadioGroup
        android:id="@+id/rg"
        android:layout_width="wrap_content"
        android:layout_height="wrap_content"
        android:layout_marginStart="30dp"
        android:layout_marginLeft="30dp"
        android:layout_marginTop="60dp"
        android:orientation="horizontal"
        app:layout_constraintStart_toStartOf="parent"
        app:layout_constraintTop_toBottomOf="@+id/et2">

        <RadioButton
            android:id="@+id/rb1"
            android:layout_width="match_parent"
            android:layout_height="wrap_content"
            android:text="男" />

        <RadioButton
            android:id="@+id/rb2"
            android:layout_width="match_parent"
            android:layout_height="wrap_content"
            android:text="女" />
    </RadioGroup>

    <TextView
        android:id="@+id/textView4"
        android:layout_width="wrap_content"
        android:layout_height="wrap_content"
        android:layout_marginStart="30dp"
        android:layout_marginLeft="30dp"
        android:layout_marginTop="30dp"
        android:text="兴趣爱好"
        app:layout_constraintStart_toStartOf="parent"
        app:layout_constraintTop_toBottomOf="@+id/rg" />

    <CheckBox
        android:id="@+id/cb1"
        android:layout_width="wrap_content"
        android:layout_height="wrap_content"
        android:layout_marginStart="28dp"
        android:layout_marginLeft="28dp"
        android:layout_marginTop="16dp"
        android:text="游戏编程"
        app:layout_constraintStart_toStartOf="parent"
        app:layout_constraintTop_toBottomOf="@+id/textView4" />

    <CheckBox
        android:id="@+id/cb2"
        android:layout_width="wrap_content"
        android:layout_height="wrap_content"
        android:layout_marginStart="28dp"
        android:layout_marginLeft="28dp"
        android:text="王者荣耀"
        app:layout_constraintStart_toStartOf="parent"
        app:layout_constraintTop_toBottomOf="@+id/cb1" />

    <CheckBox
        android:id="@+id/cb3"
        android:layout_width="wrap_content"
        android:layout_height="wrap_content"
        android:layout_marginStart="28dp"
        android:layout_marginLeft="28dp"
        android:text="看《觉醒年代》"
        app:layout_constraintStart_toStartOf="parent"
        app:layout_constraintTop_toBottomOf="@+id/cb2" />

    <Button
        android:id="@+id/button"
        android:layout_width="wrap_content"
        android:layout_height="wrap_content"
        android:layout_marginTop="36dp"
        android:text="注册"
        app:layout_constraintEnd_toEndOf="parent"
        app:layout_constraintHorizontal_bias="0.498"
        app:layout_constraintStart_toStartOf="parent"
        app:layout_constraintTop_toBottomOf="@+id/cb3" />

    <TextView
        android:id="@+id/tv"
        android:layout_width="wrap_content"
        android:layout_height="wrap_content"
        android:layout_marginTop="40dp"
        android:text="执行结果"
        app:layout_constraintEnd_toEndOf="parent"
        app:layout_constraintStart_toStartOf="parent"
        app:layout_constraintTop_toBottomOf="@+id/button" />


</androidx.constraintlayout.widget.ConstraintLayout>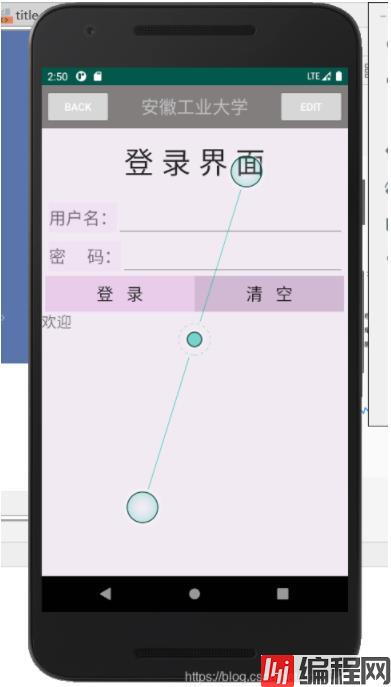
<?xml version="1.0" encoding="utf-8"?>
<LinearLayout xmlns:android="http://schemas.android.com/apk/res/android"
    xmlns:xmlna="http://schemas.android.com/apk/res-auto"
    android:orientation="vertical"
    android:layout_width="fill_parent"
    android:layout_height="fill_parent"
    android:background="#F1EAF3">

        <com.example.myapplication1.TitleLayout
            android:layout_width="match_parent"
            android:layout_height="wrap_content"/>
    <TextView
        android:layout_width="fill_parent"
        android:layout_height="90dp"
        android:text="登 录 界 面"
        android:textColor="#232121"
        android:textSize="40dp"
        android:gravity="center">
    </TextView>

    <LinearLayout
        android:orientation="vertical"
        android:layout_width="fill_parent"
        android:layout_height="wrap_content"
        android:background="#F1EAF3"
        android:paddingLeft="5dip"
        android:paddingRight="5dip"
        android:paddingTop="5dip">

        <LinearLayout
            android:id="@+id/LinearLayout1"
            android:orientation="horizontal"
            android:layout_width="fill_parent"
            android:layout_height="fill_parent">

            <TextView
                android:id="@+id/TextView2"
                android:layout_width="wrap_content"
                android:layout_height="40dip"
                android:layout_marginLeft="5dip"
                android:textSize="23Dip"
                android:gravity="center_vertical"
                android:background="#F0E1F3"
                android:text="用户名:">
            </TextView>

            <EditText
                android:id="@+id/EditTextuid"
                android:layout_width="fill_parent"
                android:layout_height="wrap_content"
                android:singleLine="true"
                android:layout_marginLeft="0dip"
                android:text=""
                android:textSize="23dip">
            </EditText>

        </LinearLayout>

        <LinearLayout
            android:id="@+id/LinearLayout2"
            android:layout_width="fill_parent"
            android:layout_height="wrap_content"
            android:orientation="horizontal">

            <TextView
                android:id="@+id/TextView3"
                android:layout_width="wrap_content"
                android:layout_height="40dip"
                android:layout_marginLeft="5dip"
                android:textSize="23dip"
                android:gravity="center_vertical"
                android:background="#F0E1F3"
                android:text="密     码:">
            </TextView>

            <EditText
                android:id="@+id/EditTextPwd"
                android:layout_width="fill_parent"
                android:layout_height="wrap_content"
                android:singleLine="true"
                android:text="LING"
                android:textSize="23dip">
            </EditText>

        </LinearLayout>

        <LinearLayout
            android:id="@+id/LinearLayout3"
            android:layout_width="fill_parent"
            android:layout_height="wrap_content"
            android:orientation="horizontal">

            <Button
                android:id="@+id/loginLog"
                android:layout_width="wrap_content"
                android:layout_height="wrap_content"
                android:textSize="23dip"
                android:background="#E8CCEA"
                android:layout_weight="1"
                android:text="登   录">
            </Button>

            <Button
                android:id="@+id/loginClear"
                android:layout_width="wrap_content"
                android:layout_height="wrap_content"
                android:textSize="23dip"
                android:background="#D1B8D3"
                android:layout_weight="1"
                android:text="清   空">
            </Button>

        </LinearLayout>

    </LinearLayout>

    <TextView
        android:id="@+id/all"
        android:layout_width="match_parent"
        android:layout_height="wrap_content"
        android:text="欢迎"
        android:textSize="20sp"/>
</LinearLayout>
java代码实现跳转
package com.example.myapplication1;

import android.content.Intent;
import android.os.Bundle;
import android.view.View;
import android.widget.Button;
import android.widget.CheckBox;
import android.widget.CompoundButton;
import android.widget.EditText;
import android.widget.RadioButton;
import android.widget.RadioGroup;
import android.widget.TextView;

import androidx.appcompat.app.ActionBar;
import androidx.appcompat.app.AppCompatActivity;

public class MainActivity extends AppCompatActivity implements View.OnClickListener,RadioGroup.OnCheckedChangeListener, CompoundButton.OnCheckedChangeListener{
    private Button zc;//声明注册按钮的变量
    RadioGroup rg;//声明单选组的变量
    RadioButton rb1,rb2;//声明单选1,单选2的变量
    CheckBox cb1,cb2,cb3;//声明复选框1,2,3的变量
    EditText et1,et2;声明输入文本框1,2的变量
    TextView tv,txtage,txtall;//声明结果文本的变量


    @Override
    protected void onCreate(Bundle savedInstanceState) {
        super.onCreate(savedInstanceState);
        setContentView(R.layout.activity_main);

        //屏蔽系统自带
        ActionBar actionBar = getSupportActionBar();
        if(actionBar != null){
            actionBar.hide();}

        zc=findViewById(R.id.button);//寻找注册按钮id
        zc.setOnClickListener(this);//给注册按钮安装监听器

        rg=findViewById(R.id.rg);//寻找单选组控件id
        rg.setOnCheckedChangeListener(this);//给单选组安装监听器
        rb1=findViewById(R.id.rb1);//寻找单选控件1id
        rb1.setOnCheckedChangeListener(this);//给单选控件1安装监听器
        rb2=findViewById(R.id.rb2);//寻找单选控件2id
        rb2.setOnCheckedChangeListener(this);//给单选控件2安装监听器

        //txtage=(TextView)findViewById(R.id.age);

        cb1=findViewById(R.id.cb1);//寻找复选框1控件id
        cb1.setOnCheckedChangeListener(this);//给复选框控件1安装监听器
        cb2=findViewById(R.id.cb2);//寻找复选框2控件id
        cb2.setOnCheckedChangeListener(this);//给复选框控件2安装监听器
        cb3=findViewById(R.id.cb3);//寻找复选框3控件id
        cb3.setOnCheckedChangeListener(this);//给复选框控件3安装监听器

        et1=findViewById(R.id.et1);//寻找输入框1控件id
        et2=findViewById(R.id.et2);//寻找输入框2控件id
        tv=findViewById(R.id.tv);//寻找输入框2控件id

    }


    //实现选项按钮组交互功能
    @Override
    public void onCheckedChanged(RadioGroup group, int checkedId) {
        switch (checkedId){
            case R.id.rb1:
                System.out.println(rb1.getText().toString());
                break;

            case R.id.rb2:
                System.out.println(rb2.getText().toString());
                break;

        }
    }

    //实现复选框交互功能
    @Override                      //CompoundButton选中或未选中按钮
    public void onCheckedChanged(CompoundButton CompoundButton, boolean b) {
        switch (CompoundButton.getId()) //得到选中或未选中按钮id
        {
            case R.id.cb1: //复选框1id
                if (b==true)//判断复选框1是否为真
                    System.out.println(cb1.getText().toString());
                //如果是真执行复选框按钮输出的结果是得到该文本(cb1对应的text属性文本字符串)字符串
                break;
            case R.id.cb2:
                if (b==true)
                    System.out.println(cb2.getText().toString());
                break;

            case R.id.cb3:
                if (b==true)
                    System.out.println(cb3.getText().toString());
                break;
        }
    }

    //注册按钮实现交互功能
    @Override
    public void  onClick(View view){
        String strname=et1.getText().toString();//获取用户名(ID绑定用户名)
        String strPassword=et2.getText().toString();//获取密码(ID绑定密码)
        //
                int age;
                CharSequence str="";
                if(rb1.isChecked())
                    str=rb1.getText();
                if(rb2.isChecked())
                    str=rb2.getText();

                String str1="";
                if (cb1.isChecked()) str1=str1+"\n"+cb1.getText();
                if (cb2.isChecked()) str1=str1+"\n"+cb2.getText();
                if (cb3.isChecked()) str1=str1+"\n"+cb3.getText();

        //
        if (strname.equals(" ")||strPassword.equals(""))//判断用户名是否等于""并且满足密码等于""
            tv.setText("注册失败,请重新修改信息后再来注册");//否则执行结果文本框输出内容为"注册失败,请重新修改信息后再来注册"
        else
        {
            tv.setText(strname+"注册成功");//如果满足条件的话执行结果文本框输出内容为"注册成功"
             Intent intent=new Intent(MainActivity.this, success.class);
             intent.putExtra("strname",strname);
             intent.putExtra("strPassword",strPassword);
            //intent.putExtra("strname",strname);
            intent.putExtra("sex",str);
            intent.putExtra("str1",str1);
            startActivity(intent);
        }
    }
}
以上就是本文的全部内容,希望对大家的学习有所帮助,也希望大家多多支持编程网。
--结束END--
本文标题: AndroidStudio实现注册页面跳转登录页面的创建
本文链接: https://www.lsjlt.com/news/148990.html(转载时请注明来源链接)
有问题或投稿请发送至: 邮箱/279061341@qq.com QQ/279061341
下载Word文档到电脑,方便收藏和打印~
2024-01-21
2023-10-28
2023-10-28
2023-10-27
2023-10-27
2023-10-27
2023-10-27
回答
回答
回答
回答
回答
回答
回答
回答
回答
回答


官方手机版

微信公众号

商务合作


0