本文实例为大家分享了Android实现页面跳转的具体代码,供大家参考,具体内容如下 一. Android实现页面跳转有两种方式,一种为.MainActivity跳转;第二种是Rela
本文实例为大家分享了Android实现页面跳转的具体代码,供大家参考,具体内容如下
一. Android实现页面跳转有两种方式,一种为.MainActivity跳转;第二种是Relatelayout布局跳转,首先看第一种方式
1. MainActivity区域设置
public class MainActivity extends AppCompatActivity {

    @Override
    protected void onCreate(Bundle savedInstanceState) {
        super.onCreate(savedInstanceState);
        setContentView(R.layout.activity_main);

        //获取按钮
        Button button = findViewById(R.id.button);

        //按钮进行监听
        button.setOnClickListener(new View.OnClickListener() {
            @Override
            public void onClick(View v) {
                //监听按钮,如果点击,就跳转
                Intent intent = new Intent();
                //前一个(MainActivity.this)是目前页面,后面一个是要跳转的下一个页面
                intent.setClass(MainActivity.this,NextActivity.class);
                startActivity(intent);
            }
        });
    }
}
2. 这是下一个页面 的设置
public class NextActivity extends AppCompatActivity {

    @Override
    protected void onCreate(Bundle savedInstanceState) {
        super.onCreate(savedInstanceState);
        //这个是获取布局文件的,这里是你下一个页面的布局文件
        setContentView(R.layout.activity_next);
    }
}
3. 这是第一个页面的布局文件
<?xml version="1.0" encoding="utf-8"?>
<androidx.constraintlayout.widget.ConstraintLayout xmlns:android="Http://schemas.android.com/apk/res/android"
    xmlns:app="http://schemas.android.com/apk/res-auto"
    xmlns:tools="http://schemas.android.com/tools"
    android:layout_width="match_parent"
    android:layout_height="match_parent"
    tools:context=".MainActivity">
    <RelativeLayout
        android:layout_width="match_parent"
        android:layout_height="match_parent">
        <TextView
            android:id="@+id/one"
            android:layout_width="200dp"
            android:layout_height="100dp"
            android:text="这是第一个页面!"
            android:textSize="25dp"
            android:layout_centerInParent="true"
            />

        <Button
            android:id="@+id/button"
            android:layout_width="100dp"
            android:layout_height="50dp"
            tools:ignore="MissinGConstraints"
            android:text="跳转"
            android:layout_centerHorizontal="true"
            android:layout_below="@+id/one"
            />
    </RelativeLayout>
</androidx.constraintlayout.widget.ConstraintLayout>
4. 这是第二个页面的布局文件
<?xml version="1.0" encoding="utf-8"?>
<androidx.constraintlayout.widget.ConstraintLayout xmlns:android="http://schemas.android.com/apk/res/android"
xmlns:app="http://schemas.android.com/apk/res-auto"
xmlns:tools="http://schemas.android.com/tools"
android:layout_width="match_parent"
android:layout_height="match_parent"
tools:context=".MainActivity">
<TextView
android:id="@+id/two"
android:layout_width="wrap_content"
android:layout_height="wrap_content"
android:text="这是第二个页面!"
android:textSize="25dp"
android:textColor="#663399"
app:layout_constraintBottom_toBottomOf="parent"
app:layout_constraintLeft_toLeftOf="parent"
app:layout_constraintRight_toRightOf="parent"
app:layout_constraintTop_toTopOf="parent" />
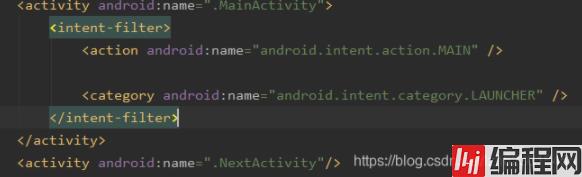
</androidx.constraintlayout.widget.ConstraintLayout>5. AndroidManifest.xml配置加上第二个页面的入口
6. 效果图


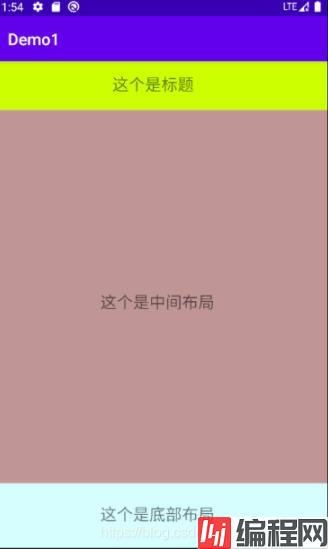
二. 第二种方式是通过控制Java布局文件进行布局组合
1. 首先MainActivity文件
public class MainActivity extends AppCompatActivity {


    RelativeLayout layoutTitle,layoutBox,layoutButton;
    @Override
    protected void onCreate(Bundle savedInstanceState) {
        super.onCreate(savedInstanceState);
        setContentView(R.layout.activity_main);

        //获取布局文件
        getwige();
    }


    private void getwige() {

        //获取标题布局
        getTitles();

        //获取中间布局
        getBoxs();

        //获取底部布局
        getButtons();

    }

    public void getTitles(){

        //获取总布局中的标题布局
        layoutTitle = this.findViewById(R.id.title);
        //初始化一个标题布局类
        Titles title = new Titles(this);
        //进行组合布局
        layoutTitle.addView(title);
    }


    public void getBoxs(){

        //获取总布局中的中间布局
        layoutBox = this.findViewById(R.id.box);
        //初始化一个中间布局类
        Box box = new Box(this);
        //进行组合布局
        layoutBox.addView(box);
    }


    public void getButtons(){

        //获取总布局中的底部布局
        layoutButton = this.findViewById(R.id.button);
        //初始化一个底部布局类
        Buttons buttons = new Buttons(this);
        //进行组合布局
        layoutButton.addView(buttons);
    }
}
其相对的主要布局文件如下:
<?xml version="1.0" encoding="utf-8"?>
<androidx.constraintlayout.widget.ConstraintLayout xmlns:android="http://schemas.android.com/apk/res/android"
    xmlns:app="http://schemas.android.com/apk/res-auto"
    xmlns:tools="http://schemas.android.com/tools"
    android:layout_width="match_parent"
    android:layout_height="match_parent"
    tools:context=".MainActivity">
    <RelativeLayout
        android:layout_width="match_parent"
        android:layout_height="match_parent">

        <RelativeLayout
            android:id="@+id/title"
            android:layout_width="match_parent"
            android:layout_height="60dp"

            />

        <RelativeLayout
            android:id="@+id/box"
            android:layout_width="match_parent"
            android:layout_height="590dp"
            android:layout_above="@+id/button"
            android:layout_below="@+id/title" />

        <RelativeLayout
            android:id="@+id/button"
            android:layout_width="match_parent"
            android:layout_height="80dp"
            android:layout_alignParentBottom="true"
            />
    </RelativeLayout>
</androidx.constraintlayout.widget.ConstraintLayout>
2. 首先其他的一些组合布局的类以及其相对布局文件
1)、标题布局
public class Titles extends RelativeLayout {

    public Titles(Context context) {
        super(context);
        View.inflate(context, R.layout.activity_title,this);
    }

    public Titles(Context context, AttributeSet attrs) {
        super(context, attrs);
        View.inflate(context, R.layout.activity_title,this);
    }

    public Titles(Context context, AttributeSet attrs, int defStyleAttr) {
        super(context, attrs, defStyleAttr);
        View.inflate(context, R.layout.activity_title,this);
    }
}
布局文件:
<?xml version="1.0" encoding="utf-8"?>
<androidx.constraintlayout.widget.ConstraintLayout xmlns:android="http://schemas.android.com/apk/res/android"
    xmlns:app="http://schemas.android.com/apk/res-auto"
    xmlns:tools="http://schemas.android.com/tools"
    android:layout_width="match_parent"
    android:layout_height="60dp"
    tools:context=".MainActivity">

    <RelativeLayout
        android:id="@+id/title"
        android:layout_width="match_parent"
        android:layout_height="60dp"
        tools:ignore="MissingConstraints"
        android:background="#CCFF00">

        <TextView
            android:layout_width="120dp"
            android:layout_height="30dp"
            android:layout_centerInParent="true"
            android:textSize="20dp"
            android:text="这个是标题"
            />
    </RelativeLayout>

</androidx.constraintlayout.widget.ConstraintLayout>
2)、中间布局
public class Box extends RelativeLayout {

    public Box(Context context) {
        super(context);
        View.inflate(context, R.layout.activity_box,this);
    }

    public Box(Context context, AttributeSet attrs) {
        super(context, attrs);
        View.inflate(context, R.layout.activity_box,this);
    }

    public Box(Context context, AttributeSet attrs, int defStyleAttr) {
        super(context, attrs, defStyleAttr);
        View.inflate(context, R.layout.activity_box,this);
    }
}
布局文件:
<?xml version="1.0" encoding="utf-8"?>
<androidx.constraintlayout.widget.ConstraintLayout xmlns:android="http://schemas.android.com/apk/res/android"
    xmlns:app="http://schemas.android.com/apk/res-auto"
    xmlns:tools="http://schemas.android.com/tools"
    android:layout_width="match_parent"
    android:layout_height="match_parent"
    tools:context=".MainActivity">

    <RelativeLayout
        android:id="@+id/box"
        android:layout_width="match_parent"
        android:layout_height="590dp"
        tools:ignore="MissingConstraints"
        android:background="#6600">

        <TextView
            android:layout_width="150dp"
            android:layout_height="590dp"
            android:layout_marginTop="450dp"
            android:layout_centerInParent="true"
            android:textSize="20dp"
            android:text="这个是中间布局"
            />
    </RelativeLayout>

</androidx.constraintlayout.widget.ConstraintLayout>
3)、底部布局
public class Buttons extends RelativeLayout {

    public Buttons(Context context) {
        super(context);
        View.inflate(context, R.layout.activity_button,this);
    }

    public Buttons(Context context, AttributeSet attrs) {
        super(context, attrs);
        View.inflate(context, R.layout.activity_button,this);
    }

    public Buttons(Context context, AttributeSet attrs, int defStyleAttr) {
        super(context, attrs, defStyleAttr);
        View.inflate(context, R.layout.activity_button,this);
    }
}
布局文件:
<?xml version="1.0" encoding="utf-8"?>
<androidx.constraintlayout.widget.ConstraintLayout xmlns:android="http://schemas.android.com/apk/res/android"
    xmlns:app="http://schemas.android.com/apk/res-auto"
    xmlns:tools="http://schemas.android.com/tools"
    android:layout_width="match_parent"
    android:layout_height="match_parent"
    tools:context=".MainActivity">

    <RelativeLayout
        android:id="@+id/box"
        android:layout_width="match_parent"
        android:layout_height="80dp"
        tools:ignore="MissingConstraints"
        android:background="#ccff">

        <TextView
            android:layout_width="150dp"
            android:layout_height="30dp"
            android:layout_centerInParent="true"
            android:textSize="20dp"
            android:text="这个是底部布局"
            />
    </RelativeLayout>

</androidx.constraintlayout.widget.ConstraintLayout>
效果图:
总结,其中第一中方法是真正的跳转方法,而第二中相对于一种组合布局,前者要用到两个或者多个Activity的子类,而后者只需要一个MainActivity。另外,在存在多个Activity的子类时需要设置多个入口,也就是
<activity android:name=".NextActivity"/>其中,“.”后面是你Activity的子类的名字。
--结束END--
本文标题: Android实现页面跳转
本文链接: https://www.lsjlt.com/news/151721.html(转载时请注明来源链接)
有问题或投稿请发送至: 邮箱/279061341@qq.com QQ/279061341
下载Word文档到电脑,方便收藏和打印~
2024-01-21
2023-10-28
2023-10-28
2023-10-27
2023-10-27
2023-10-27
2023-10-27
回答
回答
回答
回答
回答
回答
回答
回答
回答
回答


官方手机版

微信公众号

商务合作


0