目录1.与用户相关的命令2.配置mongoDB登陆授权认证2.1.创建一个用户2.2.修改配置文件启用用户认证2.3.重启monGodb2.4.使用口令登陆mongodb3.授权用户
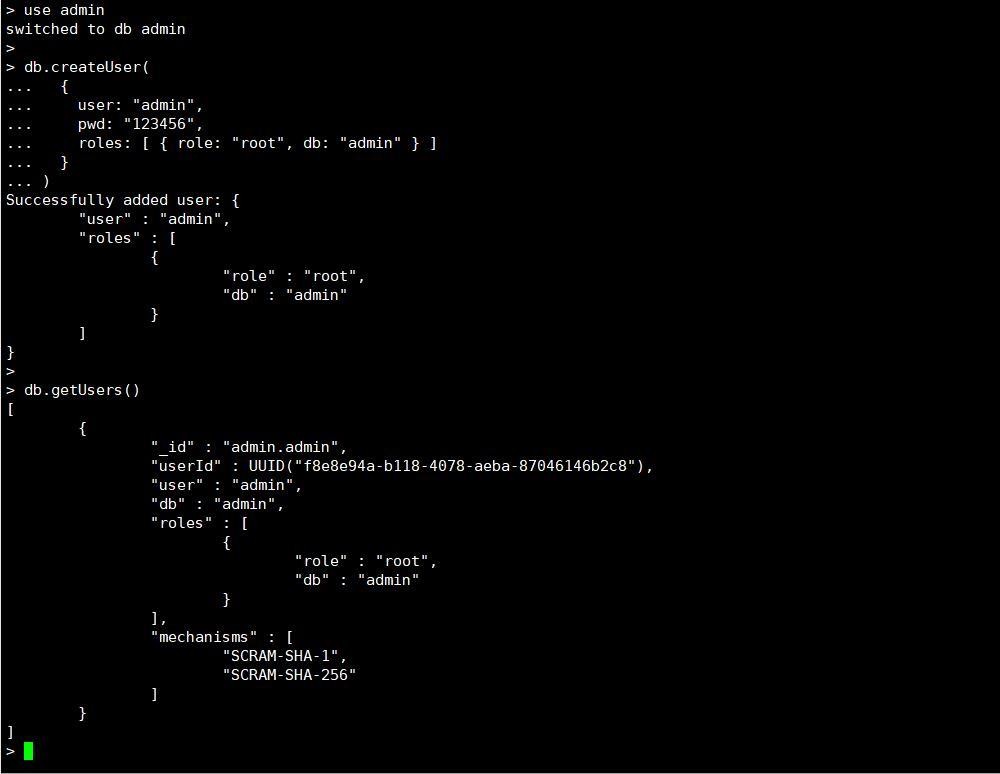
> use admin
> db.createUser(
{
   user: "admin",
   pwd: "123456",
   roles: [ { role: "root", db: "admin" } ]			//指定角色为root,表示管理员
}
> db.getUsers()
[mongo@mongodb-1 ~]$ vim /data/mongodb_cluster/mongodb_27017/conf/mongodb.yml
security:
  authorization: enabled
[mongo@mongodb-1 ~]$ mongod -f /data/mongodb_cluster/mongodb_27017/conf/mongodb.yml --shutdown
killing process with pid: 17899
[mongo@mongodb-1 ~]$ mongod -f /data/mongodb_cluster/mongodb_27017/conf/mongodb.yml
about to fork child process, waiting until server is ready for connections.
forked process: 18511
child process started successfully, parent exiting
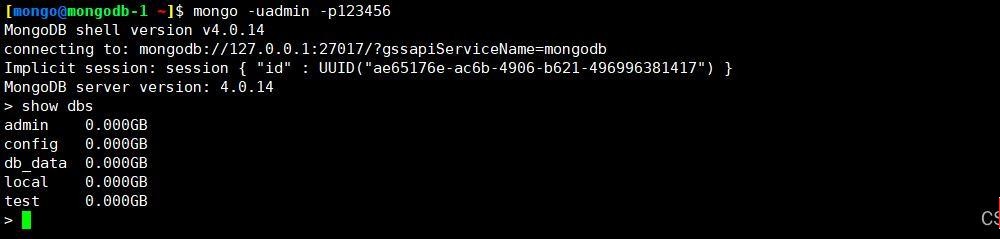
[mongo@mongodb-1 ~]$ mongo -uadmin -p123456
MongoDB shell version v4.0.14
connecting to: mongodb://127.0.0.1:27017/?gssapiServiceName=mongodb
Implicit session: session { "id" : UUID("ae65176e-ac6b-4906-b621-496996381417") }
MongoDB server version: 4.0.14
> show dbs
使用口令登陆后会发现最后一个警告信息也会消失
mongodb可以创建多个用户并针对不同的库进行不同的操作
1.创建用户
[mongo@mongodb-1 ~]$ mongo -uadmin -p123456
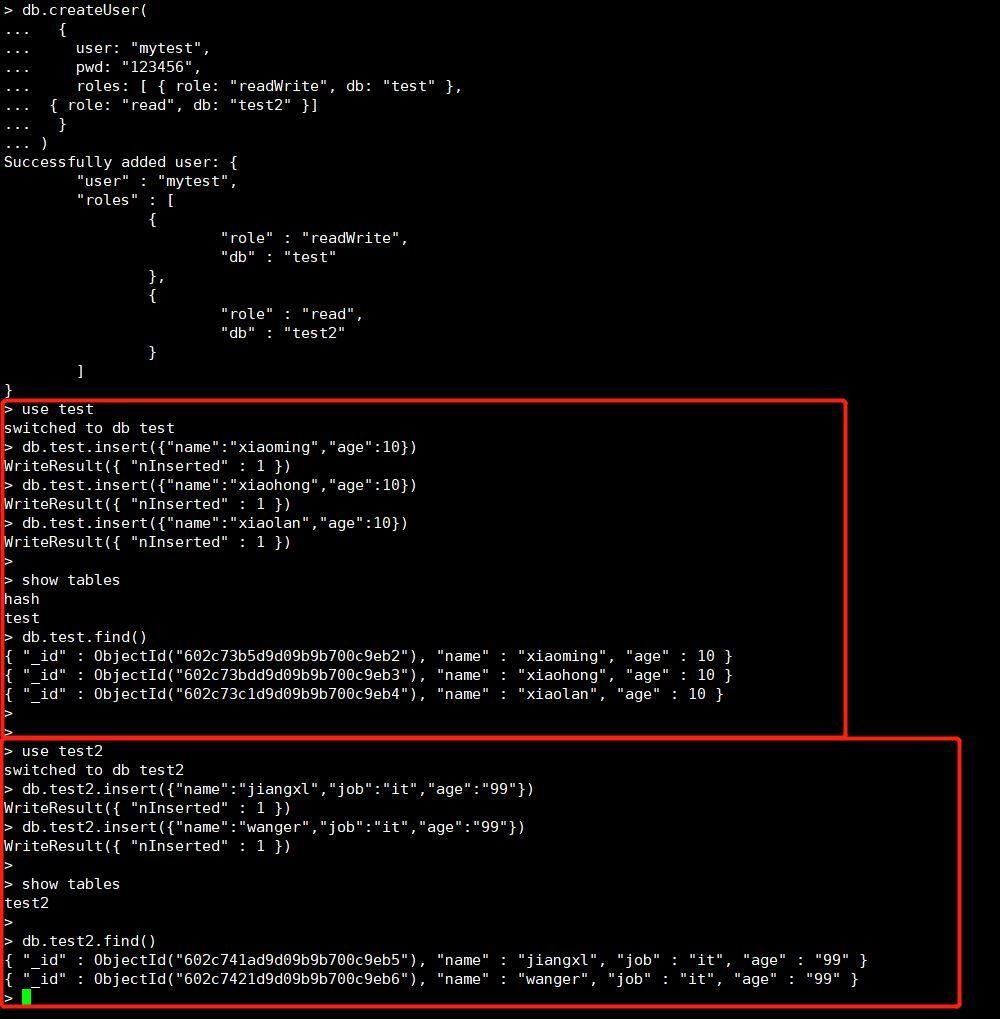
> db.createUser(
... {
... user: "mytest",
... pwd: "123456",
... roles: [ { role: "readWrite", db: "test" }, //可读可写
... { role: "read", db: "test2" } ] //可读
... }
... )
2.插入数据
test库
> use test
> db.test.insert({"name":"xiaoming","age":10})
> db.test.insert({"name":"xiaohong","age":10})
> db.test.insert({"name":"xiaolan","age":10})
test2库
> use test2
> db.test2.insert({"name":"jiangxl","job":"it","age":"99"})
> db.test2.insert({"name":"wanger","job":"it","age":"99"})
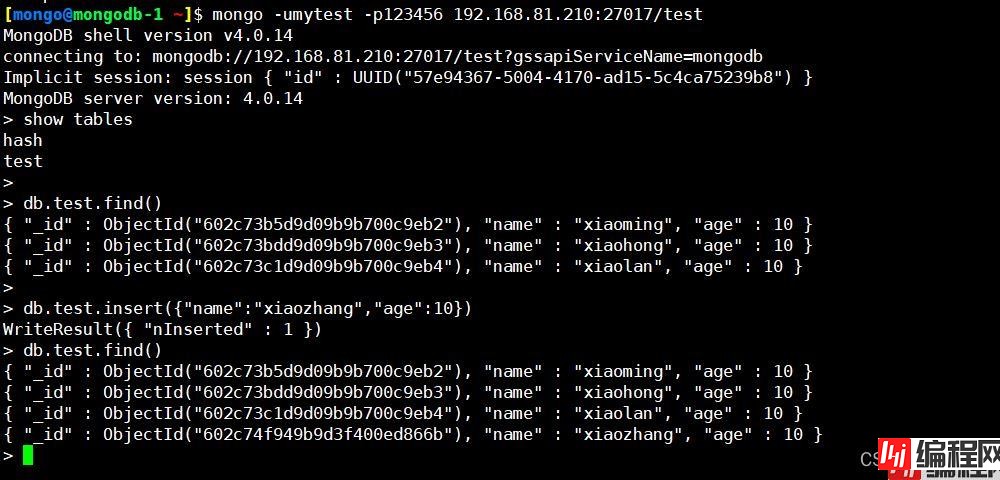
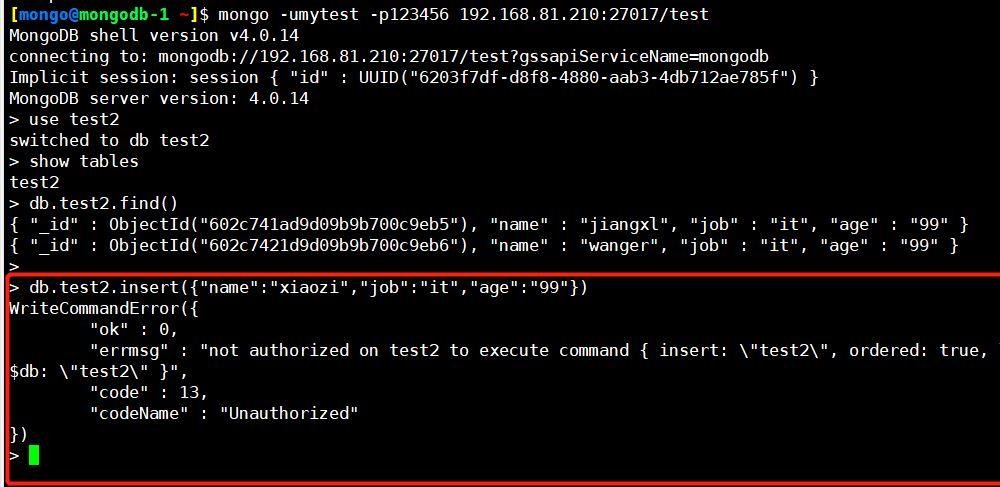
1.登录mytest用户并连接到tets库
[mongo@mongodb-1 ~]$ mongo -umytest -p123456 192.168.81.210:27017/test

2.查看所有表
> show tables
hash
test

3.查看是否有读权限
> db.test.find()
{ "_id" : ObjectId("602c73b5d9d09b9b700c9eb2"), "name" : "xiaoming", "age" : 10 }
{ "_id" : ObjectId("602c73bdd9d09b9b700c9eb3"), "name" : "xiaohong", "age" : 10 }
{ "_id" : ObjectId("602c73c1d9d09b9b700c9eb4"), "name" : "xiaolan", "age" : 10 }

4.查看是否有写入权限
> db.test.insert({"name":"xiaozhang","age":10})

5.查看是否写入成功
> db.test.find()
{ "_id" : ObjectId("602c73b5d9d09b9b700c9eb2"), "name" : "xiaoming", "age" : 10 }
{ "_id" : ObjectId("602c73bdd9d09b9b700c9eb3"), "name" : "xiaohong", "age" : 10 }
{ "_id" : ObjectId("602c73c1d9d09b9b700c9eb4"), "name" : "xiaolan", "age" : 10 }
{ "_id" : ObjectId("602c74f949b9d3f400ed866b"), "name" : "xiaozhang", "age" : 10 }
可读可写
由于普通用户只能登录test库因此想要切换其他库,只能是登陆test库后使用use进行切换
1.登录test库
[mongo@mongodb-1 ~]$ mongo -umytest -p123456 192.168.81.210:27017/test

2.切换到tets2库
> use test2

3.查看表
> show tables
test2

4.查看表中数据
> db.test2.find()

5.插入一条数据,查看是否插入成功
> db.test2.insert({"name":"xiaozi","job":"it","age":"99"})
WriteCommandError({
	"ok" : 0,
	"errmsg" : "not authorized on test2 to execute command { insert: \"test2\", ordered: true, lsid: { id: UUID(\"6203f7df-d8f8-4880-aab3-4db712ae785f\") }, $db: \"test2\" }",
	"code" : 13,
	"codeName" : "Unauthorized"
})
可以看到只能读取,不能插入
到此这篇关于MongoDB数据库授权认证的实现的文章就介绍到这了,更多相关MongoDB数据库授权认证内容请搜索编程网以前的文章或继续浏览下面的相关文章希望大家以后多多支持编程网!
--结束END--
本文标题: MongoDB数据库授权认证的实现
本文链接: https://www.lsjlt.com/news/161136.html(转载时请注明来源链接)
有问题或投稿请发送至: 邮箱/279061341@qq.com QQ/279061341
下载Word文档到电脑,方便收藏和打印~
2024-03-01
2024-03-01
2024-02-29
2024-02-29
2024-02-29
2024-02-29
2024-02-29
2024-02-29
2024-02-29
2024-02-29
回答
回答
回答
回答
回答
回答
回答
回答
回答
回答


官方手机版

微信公众号

商务合作


0