Python 官方文档:入门教程 => 点击学习
目录Redis创建spring项目集成RedisCache部分代码@Cacheable 作用和配置方法@CacheEvict 作用和配置方法前不久做了一个需要查询多,更新少的功能,老
前不久做了一个需要查询多,更新少的功能,老司机同事建议用Redis来做缓存,同时结合Spring Cache来做,特来总结下。
Redis 是一个高性能key-value数据库,个人感觉就像java中的Map,不过比它更加强大。
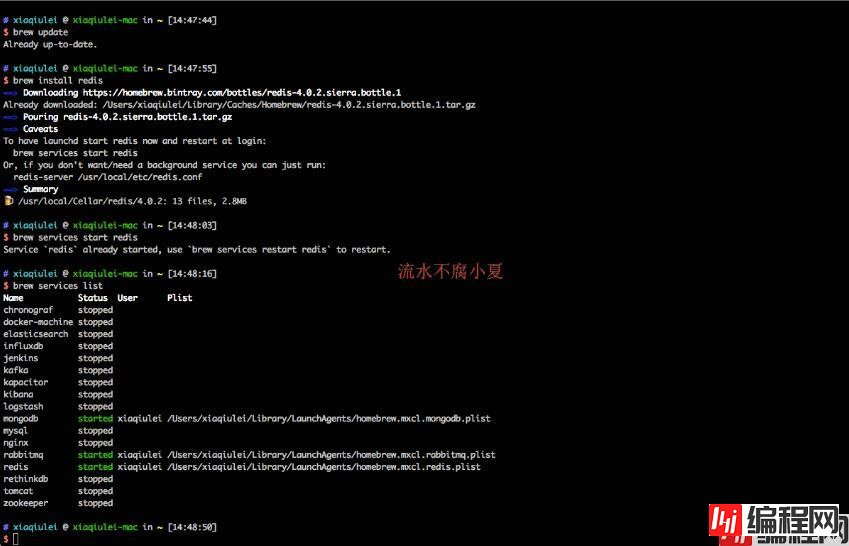
由于我用的是Mac,下面介绍如何安装Redis。
brew update
brew install redis
开启服务
brew services start redis
brew services list
下面是我本机的运行截图
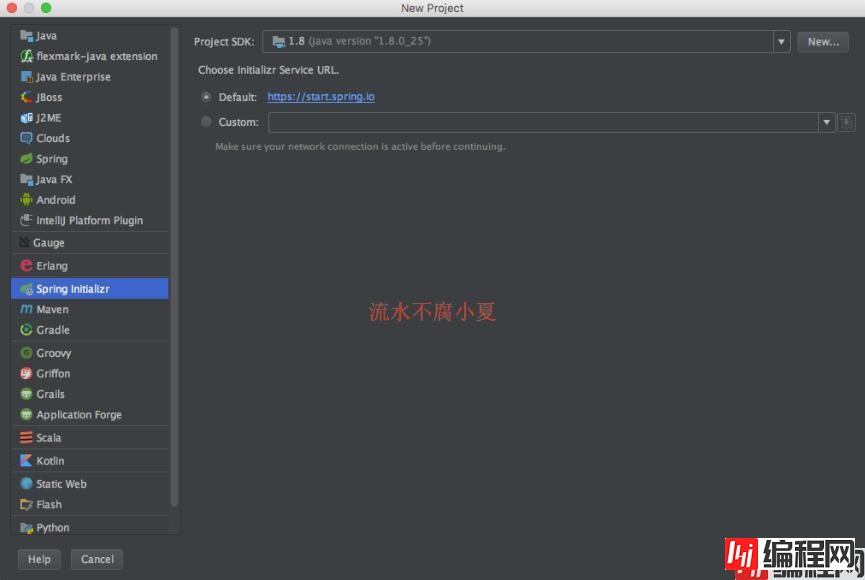
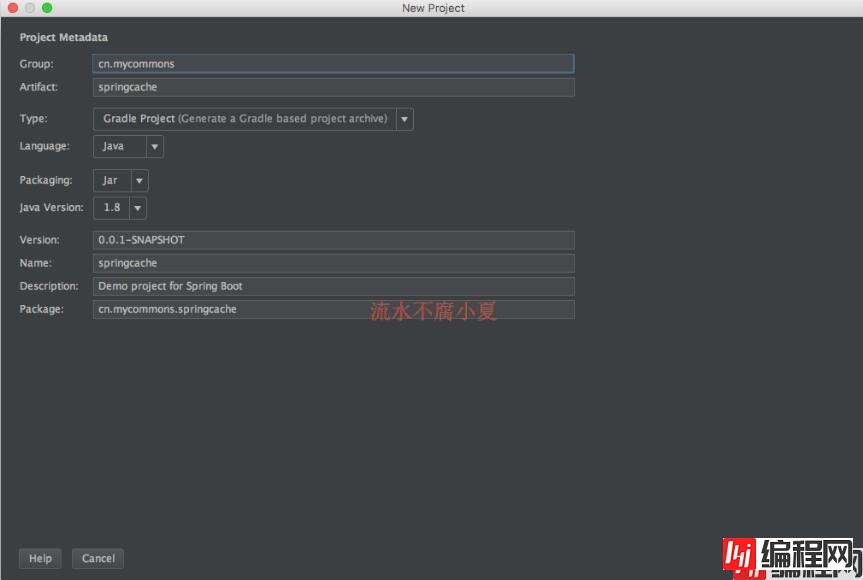
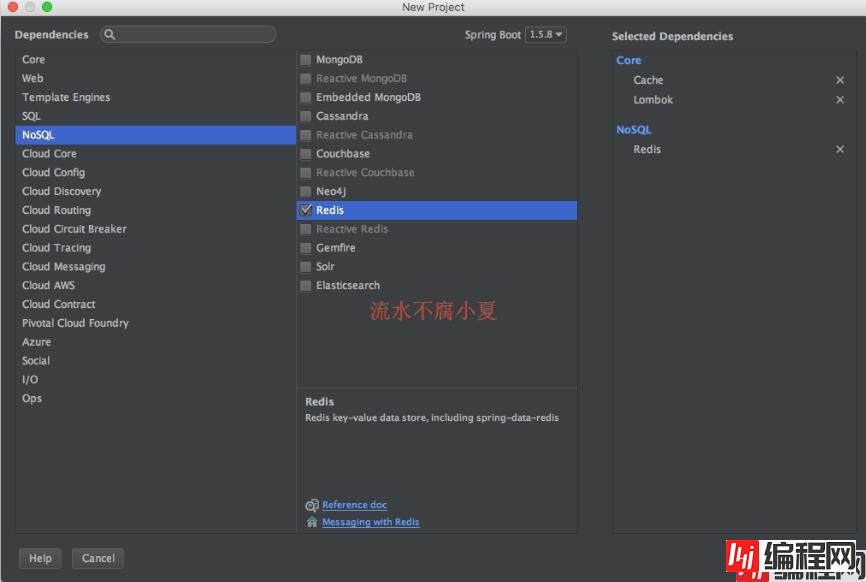
我这边为了简单方便,直接使用了Spring Boot,直接用IntelJ idea,需要添加Redis、Cache和Lombok库。
集成Redis,直接在配置文件配置即可。
application.properties
#redis
spring.redis.host=localhost
spring.redis.port=6379
spring.redis.passWord=
spring.redis.timeout=0然后测试下Redis是否集成功。
@Slf4j
@RunWith(SpringRunner.class)
@SpringBootTest
public class SprinGCacheApplicationTests {
    @Autowired
    StringRedisTemplate redisTemplate;

    @Test
    public void contextLoads() {
        Assert.assertNotNull(redisTemplate);

        redisTemplate.opsForValue().set("hello", "world");
        String value = redisTemplate.opsForValue().get("hello");
        log.info("value = " + value);

        redisTemplate.delete("hello");
        value = redisTemplate.opsForValue().get("hello");
        log.info("value = " + value);
    }
}
运行结果如下,如果没有出错,则表示集成功。
2017-11-19 14:56:10.075 INFO 73896 --- [ main] c.m.s.SpringcacheApplicationTests : value = world
2017-11-19 14:56:10.076 INFO 73896 --- [ main] c.m.s.SpringcacheApplicationTests : value = null
配置CacheManager,它的实现部分是由RedisCacheManager来实现的,我们先设置缓存时间为3s,超过这个时间,缓存自动失效。
@Configuration
@EnableCaching
public class CachingConfig {

    @Bean
    public CacheManager cacheManager(RedisTemplate redisTemplate) {
        RedisCacheManager redisCacheManager = new RedisCacheManager(redisTemplate);
        redisCacheManager.setDefaultExpiration(3);
        return redisCacheManager;
    }

    @Bean
    public CacheErrorHandler errorHandler() {
        return new RedisCacheErrorHandler();
    }

    @Slf4j
    private static class RedisCacheErrorHandler extends SimpleCacheErrorHandler {

        @Override
        public void handleCacheGetError(RuntimeException exception, Cache cache, Object key) {
            log.error("handleCacheGetError key = {}, value = {}", key, cache);
            log.error("cache get error", exception);
        }

        @Override
        public void handleCachePutError(RuntimeException exception, Cache cache, Object key, Object value) {
            log.error("handleCachePutError key = {}, value = {}", key, cache);
            log.error("cache put error", exception);
        }

        @Override
        public void handleCacheEvictError(RuntimeException exception, Cache cache, Object key) {
            log.error("handleCacheEvictError key = {}, value = {}", key, cache);
            log.error("cache evict error", exception);
        }

        @Override
        public void handleCacheClearError(RuntimeException exception, Cache cache) {
            log.error("handleCacheClearError value = {}", cache);
            log.error("cache clear error", exception);
        }
    }
}
添加一个简单的实体,然后添加服务接口和实现类。
@Data是lombok提供的,可以减少简洁代码。注意实体必须实现Serializable接口。
@Data
public class User implements Serializable {
    private int id;
    private String name;
    private String email;
}
public interface UserService {
    void addUser(User user);
    User findById(int id);
    void delete(int id);
}
@Slf4j
@Service
public class UserServiceImpl implements UserService {
    private final Map<Integer, User> db = new HashMap<>();
    @Override
    public void addUser(User user) {
        log.info("addUser.user = " + user);
        db.put(user.getId(), user);
    }

    @Cacheable(cacheNames = "user_cache", key = "#id")
    @Override
    public User findById(int id) {
        log.info("findById.id = " + id);
        return db.get(id);
    }

    @CacheEvict(cacheNames = "user_cache", key = "#id")
    @Override
    public void delete(int id) {
        log.info("delete.id = " + id);
        db.remove(id);
    }
}
上面Cacheable和CacheEvict就是Spring Cache提供的注解。具体说明如下。
value、cacheNames缓存的名称,在 spring 配置文件中定义,必须指定至少一个
例如: @Cacheable(value=”mycache”) @Cacheable(value={”cache1”,”cache2”}
key缓存的 key,可以为空,如果指定要按照 SpEL 表达式编写,如果不指定,则缺省按照方法的所有参数进行组合
例如: @Cacheable(value=”testcache”,key=”#userName”)
condition缓存的条件,可以为空,使用 SpEL 编写,返回 true 或者 false,只有为 true 才进行缓存
例如:@Cacheable(value=”testcache”,condition=”#userName.length()>2”)
value缓存的名称,在 spring 配置文件中定义,必须指定至少一个
例如: @CacheEvict(value=”my cache”)
key 缓存的 key,可以为空,如果指定要按照 SpEL 表达式编写,如果不指定,则缺省按照方法的所有参数进行组合
例如: @CacheEvict(value=”testcache”,key=”#userName”)
condition 缓存的条件,可以为空,使用 SpEL 编写,返回 true 或者 false,只有为 true 才进行缓存
例如: @CacheEvict(value=”testcache”,condition=”#userName.length()>2”)
allEntries是否清空所有缓存内容,缺省为 false,如果指定为 true,则方法调用后将立即清空所有缓存
例如: @CachEvict(value=”testcache”,allEntries=true)
beforeInvocation 是否在方法执行前就清空,缺省为 false,如果指定为 true,则在方法还没有执行的时候就清空缓存,缺省情况下,如果方法执行抛出异常,则不会清空缓存
例如: @CachEvict(value=”testcache”,beforeInvocation=true)
测试用例:
@Slf4j
@RunWith(SpringRunner.class)
@SpringBootTest
public class CacheTest {

    @Autowired
    UserService userService;

    @Test
    public void contextLoads() {
        Assert.assertNotNull(userService);

        // 创建一个实体
        User user = new User();
        user.setId(100);
        user.setName("admin");
        user.setEmail("admin@123.com");

        // 添加一个
        userService.addUser(user);

        // 根据Id查询
        log.info("user1 = " + userService.findById(100));
        sleep(1);
        // 等1s再次查询
        log.info("user2 = " + userService.findById(100));
        sleep(5);
        // 等5s再次查询
        log.info("user3 = " + userService.findById(100));

        // 添加一个
        userService.addUser(user);
        // 根据Id查询
        log.info("user4 = " + userService.findById(100));
        // 删除
        userService.delete(100);
        // 根据Id查询
        log.info("user5 = " + userService.findById(100));
    }

    private void sleep(int i) {
        try {
            Thread.sleep(i * 1000);
        } catch (InterruptedException e) {
            e.printStackTrace();
        }
    }
}
测试结果
2017-11-19 15:08:35.732 INFO 76558 --- [ main] c.m.s.service.impl.UserServiceImpl : addUser.user = User(id=100, name=admin, email=admin@123.com)
2017-11-19 15:08:35.921 INFO 76558 --- [ main] c.m.s.service.impl.UserServiceImpl : findById.id = 100
2017-11-19 15:08:35.951 INFO 76558 --- [ main] cn.mycommons.springcache.CacheTest : user1 = User(id=100, name=admin, email=admin@123.com)
2017-11-19 15:08:37.016 INFO 76558 --- [ main] cn.mycommons.springcache.CacheTest : user2 = User(id=100, name=admin, email=admin@123.com)
2017-11-19 15:08:42.019 INFO 76558 --- [ main] c.m.s.service.impl.UserServiceImpl : findById.id = 100
2017-11-19 15:08:42.021 INFO 76558 --- [ main] cn.mycommons.springcache.CacheTest : user3 = User(id=100, name=admin, email=admin@123.com)
2017-11-19 15:08:42.021 INFO 76558 --- [ main] c.m.s.service.impl.UserServiceImpl : addUser.user = User(id=100, name=admin, email=admin@123.com)
2017-11-19 15:08:42.022 INFO 76558 --- [ main] cn.mycommons.springcache.CacheTest : user4 = User(id=100, name=admin, email=admin@123.com)
2017-11-19 15:08:42.023 INFO 76558 --- [ main] c.m.s.service.impl.UserServiceImpl : delete.id = 100
2017-11-19 15:08:42.025 INFO 76558 --- [ main] c.m.s.service.impl.UserServiceImpl : findById.id = 100
2017-11-19 15:08:42.025 INFO 76558 --- [ main] cn.mycommons.springcache.CacheTest : user5 = null
从结果来看,添加一个数据后,第一次,查询是从UserServiceImpl中获取,再次查询,则没有直接调用UserServiceImpl,直接返回了缓存结果。
当超过缓存时间后,再次去查询,我们这边设置缓存时间为3s,等待5s后,再次查询,发现又从UserServiceImpl中获取数据。
当我们主动调用删除记录,同时同步清楚缓存数据后,发现查询是没有数据的。说明删除和清楚缓存操作实现了同步。
以上为个人经验,希望能给大家一个参考,也希望大家多多支持编程网。
--结束END--
本文标题: SpringCache与Redis结合的使用方式
本文链接: https://www.lsjlt.com/news/161344.html(转载时请注明来源链接)
有问题或投稿请发送至: 邮箱/279061341@qq.com QQ/279061341
下载Word文档到电脑,方便收藏和打印~
2024-03-01
2024-03-01
2024-03-01
2024-02-29
2024-02-29
2024-02-29
2024-02-29
2024-02-29
2024-02-29
2024-02-29
回答
回答
回答
回答
回答
回答
回答
回答
回答
回答


官方手机版

微信公众号

商务合作


0