目录正文原子属性OSSpinLock - 自旋锁os_unfair_lock - 互斥锁NSLock - 互斥锁NSCondition - 互斥锁NSConditionLock -
多线程开发,就会有资源抢占的情况,导致出现我们意想不到的数据问题,我们就需要对数据进行加锁,已保证线程安全.
锁主要分为两大类自旋锁和互斥锁。
我们创建属性一般都会设置属性为非原子属性noatomic, 因为原子属性atomic会有额外的加锁开销,那如果我们创建属性使用原子属性atomic,它能保证property是线程安全的吗?
#import "ViewController.h"
@interface ViewController ()
@property (atomic ,assign) int count;
@end
@implementation ViewController
- (void)viewDidLoad {
    [super viewDidLoad];
    self.count = 0;
    [self test_atomic];
}
- (void)test_atomic {
    // self.count初始值是10
    for (int i = 0; i < 10; i ++) {
        dispatch_async(dispatch_get_global_queue(0, 0), ^{
            self.count ++;
            NSLog(@"%d",self.count);
        });
    }
}
@end
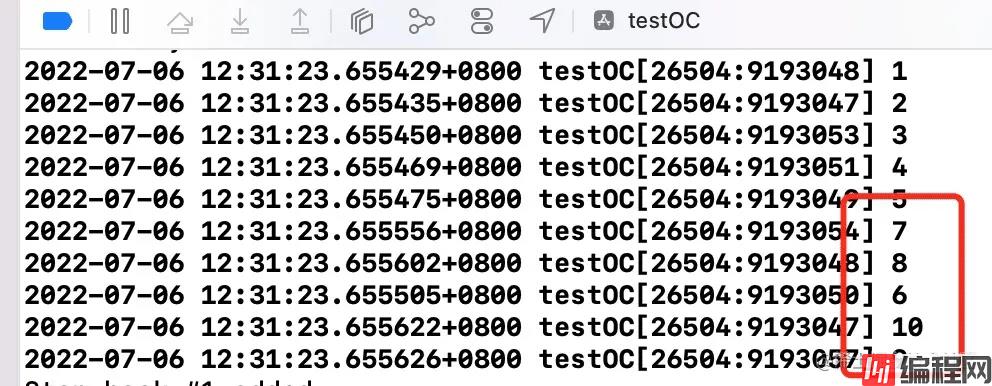
从上面我们可以看到原子属性atomic不能保证数据的线程安全.下面我们从源码进行分析:在属性的getter/setter方法调用的底层atomic和nonatomic有什么区别。先看看setter方法:objc_setProperty
void objc_setProperty(id self, SEL _cmd, ptrdiff_t offset, id newValue, BOOL atomic, signed char shouldCopy) {
    bool copy = (shouldCopy && shouldCopy != MUTABLE_COPY);
    bool mutableCopy = (shouldCopy == MUTABLE_COPY);
    reallySetProperty(self, _cmd, newValue, offset, atomic, copy, mutableCopy);
}
void objc_setProperty_atomic(id self, SEL _cmd, id newValue, ptrdiff_t offset{
    reallySetProperty(self, _cmd, newValue, offset, true, false, false);
}
void objc_setProperty_nonatomic(id self, SEL _cmd, id newValue, ptrdiff_t offset) {
    reallySetProperty(self, _cmd, newValue, offset, false, false, false);
}
void objc_setProperty_atomic_copy(id self, SEL _cmd, id newValue, ptrdiff_t offset) {
    reallySetProperty(self, _cmd, newValue, offset, true, true, false);
}
void objc_setProperty_nonatomic_copy(id self, SEL _cmd, id newValue, ptrdiff_t offset) {
    reallySetProperty(self, _cmd, newValue, offset, false, true, false);
}
我们可以看到都是调用的reallySetProperty方法,atomic第五个参数为true,nonatomic为false, copy第六个参数为true, mutableCopy第七个参数为true.
static inline void reallySetProperty(id self, SEL _cmd, id newValue, ptrdiff_t offset, bool atomic, bool copy, bool mutableCopy) {
    if (offset == 0) {
        object_setClass(self, newValue);
        return;
    }
    id oldValue;
    id *slot = (id*) ((char*)self + offset);
    if (copy) {
        newValue = [newValue copyWithZone:nil];
    } else if (mutableCopy) {
        newValue = [newValue mutableCopyWithZone:nil];
    } else {
        if (*slot == newValue) return;
        newValue = objc_retain(newValue);
    }
    if (!atomic) {
        oldValue = *slot;
        *slot = newValue;
    } else {
        spinlock_t& slotlock = PropertyLocks[slot];
        slotlock.lock();
        oldValue = *slot;
        *slot = newValue;
        slotlock.unlock();
    }
    objc_release(oldValue);
}
copy和mutableCopy使用copyWithZone进行新值的copy,其他使用objc_retain增加引用计数.nonatomic直接进行赋值;atomic会使用spinlock_t在赋值之前加锁,赋值之后解锁. 我们再来看看getter方法:objc_getProperty
id objc_getProperty(id self, SEL _cmd, ptrdiff_t offset, BOOL atomic) {
    if (offset == 0) {
        return object_getClass(self);
    }
    // Retain release world
    id *slot = (id*) ((char*)self + offset);
    if (!atomic) return *slot;
    // Atomic retain release world
    spinlock_t& slotlock = PropertyLocks[slot];
    slotlock.lock();
    id value = objc_retain(*slot);
    slotlock.unlock();
    // for perfORMance, we (safely) issue the autorelease OUTSIDE of the spinlock.
    return objc_autoreleaseReturnValue(value);
}
我们可以看到nonatomic直接返回,atomic在取值前加锁,取值后解锁,再返回值.
那么原子属性atomic在getter/setter底层有加锁解锁操作,为什么不能保证线程安全的呢?
因为原子属性atomic锁住资源的范围不够大。在self.count --;的时候,既有getter也有setter,可能就出现当getter的时候还没有return出去就被其它线程setter。
OSSpinLock 在iOS10之后被移除了。 被移除的原因是它有一个bug:优先级反转。
优先级反转:当多个线程有优先级的时候,有一个优先级较低的线程先去访问了资源,并是有了OSSpinLock对资源加锁,又来一个优先级较高的线程去访问了这个资源,这个时候优先级较高的线程就会一直占用cpu的资源,导致优先级较低的线程没办法与较高的线程争夺cpu的时间,最后导致最先被优先级较低的线程锁住的资源迟迟不能被释放,从而造成优先级反转的bug。
所以 OSSpinLock使用限制:必须保证所有访问同一资源的线程处于优先级平等的时候,才可以使用。
OSSpinLock已被苹果放弃了,大家也可以放弃它,苹果设计了os_unfair_lock来代替OSSpinLock。
iOS10之后开始支持,os_unfair_lock 在os库中,使用之前需要导入头文件<os/lock.h>。
#import "ViewController.h"
#import <os/lock.h>
@interface ViewController ()
@property (nonatomic ,assign) int count;
@property (nonatomic ,assign) os_unfair_lock unfairLock;
@end
@implementation ViewController
- (void)viewDidLoad {
    [super viewDidLoad];
    self.count = 0;
    self.unfairLock = OS_UNFAIR_LOCK_INIT; // 初始化锁
}
-(void)touchesBegan:(NSSet<UITouch *> *)touches withEvent:(UIEvent *)event {
    for (int i = 0; i<10; i++) {
        dispatch_async(dispatch_get_global_queue(0, 0), ^{
            os_unfair_lock_lock(&_unfairLock); // 加锁
            self.count ++;
            NSLog(@"%d",self.count);
            os_unfair_lock_unlock(&_unfairLock); // 解锁
        });
    }
}
@end
NSLock - Foundation框架内部的?,使用起来非常方便,基于pthroad_mutex封装而来,是一把互斥非递归锁。因为OC的Foundation框架是非开源的,所以我们查看swift的Foundation框架,来查看其源码实现,原理是相同的
#if os(windows)
#elseif CYGWIN
#else
private typealias _MutexPointer = UnsafeMutablePointer<pthread_mutex_t>
private typealias _RecursiveMutexPointer = UnsafeMutablePointer<pthread_mutex_t>
private typealias _ConditionVariablePointer = UnsafeMutablePointer<pthread_cond_t>
#endif
open class NSLock: NSObject, NSLocking {
    internal var mutex = _MutexPointer.allocate(capacity: 1)
#if os(MacOS) || os(iOS) || os(Windows)
    private var timeoutCond = _ConditionVariablePointer.allocate(capacity: 1)
    private var timeoutMutex = _MutexPointer.allocate(capacity: 1)
#endif
    public override init() {
#if os(Windows)
#else
        pthread_mutex_init(mutex, nil)
#if os(macOS) || os(iOS)
        pthread_cond_init(timeoutCond, nil)
        pthread_mutex_init(timeoutMutex, nil)
#endif
#endif
    }
    deinit {
#if os(Windows)
#else
        pthread_mutex_destroy(mutex)
#endif
        mutex.deinitialize(count: 1)
        mutex.deallocate()
#if os(macOS) || os(iOS) || os(Windows)
        deallocateTimedLockData(cond: timeoutCond, mutex: timeoutMutex)
#endif
    }
    open func lock() {
#if os(Windows)
#else
        pthread_mutex_lock(mutex)
#endif
    }
    open func unlock() {
#if os(Windows)
#else
        pthread_mutex_unlock(mutex)
#if os(macOS) || os(iOS)
        // Wakeup any threads waiting in lock(before:)
        pthread_mutex_lock(timeoutMutex)
        pthread_cond_broadcast(timeoutCond)
        pthread_mutex_unlock(timeoutMutex)
#endif
#endif
    }
    ...
}
我们可以起内部是对pthread_mutex_t的封装
在pthread_mutex中可以通过pthread_mutexattr_settype(attrs, Int32(PTHREAD_MUTEX_RECURSIVE))来设置锁为递归锁,这里并没有设置,所以NSLock不是一把递归锁!
我们通过查看swift foundation 源码 可以看到其和NSLock类似,也是对pthread_mutex_t的封装,相比于NSLock,NSCondition多了几个api:
    open func wait() {
        pthread_cond_wait(cond, mutex)
    }
    open func wait(until limit: Date) -> Bool {
        guard var timeout = timeSpecFrom(date: limit) else {
            return false
        }
        return pthread_cond_timedwait(cond, mutex, &timeout) == 0
    }
    open func signal() {
        pthread_cond_signal(cond)
    }
    open func broadcast() {
        pthread_cond_broadcast(cond)
    }
#import "ViewController.h"
@interface ViewController ()
@property (nonatomic ,assign) int count;
@property (nonatomic ,strong) NSCondition *iCondition;
@end
@implementation ViewController
- (void)viewDidLoad {
    [super viewDidLoad];
    self.count = 0;
    self.iCondition = [[NSCondition alloc] init]; // 初始化锁
}
-(void)touchesBegan:(NSSet<UITouch *> *)touches withEvent:(UIEvent *)event {
    [self nscondition_test];
}
#pragma mark -- NSCondition
- (void)nscondition_test {
    // 生产
    for (int i = 0; i < 50; i ++) {
        dispatch_async(dispatch_get_global_queue(0, 0), ^{
            [self my_production];
        });
    }
    // 消费
    for (int i = 0; i < 100; i ++) {
        dispatch_async(dispatch_get_global_queue(0, 0), ^{
            [self my_consumption];
        });
    }
}
- (void)my_production {
    [self.iCondition lock];
    self.count ++;
    NSLog(@"生产了一个产品,现有产品 : %d个",self.count);
    [self.iCondition signal]; // 唤醒一个wait正在休眠的线程
    [self.iCondition unlock];
}
- (void)my_consumption {
    [self.iCondition lock];
    while (self.count == 0) { // 这里使用 if 会出现现有产品是负数的情况
        [self.iCondition wait]; // 阻塞当前线程,使线程进入休眠,等待唤醒信号signal
    }
    self.count --;
    NSLog(@"消费了一个产品,现有产品: %d个",self.count);
    [self.iCondition unlock];
}
@end
注意⚠️:pthread_mutex 存在虚假唤醒的情况,一个signl唤醒多个wait,不是预期的signal : wait = 1:1效果。 在编码过程中可以通过while条件判断,使被唤醒的线程,陷入while循环中,从而解决此问题。
NSConditionLock是基于NSCondition的封装。目的是让NSConditionLock自带条件探测
open class NSConditionLock : NSObject, NSLocking {
    internal var _cond = NSCondition()
    ......
    open func lock(whenCondition condition: Int) {
        let _ = lock(whenCondition: condition, before: Date.distantFuture)
    }
    open func `try`() -> Bool {
        return lock(before: Date.distantPast)
    }
    open func tryLock(whenCondition condition: Int) -> Bool {
        return lock(whenCondition: condition, before: Date.distantPast)
    }
    open func unlock(withCondition condition: Int) {
        _cond.lock()
        _thread = nil
        _value = condition
        _cond.broadcast()
        _cond.unlock()
    }
    ...
}
#import "ViewController.h"
@interface ViewController ()
@property (nonatomic ,strong) NSConditionLock *iConditionLock;
@end
@implementation ViewController
-(void)touchesBegan:(NSSet<UITouch *> *)touches withEvent:(UIEvent *)event {
    [self conditonLock_test];
}
#pragma mark -- NSConditionLock
- (void)conditonLock_test {
    self.iConditionLock = [[NSConditionLock alloc] initWithCondition:3];
    dispatch_async(dispatch_get_global_queue(0, 0), ^{
        [self.iConditionLock lockWhenCondition:3];
        NSLog(@"1");
        [self.iConditionLock unlockWithCondition:2];
    });
    dispatch_async(dispatch_get_global_queue(0, 0), ^{
        [self.iConditionLock lockWhenCondition:2];
        NSLog(@"2");
        [self.iConditionLock unlockWithCondition:1];
    });
    dispatch_async(dispatch_get_global_queue(0, 0), ^{
        [self.iConditionLock lockWhenCondition:1];
        NSLog(@"3");
        [self.iConditionLock unlockWithCondition:0];
    });
}
@end
// 线程任务的执行顺序:1 2 3
NSConditionLock能够达到控制线程执行任务顺序的目的。
递归锁:同一时刻只能被一条线程所拥有。 NSRecursiveLock是基于pthread的封装,并设置了递归属性。
open class NSRecursiveLock: NSObject, NSLocking {
    internal var mutex = _RecursiveMutexPointer.allocate(capacity: 1)
#if os(macOS) || os(iOS) || os(Windows)
    private var timeoutCond = _ConditionVariablePointer.allocate(capacity: 1)
    private var timeoutMutex = _MutexPointer.allocate(capacity: 1)
#endif
    public override init() {
        super.init()
#if CYGWIN
        var attrib : pthread_mutexattr_t? = nil
#else
        var attrib = pthread_mutexattr_t()
#endif
        withUnsafeMutablePointer(to: &attrib) { attrs in
            pthread_mutexattr_init(attrs)
            // 设置递归属性
            pthread_mutexattr_settype(attrs, Int32(PTHREAD_MUTEX_RECURSIVE))
            pthread_mutex_init(mutex, attrs)
        }
        pthread_cond_init(timeoutCond, nil)
    }
NSConditionLock是一把递归锁,可递归加锁解锁(可适用于递归函数)
通过PTHREAD_MUTEX_RECURSIVE来设置锁为递归锁。当锁为递归锁的时候,它的使用场景为单个线程中的递归调用。
#import "ViewController.h"
@interface ViewController ()
@property (nonatomic ,assign) int count;
@property (nonatomic ,strong) NSRecursiveLock *iRecursiveLock;
@end
@implementation ViewController
- (void)viewDidLoad {
    [super viewDidLoad];
    self.count = 0;
    self.iRecursiveLock = [[NSRecursiveLock alloc] init]; // 初始化锁
    [self recursiveTest]; // 递归锁案例
}
-(void)touchesBegan:(NSSet<UITouch *> *)touches withEvent:(UIEvent *)event {
    for (int i = 0; i<10; i++) {
        dispatch_async(dispatch_get_global_queue(0, 0), ^{
            [self recursiveLock_test];
        });
    }
}
#pragma mark -- NSRecursiveLock
-(void)recursiveLock_test {
    [self.iRecursiveLock lock];
    self.count ++;
    NSLog(@"%d",self.count);
    [self.iRecursiveLock unlock];
}
- (void)recursiveTest {
    dispatch_async(dispatch_get_global_queue(0, 0), ^{
        static void (^recursiveMethod)(int);
        recursiveMethod = ^(int value){
            if (value > 0) {
                [self.iRecursiveLock lock];
                NSLog(@"%d",value);
                recursiveMethod(value - 1);
                [self.iRecursiveLock unlock];
            }
        };
        recursiveMethod(10);
    });
}
@end
如果在不同线程进行递归调用的话,会出现问题,把recursiveTest方法放到for循环里
- (void)recursiveTest {
    for (int i = 0; i < 5; i++) {
        dispatch_async(dispatch_get_global_queue(0, 0), ^{
            static void (^recursiveMethod)(int);
            recursiveMethod = ^(int value){
                if (value > 0) {
                    [self.iRecursiveLock lock];
                    NSLog(@"%d",value);
                    recursiveMethod(value - 1);
                    [self.iRecursiveLock unlock];
                }
            };
            recursiveMethod(10);
        });
    }
}
此时代码会因为子线程相互等待资源而造成线程死锁。
@synchronized不管你几条线程,不管你是否递归调用,它都支持,是我们最常用的一把锁,虽然都在诟病其性能问题,可是在真机条件下测试其性能,和其他锁并没有那么明显的差别。
#import "ViewController.h"
@interface ViewController ()
@property (nonatomic ,assign) int count;
@end
@implementation ViewController
- (void)viewDidLoad {
    [super viewDidLoad];
    self.count = 0;
    [self synchronized_test]; // synchronized案例
}
- (void)synchronized_test {
    for (int i=0; i<5; i++) {
        dispatch_async(dispatch_get_global_queue(0, 0), ^{
            static void (^recursiveMethod)(int);
            recursiveMethod = ^(int value){
                if (value > 0) {
                    @synchronized(self) {
                         NSLog(@"%d",value);
                         recursiveMethod(value - 1);
                    }
                }
            };
            recursiveMethod(10);
        });
    }
}
@end
@synchronized(obj)指令使用的obj为该锁的唯一标识,只有当标识相同时,才为满足互斥。, @synchronized还是个递归可重入锁,如下代码所示:
   NSObject *obj = [[NSObject alloc] init];
   dispatch_async(dispatch_get_global_queue(DISPATCH_QUEUE_PRIORITY_DEFAULT,0), ^{
        @synchronized(obj){
            NSLog(@"1开始");
            @synchronized (obj) {
                NSLog(@"2开始");
                @synchronized (obj) {
                    NSLog(@"3");
                }
                NSLog(@"2完成");
            }
            NSLog(@"1结束");
        }
    });
@synchronized是个递归互斥锁,同一个线程可以重复获得这个锁并进入执行执行块里面的代码而不会导致死锁。
@synchronized的优点:不需要在代码中显式的创建锁对象,便可以实现锁的机制;递归互斥,同一个线程可以重复进入而不导致死锁。
@synchronized的缺点:效率低(在真机上不见得效率那么低)。@synchronized块会隐式的添加一个异常处理例程来保护代码,该处理例程会在异常抛出的时候自动的释放互斥锁,这会增加额外的开销。同时为了实现递归互斥可重入,底层使用的是递归锁加上复杂的业务逻辑,也增加了不少的消耗。
@synchronized加锁需要一个对象参数,在选着对象参数的时候要特别注意不能让对象参数为nil,否则加锁无效。
同样的信号量也可以解决线程安全问题,相关内容请查阅GCD篇章,主要是控制并发数量,来实现线程安全
#pragma mark -- dispatch_semaphore_t
- (void)dispatch_semaphore_t_test {
    dispatch_semaphore_t sem = dispatch_semaphore_create(0);
    dispatch_async(dispatch_get_global_queue(0, 0), ^{
        NSLog(@"任务1");
        dispatch_semaphore_signal(sem);
    });
    dispatch_semaphore_wait(sem, DISPATCH_TIME_FOREVER);
    dispatch_async(dispatch_get_global_queue(0, 0), ^{
        NSLog(@"任务2");
        dispatch_semaphore_signal(sem);
    });
    dispatch_semaphore_wait(sem, DISPATCH_TIME_FOREVER);
    dispatch_async(dispatch_get_global_queue(0, 0), ^{
        NSLog(@"任务3");
    });
}
纯C的锁,需要我们自己进行对象的内存管理,前面有些锁就是对齐进行的封装.
#pragma mark -- pthread_mutex
- (void)pthread_mutex_test {
    //非递归加锁
    pthread_mutex_t lock0;
    pthread_mutex_init(&lock0, NULL);
    pthread_mutex_lock(&lock0);
    // 锁住的资源...
    pthread_mutex_unlock(&lock0);
    pthread_mutex_destroy(&lock0); // c对象,需要自己释放资源
    //递归加锁
    pthread_mutex_t lock;
    pthread_mutexattr_t attr;
    pthread_mutexattr_init(&attr);
    pthread_mutexattr_settype(&attr, PTHREAD_MUTEX_RECURSIVE); // 设置递归属性
    pthread_mutex_init(&lock, &attr);
    pthread_mutexattr_destroy(&attr);
    pthread_mutex_lock(&lock);
    // 锁住的资源...
    pthread_mutex_unlock(&lock);
    pthread_mutex_destroy(&lock); // c对象,需要自己释放资源
}
读写锁实际是一种特殊的自旋锁,它把对共享资源的访问者划分成读者和写者,读者只对共享资源进行读访问,写者则需要对共享资源进行写操作。这种锁相对于自旋锁而言,能提高并发性,因为在多处理器系统中,它允许同时有多个读者来访问共享资源,最大可能的读者数为实际的逻辑CPU数。写者是排他性的,一个读写锁同时只能有一个写者或多个读者(与CPU数相关),但不能同时既有读者又有写者。在读写锁保持期间也是抢占失效的。
如果读写锁当前没有读者,也没有写者,那么写者可以立刻获得读写锁,否则它必须自旋在那里,直到没有任何写者或读者。如果读写锁没有写者,那么读者可以立即获得该读写锁,否则读者必须自旋在那里,直到写者释放该读写锁。
读写锁可以实现多读单写功能(读读并发、读写互斥、写写互斥) 我们通过GCD的栅栏函数实现的一个简单读写锁案例:
#import "ViewController.h"
@interface ViewController ()
@property (nonatomic ,strong) dispatch_queue_t iQueue;
@property (nonatomic ,strong) NSMutableDictionary *dataDic;
@end
@implementation ViewController
- (void)viewDidLoad {
    [super viewDidLoad];
    self.iQueue = dispatch_queue_create("AnAn", DISPATCH_QUEUE_CONCURRENT);
    self.dataDic = [NSMutableDictionary new];
    [self my_write: @"我是写的东西"];
}
- (void)test {
    for (int i = 0; i < 10; i ++) {
        dispatch_async(dispatch_get_global_queue(0, 0), ^{
            [self my_read];
        });
    }
}
#pragma mark -- 读写锁
- (NSString *)my_read {
    // 异步读取
    __block NSString *ret;
    dispatch_sync(self.iQueue, ^{
        // 读取的代码
        ret = self.dataDic[@"name"];
    });
    NSLog(@"%@",ret);
    return ret;
}
- (void)my_write: (NSString *)name {
    // 写操作
    dispatch_barrier_async(self.iQueue, ^{
        [self.dataDic setObject:name forKey:@"name"];
    });
}以上就是iOS开发常用线程安全锁的详细内容,更多关于iOS线程安全锁的资料请关注编程网其它相关文章!
--结束END--
本文标题: iOS开发常用线程安全锁
本文链接: https://www.lsjlt.com/news/165226.html(转载时请注明来源链接)
有问题或投稿请发送至: 邮箱/279061341@qq.com QQ/279061341
下载Word文档到电脑,方便收藏和打印~
2024-01-21
2023-10-28
2023-10-28
2023-10-27
2023-10-27
2023-10-27
2023-10-27
回答
回答
回答
回答
回答
回答
回答
回答
回答
回答


官方手机版

微信公众号

商务合作


0