目录底图实现被验证区域块滑块区域动态滑动有效验证动画处理完整代码看到一个好文,所以模仿这实现一个登录时的拼图验证。效果展示如下。 底图实现 首先实现一个盒子,存放我的 // ht
看到一个好文,所以模仿这实现一个登录时的拼图验证。效果展示如下。

首先实现一个盒子,存放我的

// html
        <div class="check">
        </div>
// CSS
.check {
width: 400px;
height: 300px;
background-image: url(./img/bg.avif);
background-size: 100% 100%;
background-repeat: no-repeat;
position: relative;
filter: brightness(80%);
}底图中的验证区域通过伪类实现

    .check::before {
            position: absolute;
            content: '';
            width: 50px;
            height: 50px;
            background: rgba(0, 0, 0, 0.5);
            top: 100px;
            left: 280px;
}被验证区域有点类似于抠图的概念了,通过从底图中截取一部分,并且改变放置的位置,使其看起来是整体的一部分。核心的思想就是利用了background-position设置负值,获取图片的部分
        <div class="check">
                <!-- 验证区块通过伪类实现 -->
                <!-- 被验证区块 -->
                <div class="check-box" id="check-box"></div>
        </div>
.check-box {
width: 50px;
height: 50px;
position: absolute;
top: 100px;
left: 0;
background-image: inherit;
background-repeat: inherit;
background-size: 400px 300px;
background-position: -280px -100px;
border: 1px solid #fff;
}滑块的html+css实现特别简单,这里有一个对号是通过border-width实现的,感觉很妙呀!
<!-- 拖动条 -->
<div class="drag">
<!-- 滑块 -->
<div class="drag-box" id="drag-box">
<!-- 对号 -->
<div id="drag-mark" class="drag-mark"></div>
</div>
<!-- 文字提示 -->
<div class="drag-tips">
<span>按住左边按钮向右拖动完成上方图像验证</span>
</div>
</div> .drag {
width: 400px;
height: 50px;
background-color: #e3e3e3;
margin-top: 10px;
position: relative;
}
.drag-box {
position: absolute;
top: 0;
left: 0;
width: 50px;
height: 50px;
background-color: aquamarine;
z-index: 10;
display: flex;
justify-content: center;
align-items: center;
}
.drag-tips {
position: absolute;
top: 0;
left: 0;
display: flex;
justify-content: end;
align-items: center;
width: 95%;
height: 100%;
font-size: 12px;
color: #8a8a8a;
user-select: none;
}
.drag-mark {
width: 8px;
height: 16px;
border-color: #009933;
border-style: solid;
border-width: 0 3px 5px 0;
transfORM: rotate(45deg);
opacity: 0;
transition: 0.3s;
}滑动的过程涉及鼠标按下、鼠标移动、鼠标弹起
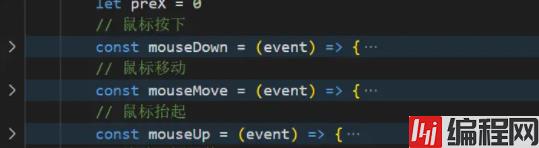
鼠标按下
保存鼠标的初始水平值pageX,方便下一步计算移动值
监听鼠标的移动事件
// 鼠标按下
const mouseDown = (event) => {
// 获取鼠标坐标
preX = event.pageX
// 监听鼠标移动
document.addEventListener('mousemove', mouseMove)
}
···鼠标移动
思考:这里使用pageX,clientX都可以实现相应的效果,但是使用offsetX的时候会出现闪烁的效果,看到很多帖子说使用pointer-events: none解决,我的不可以,留一个疑问在这里吧:鼠标的移动值到底怎么计算?,等日后参悟透了再来更新。
// 鼠标移动
const mouseMove = (event) => {
const { pageX } = event
// 移动距离
const moveX = pageX - preX
// 移动不能超出区域
if (moveX < 0 || moveX > 350) {
return
}
check.style.transform = `translateX(${moveX}px)`
drag.style.transform = `translateX(${moveX}px)`
}鼠标抬起
// 鼠标抬起
const mouseUp = (event) => {
// 移出移动事件
document.removeEventListener('mousemove', mouseMove)
const { pageX } = event
const moveX = pageX - preX
if (moveX < 278 || moveX > 285) {
.......
} else {
success()
}
}有效验证是指验证通过的回调函数
// 校验回调函数
const success = () => {
console.log('通过校验!')
}对于回弹动画的处理,首先是css方面,设计动画效果,然后是js方面,滑块和被验证区域赋值动画效果,监听动画结束事件,动画结束的时候,滑块和被验证区域回到0的位置,清除动画效果。
@keyframes move {
to {
transform: translateX(0);
}
} if (moveX < 278 || moveX > 285) {
// 没有在校验区域 增加回弹动画
drag.style.animation = 'move 0.5s ease-in-out'
check.style.animation = 'move 0.5s ease-in-out'
// 动画结束回调
const animationEnd = () => {
check.style.transform = `translateX(${0}px)`
drag.style.transform = `translateX(${0}px)`
mark.style.opacity = 0
// 清除动画
drag.style.animation = ''
check.style.animation = ''
// 取消监听动画结束回调
document.removeEventListener('animationEnd', animationEnd)
}
document.addEventListener('animationend', animationEnd)
}图片是远程服务器上的,我下载到本地了,点击上面的底图链接可以获取到原图。
<!--
* @Author: Kongjingjing
* @Date: 2023-01-10 15:37:03
* @Description:
-->
<!DOCTYPE html>
<html lang="en">
<head>
<meta charset="UTF-8" />
<meta Http-equiv="X-UA-Compatible" content="IE=edge" />
<meta name="viewport" content="width=device-width, initial-scale=1.0" />
<title>Document</title>
<style>
.check {
width: 400px;
height: 300px;
background-image: url(./img/bg.avif);
background-size: 100% 100%;
background-repeat: no-repeat;
position: relative;
filter: brightness(80%);
}
.check::before {
position: absolute;
content: '';
width: 50px;
height: 50px;
background: rgba(0, 0, 0, 0.5);
top: 100px;
left: 280px;
}
        .check-box {
                width: 50px;
                height: 50px;
                position: absolute;
                top: 100px;
                left: 0;
                background-image: inherit;
                background-repeat: inherit;
                background-size: 400px 300px;
                background-position: -280px -100px;
                border: 1px solid #fff;
        }
.drag {
width: 400px;
height: 50px;
background-color: #e3e3e3;
margin-top: 10px;
position: relative;
}
.drag-box {
position: absolute;
top: 0;
left: 0;
width: 50px;
height: 50px;
background-color: aquamarine;
z-index: 10;
display: flex;
justify-content: center;
align-items: center;
}
.drag-tips {
position: absolute;
top: 0;
left: 0;
display: flex;
justify-content: end;
align-items: center;
width: 95%;
height: 100%;
font-size: 12px;
color: #8a8a8a;
user-select: none;
}
@keyframes move {
to {
transform: translateX(0);
}
}
.drag-mark {
width: 8px;
height: 16px;
border-color: #009933;
border-style: solid;
border-width: 0 3px 5px 0;
transform: rotate(45deg);
opacity: 0;
transition: 0.3s;
}
</style>
</head>
<body>
<div class="check">
<!-- 验证区块通过伪类实现 -->
<!-- 被验证区块 -->
<div class="check-box" id="check-box"></div>
</div>
    <!-- 拖动条 -->
    <div class="drag">
            <!-- 滑块 -->
            <div class="drag-box" id="drag-box">
                    <!-- 对号 -->
                    <div id="drag-mark" class="drag-mark"></div>
            </div>
            <!-- 文字提示 -->
            <div class="drag-tips">
                    <span>按住左边按钮向右拖动完成上方图像验证</span>
            </div>
    </div>
</body>
<script>
// 被验证区块
const check = document.getElementById('check-box')
// 滑块
const drag = document.getElementById('drag-box')
// 对号
const mark = document.getElementById('drag-mark')
let preX = 0
// 鼠标按下
const mouseDown = (event) => {
// 获取鼠标坐标
preX = event.pageX
// 监听鼠标移动
document.addEventListener('mousemove', mouseMove)
}
    // 鼠标移动
    const mouseMove = (event) => {
            const { pageX } = event
            // 移动距离
            const moveX = pageX - preX
            // 移动不能超出区域
            if (moveX < 0 || moveX > 350) {
                    return
            }
            check.style.transform = `translateX(${moveX}px)`
            drag.style.transform = `translateX(${moveX}px)`
    }
// 鼠标抬起
const mouseUp = (event) => {
// 移出移动事件
document.removeEventListener('mousemove', mouseMove)
const { pageX } = event
const moveX = pageX - preX
if (moveX < 278 || moveX > 285) {
// 没有在校验区域 增加回弹动画
drag.style.animation = 'move 0.5s ease-in-out'
check.style.animation = 'move 0.5s ease-in-out'
// 动画结束回调
const animationEnd = () => {
check.style.transform = `translateX(${0}px)`
drag.style.transform = `translateX(${0}px)`
mark.style.opacity = 0
// 清除动画
drag.style.animation = ''
check.style.animation = ''
// 取消监听动画结束回调
document.removeEventListener('animationEnd', animationEnd)
}
document.addEventListener('animationend', animationEnd)
} else {
// 对号
mark.style.opacity = 1
success()
}
}
    // 校验回调函数
    const success = () => {
            console.log('通过校验!')
    }
// 滑块绑定鼠标按下事件
drag.addEventListener('mousedown', mouseDown)
document.addEventListener('mouseup', mouseUp)
</script>
</html>到此这篇关于javascript实现登录拼图验证的示例代码的文章就介绍到这了,更多相关JavaScript登录拼图验证内容请搜索编程网以前的文章或继续浏览下面的相关文章希望大家以后多多支持编程网!
--结束END--
本文标题: JavaScript实现登录拼图验证的示例代码
本文链接: https://www.lsjlt.com/news/177439.html(转载时请注明来源链接)
有问题或投稿请发送至: 邮箱/279061341@qq.com QQ/279061341
下载Word文档到电脑,方便收藏和打印~
2024-01-12
2023-05-20
2023-05-20
2023-05-20
2023-05-20
2023-05-20
2023-05-20
2023-05-20
2023-05-20
2023-05-20
回答
回答
回答
回答
回答
回答
回答
回答
回答
回答


官方手机版

微信公众号

商务合作


0