目录数量选择组件-基本结构数量选择组件-v-model语法糖数量选择组件-功能实现数量选择组件-基本结构 (1)准备基本结构 <script lang="ts" setup n
(1)准备基本结构
<script lang="ts" setup name="Numbox">
//
</script>
<template>
  <div class="numbox">
    <div class="label">数量</div>
    <div class="numbox">
      <a href="javascript:;" rel="external nofollow"  rel="external nofollow"  rel="external nofollow"  rel="external nofollow"  rel="external nofollow"  rel="external nofollow"  rel="external nofollow"  rel="external nofollow" >-</a>
      <input type="text" readonly value="1" />
      <a href="javascript:;" rel="external nofollow"  rel="external nofollow"  rel="external nofollow"  rel="external nofollow"  rel="external nofollow"  rel="external nofollow"  rel="external nofollow"  rel="external nofollow" >+</a>
    </div>
  </div>
</template>
<style scoped lang="less">
.numbox {
  display: flex;
  align-items: center;
  .label {
    width: 60px;
    color: #999;
    padding-left: 10px;
  }
  .numbox {
    width: 120px;
    height: 30px;
    border: 1px solid #e4e4e4;
    display: flex;
    > a {
      width: 29px;
      line-height: 28px;
      text-align: center;
      background: #f8f8f8;
      font-size: 16px;
      color: #666;
      &:first-of-type {
        border-right: 1px solid #e4e4e4;
      }
      &:last-of-type {
        border-left: 1px solid #e4e4e4;
      }
    }
    > input {
      width: 60px;
      padding: 0 5px;
      text-align: center;
      color: #666;
    }
  }
}
</style>
(2)全局注册
import Numbox from '@/components/numbox/index.Vue'
export default {
  install(app: App) {
    app.component('Numbox', Numbox)
  },
}
(3)提供类型声明
import Numbox from '@/components/numbox/index.vue'
declare module 'vue' {
  export interface GlobalComponents {
    Numbox: typeof Numbox
  }
}
export {}
(4)渲染
<div class="spec">
  <!-- 数字选择框 -->
  <XtxNumbox></XtxNumbox>
</div>
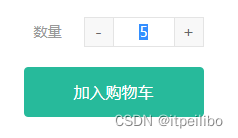
效果

目标:掌握vue3.0的v-model语法糖原理
在vue2.0中v-mode语法糖简写的代码 <Son :value="msg" @input="msg=$event" />
在vue3.0中v-model语法糖有所调整:<Son :modelValue="msg" @update:modelValue="msg=$event" />
演示代码:
<script lang="ts" setup>
defineProps({
  money: {
    type: Number,
    default: 0,
  },
})
const emit = defineEmits(['update:money'])
</script>
<template>
  <h3>子组件-{{ money }}</h3>
  <button @click="emit('update:money', money + 1)">+1</button>
</template>
<style scoped lang="less"></style>
总结: vue3.0封装组件支持v-model的时候,父传子:modelValue 子传父 @update:modelValue
补充: vue2.0的 xxx.sync 语法糖解析 父传子 :xxx 子传父 @update:xxx 在vue3.0 使用 v-model:xxx 代替。
大致功能分析:
<script lang="ts" setup name="Numbox">
const props = defineProps({
  modelValue: {
    type: Number,
    default: 1,
  },
  min: {
    type: Number,
    default: 1,
  },
  max: {
    type: Number,
    default: 20,
  },
  showLabel: {
    type: Boolean,
    default: false,
  },
})
const emit = defineEmits<{
  (e: 'update:modelValue', value: number): void
}>()
const add = () => {
  if (props.modelValue >= props.max) return
  emit('update:modelValue', props.modelValue + 1)
}
const sub = () => {
  if (props.modelValue <= props.min) return
  emit('update:modelValue', props.modelValue - 1)
}
</script>
<template>
  <div class="numbox">
    <div class="label" v-if="showLabel"><slot>数量</slot></div>
    <div class="numbox">
      <a href="javascript:;" rel="external nofollow"  rel="external nofollow"  rel="external nofollow"  rel="external nofollow"  rel="external nofollow"  rel="external nofollow"  rel="external nofollow"  rel="external nofollow"  @click="sub">-</a>
      <input type="text" readonly :value="modelValue"/>
      <a href="javascript:;" rel="external nofollow"  rel="external nofollow"  rel="external nofollow"  rel="external nofollow"  rel="external nofollow"  rel="external nofollow"  rel="external nofollow"  rel="external nofollow"  @click="add">+</a>
    </div>
  </div>
</template>
<style scoped lang="less">
.numbox {
  display: flex;
  align-items: center;
  .label {
    width: 60px;
    color: #999;
    padding-left: 10px;
  }
  .numbox {
    width: 120px;
    height: 30px;
    border: 1px solid #e4e4e4;
    display: flex;
    > a {
      width: 29px;
      line-height: 28px;
      text-align: center;
      background: #f8f8f8;
      font-size: 16px;
      color: #666;
      &:first-of-type {
        border-right: 1px solid #e4e4e4;
      }
      &:last-of-type {
        border-left: 1px solid #e4e4e4;
      }
    }
    > input {
      width: 60px;
      padding: 0 5px;
      text-align: center;
      color: #666;
    }
  }
}
</style>
动态控制禁用效果
<script lang="ts" setup name="Numbox">
const props = defineProps({
  modelValue: {
    type: Number,
    default: 1,
  },
  min: {
    type: Number,
    default: 1,
  },
  max: {
    type: Number,
    default: 20,
  },
  showLabel: {
    type: Boolean,
    default: false,
  },
})
const emit = defineEmits<{
  (e: 'update:modelValue', value: number): void
}>()
const add = () => {
  if (props.modelValue >= props.max) return
  emit('update:modelValue', props.modelValue + 1)
}
const sub = () => {
  if (props.modelValue <= props.min) return
  emit('update:modelValue', props.modelValue - 1)
}
</script>
<template>
  <div class="numbox">
    <div class="label" v-if="showLabel"><slot>数量</slot></div>
    <div class="numbox">
     + <a href="javascript:;" rel="external nofollow"  rel="external nofollow"  rel="external nofollow"  rel="external nofollow"  rel="external nofollow"  rel="external nofollow"  rel="external nofollow"  rel="external nofollow"  @click="sub" :class="{not:props.modelValue <= props.main}">-</a>
      <input type="text" readonly :value="modelValue" />
     + <a href="javascript:;" rel="external nofollow"  rel="external nofollow"  rel="external nofollow"  rel="external nofollow"  rel="external nofollow"  rel="external nofollow"  rel="external nofollow"  rel="external nofollow"  @click="add" :class="{not:props.modelValue >= props.max}">+</a>
    </div>
  </div>
</template>
<style scoped lang="less">
.numbox {
  display: flex;
  align-items: center;
  .label {
    width: 60px;
    color: #999;
    padding-left: 10px;
  }
  .numbox {
    width: 120px;
    height: 30px;
    border: 1px solid #e4e4e4;
    display: flex;
    > a {
      width: 29px;
      line-height: 28px;
      text-align: center;
      background: #f8f8f8;
      font-size: 16px;
      color: #666;
 +     &.not {
 +       cursor: not-allowed;
 +     }
      &:first-of-type {
        border-right: 1px solid #e4e4e4;
      }
      &:last-of-type {
        border-left: 1px solid #e4e4e4;
      }
    }
    > input {
      width: 60px;
      padding: 0 5px;
      text-align: center;
      color: #666;
    }
  }
}
</style>
使用组件:src/views/Goods/index.vue
<script lang="ts" setup name="Numbox">
import {ref} from "vue";
const count = ref(1)
</script>
<!-- 商品信息 -->
<div class="goods-info">
    <!-- 数字选择框 -->
    <XtxNumbox v-model="count" min:"1" :max="20" ></XtxNumbox>
</div>
思考:
我们的输入框不仅能点击加减还可以输入数字,如果用户通过输入框输入非数字会出现什么问题?
优化代码
<script lang="ts" setup name="Numbox">
const props = defineProps({
  modelValue: {
    type: Number,
    default: 1,
  },
  min: {
    type: Number,
    default: 1,
  },
  max: {
    type: Number,
    default: 20,
  },
  showLabel: {
    type: Boolean,
    default: false,
  },
})
+const { proxy } = getCurrentInstance() as ComponentInternalInstance
const emit = defineEmits<{
  (e: 'update:modelValue', value: number): void
}>()
const add = () => {
  if (props.modelValue >= props.max) return
  emit('update:modelValue', props.modelValue + 1)
}
const sub = () => {
  if (props.modelValue <= props.min) return
  emit('update:modelValue', props.modelValue - 1)
}
+const handleChange = (e: Event) => {
+  // 通过类型断言,让ts知道目前元素的类型
+  const element = e.target as htmlInputElement
+  let value = +element.value
+  if (isNaN(value)) value = 1
+  if (value >= props.max) value = props.max
+  if (value <= props.main) value = props.main
+  emit('update:modelValue',value)
+  // 强制刷新
+  proxy?.$forceUpdate()
}
</script>
<template>
  <div class="numbox">
    <div class="label" v-if="showLabel"><slot>数量</slot></div>
    <div class="numbox">
      <a href="javascript:;" rel="external nofollow"  rel="external nofollow"  rel="external nofollow"  rel="external nofollow"  rel="external nofollow"  rel="external nofollow"  rel="external nofollow"  rel="external nofollow"  @click="sub" :class="{not:props.modelValue <= props.main}">-</a>
      <input type="text" readonly :value="modelValue" @change="handleChange($event)"/>
      <a href="javascript:;" rel="external nofollow"  rel="external nofollow"  rel="external nofollow"  rel="external nofollow"  rel="external nofollow"  rel="external nofollow"  rel="external nofollow"  rel="external nofollow"  @click="add" :class="{not:props.modelValue >= props.max}">+</a>
    </div>
  </div>
</template>
<style scoped lang="less">
.numbox {
  display: flex;
  align-items: center;
  .label {
    width: 60px;
    color: #999;
    padding-left: 10px;
  }
  .numbox {
    width: 120px;
    height: 30px;
    border: 1px solid #e4e4e4;
    display: flex;
    > a {
      width: 29px;
      line-height: 28px;
      text-align: center;
      background: #f8f8f8;
      font-size: 16px;
      color: #666;
      &.not {
        cursor: not-allowed;
      }
      &:first-of-type {
        border-right: 1px solid #e4e4e4;
      }
      &:last-of-type {
        border-left: 1px solid #e4e4e4;
      }
    }
    > input {
      width: 60px;
      padding: 0 5px;
      text-align: center;
      color: #666;
    }
  }
}
</style>
到此这篇关于Vue封装数字框组件实现流程详解的文章就介绍到这了,更多相关Vue封装数字框组件内容请搜索编程网以前的文章或继续浏览下面的相关文章希望大家以后多多支持编程网!
--结束END--
本文标题: Vue封装数字框组件实现流程详解
本文链接: https://www.lsjlt.com/news/210375.html(转载时请注明来源链接)
有问题或投稿请发送至: 邮箱/279061341@qq.com QQ/279061341
下载Word文档到电脑,方便收藏和打印~
2024-01-12
2023-05-20
2023-05-20
2023-05-20
2023-05-20
2023-05-20
2023-05-20
2023-05-20
2023-05-20
2023-05-20
回答
回答
回答
回答
回答
回答
回答
回答
回答
回答


官方手机版

微信公众号

商务合作


0