这篇文章主要讲解了“Docker容器如何编译LNMP”,文中的讲解内容简单清晰,易于学习与理解,下面请大家跟着小编的思路慢慢深入,一起来研究和学习“Docker容器如何编译LNMP”吧!一、 项目描述使用Docker容器基于Centos镜像
这篇文章主要讲解了“Docker容器如何编译LNMP”,文中的讲解内容简单清晰,易于学习与理解,下面请大家跟着小编的思路慢慢深入,一起来研究和学习“Docker容器如何编译LNMP”吧!
使用Docker容器基于Centos镜像分别制作Nginx镜像,mysql镜像和PHP镜像使用编译安装的方式,最后通过镜像启动成容器时使用container模式网络模式并访问到php测试页面
//拉取centos镜像[root@Docker ~]# docker pull centosUsing default tag: latestlatest: Pulling from library/centosa1d0c7532777: Pull complete Digest: sha256:a27fd8080b517143cbbbab9dfb7c8571c40d67d534bbdee55bd6c473f432b177Status: Downloaded newer image for centos:latestdocker.io/library/centos:latest[root@localhost ~]# docker imagesREPOSITORY TAG IMAGE ID CREATED SIZEcentos latest 5d0da3Dc9764 2 months aGo 231MB// 运行centos镜像[root@localhost ~]# docker run -it --name nginx 5d0da3dc9764 /bin/bash[root@03ca6bdc0374 /]# // 传nginx安装包到容器中[root@localhost ~]# docker cp /usr/src/nginx-1.20.1.tar.gz 03ca6bdc0374:/usr/src/// 创建nginx账户[root@03ca6bdc0374 /]# useradd -r -M -s /sbin/nologin nginx// 安装依赖包[root@03ca6bdc0374 /]# yum -y install pcre-devel openssl openssl-devel gd-devel GCc gcc-c++ make// 创建nginx日志存放目录[root@03ca6bdc0374 /]# mkdir -p /var/log/nginx[root@03ca6bdc0374 /]# chown -R nginx.nginx /var/log/nginx/// 解压nginx包进行编译安装[root@03ca6bdc0374 /]# cd /usr/src/[root@03ca6bdc0374 src]# lsdebug kernels nginx-1.20.1.tar.gz[root@03ca6bdc0374 src]# tar xf nginx-1.20.1.tar.gz [root@03ca6bdc0374 src]# cd nginx-1.20.1[root@03ca6bdc0374 nginx-1.20.1]# ./configure \--prefix=/usr/local/nginx \--user=nginx \--group=nginx \--with-debug \--with-Http_ssl_module \--with-http_realip_module \--with-http_image_filter_module \--with-http_gunzip_module \--with-http_gzip_static_module \--with-http_stub_status_module \--http-log-path=/var/log/nginx/access.log \--error-log-path=/var/log/nginx/error.log[root@03ca6bdc0374 nginx-1.20.1]# make && make install// 设置环境变量[root@03ca6bdc0374 nginx-1.20.1]# echo 'export PATH=/usr/local/nginx/sbin:$PATH' > /etc/profile.d/nginx.sh[root@03ca6bdc0374 nginx-1.20.1]# source /etc/profile.d/nginx.sh // 查看监听端口[root@03ca6bdc0374 nginx-1.20.1]# nginx[root@03ca6bdc0374 nginx-1.20.1]# ss -antlState Recv-Q Send-Q Local Address:Port Peer Address:Port Process LISTEN 0 128 0.0.0.0:80 0.0.0.0:* [root@localhost ~]# curl 172.17.0.2 <!DOCTYPE html><html><head><title>Welcome to nginx!</title><style> body { width: 35em; margin: 0 auto; font-family: Tahoma, Verdana, Arial, sans-serif; }</style></head><body><h2>Welcome to nginx!</h2><p>If you see this page, the nginx WEB server is successfully installed andworking. Further configuration is required.</p><p>For online documentation and support please refer to<a href="http://nginx.org/" rel="external nofollow" >nginx.org</a>.<br/>Commercial support is available at<a href="http://nginx.com/" rel="external nofollow" >nginx.com</a>.</p><p><em>Thank you for using nginx.</em></p></body></html>// 修改配置文件[root@03ca6bdc0374 nginx-1.20.1]# vim /usr/local/nginx/conf/nginx.conf......http { include mime.types; default_type application/octet-stream; #log_fORMat main '$remote_addr - $remote_user [$time_local] "$request" ' # '$status $body_bytes_sent "$http_referer" ' # '"$http_user_agent" "$http_x_forwarded_for"'; #access_log logs/access.log main; sendfile on; #tcp_nopush on; #keepalive_timeout 0; keepalive_timeout 65; #gzip on; server { listen 80; server_name localhost; #charset koi8-r; #access_log logs/host.access.log main; location / { root html; index index.php index.html index.htm;// 添加index.php } ...... location ~ \.php$ { root /var/www/html; // php测试页面目录 fastcgi_pass 127.0.0.1:9000; // 在工作中这里要改为php服务器的地址 fastcgi_index index.php; fastcgi_param SCRIPT_FILENAME $Document_Root$fastcgi_script_name; include fastcgi_params; }......daemon off;// 写最后面// 重新加载配置文件[root@03ca6bdc0374 nginx-1.20.1]# nginx -s reload[root@03ca6bdc0374 nginx-1.20.1]# ss -antlState Recv-Q Send-Q Local Address:Port Peer Address:Port Process LISTEN 0 128 0.0.0.0:80 0.0.0.0:* // 创建nginx镜像[root@localhost ~]# docker commit -a '1826597954@qq.com' -c 'CMD ["/usr/local/nginx/sbin/nginx"]' -p 03ca6bdc0374 gaofan1225/nginx:v0.1sha256:453bfb1a13ae0aeba38e2e26ebe03e09544aa2ea8b477e45e4fb8aa51fec3e92[root@localhost ~]# docker imagesREPOSITORY TAG IMAGE ID CREATED SIZEgaofan1225/nginx v0.1 453bfb1a13ae 16 seconds ago 575MBcentos latest 5d0da3dc9764 2 months ago 231MB// 运行centos镜像[root@localhost ~]# docker imagesREPOSITORY TAG IMAGE ID CREATED SIZEgaofan1225/nginx v0.1 453bfb1a13ae 16 seconds ago 575MBcentos latest 5d0da3dc9764 2 months ago 231MB[root@localhost ~]# docker run -it --name mysql 5d0da3dc9764 /bin/bash[root@3ea39d4dfa8f /]# // 传mysql安装包到容器[root@localhost ~]# docker cp /usr/src/mysql-5.7.34-linux-glibc2.12-x86_64.tar.gz 9b6741a9ef22:/usr/src/// 安装依赖包[root@9b6741a9ef22 /]# yum -y install ncurses-devel openssl-devel openssl cmake mariadb-devel ncurses-compat-libs[root@9b6741a9ef22 /]# yum -y install libaio*[root@9b6741a9ef22 /]# yum -y install nuMactl.x86_64// 创建mysql用户[root@9b6741a9ef22 /]# useradd -r -M -s /sbin/nologin mysql// 解压安装包[root@9b6741a9ef22 /]# cd /usr/src/[root@9b6741a9ef22 src]# lsdebug kernels mysql-5.7.34-linux-glibc2.12-x86_64.tar.gz[root@9b6741a9ef22 src]# tar xf mysql-5.7.34-linux-glibc2.12-x86_64.tar.gz -C /usr/local/// 制作软链接,设置全校性[root@9b6741a9ef22 src]# cd /usr/local/[root@9b6741a9ef22 local]# lsbin include libexec shareetc lib mysql-5.7.34-linux-glibc2.12-x86_64 srcgames lib64 sbin[root@9b6741a9ef22 local]# ln -sv mysql-5.7.34-linux-glibc2.12-x86_64/ mysql'mysql' -> 'mysql-5.7.34-linux-glibc2.12-x86_64/'[root@9b6741a9ef22 local]# chown -R mysql.mysql /usr/local/mysql*// 设置环境变量[root@9b6741a9ef22 local]# echo 'export PATH=/usr/local/mysql/bin:$PATH' > /etc/profile.d/mysql.sh[root@9b6741a9ef22 local]# source /etc/profile.d/mysql.sh[root@9b6741a9ef22 local]# echo $PATH/usr/local/mysql/bin:/usr/local/sbin:/usr/local/bin:/usr/sbin:/usr/bin:/sbin:/bin// 制作头文件软链接[root@9b6741a9ef22 local]# ln -s /usr/local/mysql/include /usr/include/mysql// 创建帮助文档[root@9b6741a9ef22 local]# cat /etc/man_db.conf MANDATORY_MANPATH /usr/local/mysql/man// 创建库文件[root@9b6741a9ef22 local]# cat /etc/ld.so.conf.d/mysql.conf/usr/local/mysql/lib[root@9b6741a9ef22 local]# ldconfig// 创建数据存放目录[root@9b6741a9ef22 local]# mkdir -p /opt/data[root@9b6741a9ef22 local]# chown -R mysql.mysql /opt/data[root@9b6741a9ef22 local]# ls -l /opt/total 0drwxr-xr-x. 2 mysql mysql 6 Dec 4 01:31 data// 初始化数据库[root@9b6741a9ef22 local]# /usr/local/mysql/bin/mysqld --initialize-insecure --user=mysql --datadir=/opt/data/// 生成配置文件[root@9b6741a9ef22 local]# cat > /etc/my.cnf <<EOF[mysqld]basedir = /usr/local/mysqldatadir = /opt/dataSocket = /tmp/mysql.sockport = 3306pid-file = /opt/data/mysql.piduser = mysqlskip-name-resolveEOF// 配置mysql启动服务[root@9b6741a9ef22 local]# sed -ri 's#^(basedir=).*#\1/usr/local/mysql#g' /usr/local/mysql/support-files/mysql.server[root@9b6741a9ef22 local]# sed -ri 's#^(datadir=).*#\1/opt/data#g' /usr/local/mysql/support-files/mysql.server// 启动mysql服务[root@9b6741a9ef22 local]# /usr/local/mysql/support-files/mysql.server startStarting MySQL.Logging to '/opt/data/9b6741a9ef22.err'. SUCCESS! [root@9b6741a9ef22 local]# ss -antlState Recv-Q Send-Q Local Address:Port Peer Address:Port Process LISTEN 0 80 *:3306 *:* // 编写mysql启动脚本[root@9b6741a9ef22 local]# cd /[root@9b6741a9ef22 /]# cat /start.sh #!/bin/sh/usr/local/mysql/support-files/mysql.server start/bin/bash[root@9b6741a9ef22 /]# chmod +x /start.sh // 创建mysql镜像[root@localhost ~]# docker commit -a '1826597954@qq.com' -c 'CMD ["/bin/bash","/start.sh"]' -p 9b6741a9ef22 gaofan1225/mysql:v0.1sha256:7abe6fc819127b8ef3d9ac0ea3d24aadda1b189d739e4b53416530fc79db795f[root@localhost ~]# docker imagesREPOSITORY TAG IMAGE ID CREATED SIZEgaofan1225/mysql v0.1 7abe6fc81912 10 seconds ago 3.81GBgaofan1225/nginx v0.1 453bfb1a13ae 17 minutes ago 575MBcentos latest 5d0da3dc9764 2 months ago 231MB// 运行centos镜像[root@localhost ~]# docker imagesREPOSITORY TAG IMAGE ID CREATED SIZEgaofan1225/mysql v0.1 7abe6fc81912 10 seconds ago 3.81GBgaofan1225/nginx v0.1 453bfb1a13ae 17 minutes ago 575MBcentos latest 5d0da3dc9764 2 months ago 231MB[root@localhost ~]# docker run -it --name php 5d0da3dc9764[root@c6882394804e /]# // 把php安装包和依赖包传到容器中[root@localhost ~]# docker cp /usr/src/php-8.0.12.tar.gz c6882394804e:/usr/src/[root@localhost ~]# docker cp /usr/src/oniguruma-devel-6.8.2-2.el8.x86_64.rpm c6882394804e:/usr/src/// 下载epel源和依赖包[root@c6882394804e /]# yum -y install epel-release[root@c6882394804e /]# yum -y install libxml2 libxml2-devel openssl openssl-devel bzip2 bzip2-devel libicu-devel libjpeg libjpeg-devel libpng libpng-devel openldap-devel pcre-devel freetype freetype-devel gmp gmp-devel libmcrypt libmcrypt-devel readline readline-devel libxslt libxslt-devel mhash mhash-devel php-mysqlnd libzip-devel libsqlite3x libsqlite3x-devel oniguruma libzip-devel gcc gcc-c++ make[root@c6882394804e /]# yum -y install libcurl-devel// 解压php安装包进行编译安装[root@c6882394804e /]# cd /usr/src/[root@c6882394804e src]# ls debug oniguruma-devel-6.8.2-2.el8.x86_64.rpmkernels php-8.0.12.tar.gz[root@c6882394804e src]# yum -y install oniguruma-devel-6.8.2-2.el8.x86_64.rpm [root@c6882394804e src]# tar xf php-8.0.12.tar.gz [root@c6882394804e src]# cd php-8.0.12[root@c6882394804e php-8.0.12]# ./configure --prefix=/usr/local/php8 \--with-config-file-path=/etc \--enable-fpm \--disable-debug \--disable-rpath \--enable-shared \--enable-soap \--with-openssl \--enable-bcmath \--with-iconv \--with-bz2 \--enable-calendar \--with-curl \--enable-exif \--enable-ftp \--enable-gd \--with-jpeg \--with-zlib-dir \--with-freetype \--with-gettext \--enable-mbstring \--enable-pdo \--with-mysqli=mysqlnd \--with-pdo-mysql=mysqlnd \--with-readline \--enable-shmop \--enable-simplexml \--enable-sockets \--with-zip \--enable-mysqlnd-compression-support \--with-pear \--enable-pcntl \--enable-posix[root@c6882394804e php-8.0.12]# make && make install// 设置环境变量[root@c6882394804e php-8.0.12]# echo 'export PATH=/usr/local/php8/bin:$PATH' > /etc/profile.d/php.sh[root@c6882394804e php-8.0.12]# source /etc/profile.d/php.sh// 配置php-fpm[root@c6882394804e php-8.0.12]# cp php.ini-production /etc/php.inicp: overwrite '/etc/php.ini'? y[root@c6882394804e php-8.0.12]# cp sapi/fpm/init.d.php-fpm /etc/init.d/php-fpm[root@c6882394804e php-8.0.12]# chmod +x /etc/rc.d/init.d/php-fpm[root@c6882394804e php-8.0.12]# cd /usr/local/php8/etc/[root@c6882394804e etc]# cp php-fpm.conf.default php-fpm.conf[root@c6882394804e etc]# cd php-fpm.d/[root@c6882394804e php-fpm.d]# cp www.conf.default www.conf// 查看监听端口[root@c6882394804e php-fpm.d]# /usr/local/php8/sbin/php-fpm [root@c6882394804e php-fpm.d]# ss -antlState Recv-Q Send-Q Local Address:Port Peer Address:Port Process LISTEN 0 128 127.0.0.1:9000 0.0.0.0:* // 编写启动脚本[root@c6882394804e php-fpm.d]# cd /[root@c6882394804e /]# cat /start.sh #!/bin/sh/usr/local/php8/sbin/php-fpm/bin/bash[root@c6882394804e /]# chmod +x /start.sh// 创建测试页面[root@c6882394804e /]# mkdir -p /var/www/html[root@c6882394804e /]# cd /var/www/html/[root@c6882394804e html]# vi index.php[root@c6882394804e html]# cat index.php <?php phpinfo();?>// 制作php镜像[root@localhost ~]# docker commit -a '1826597954@qq.com' -c 'CMD ["/bin/bash","/start.sh"]' -p c6882394804e gaofan1225/php:v0.1sha256:9bb6f6ec5b7cff9b3e92bc3b2f8eb2542c963643e74642be7eace465bc2225f9[root@localhost ~]# docker imagesREPOSITORY TAG IMAGE ID CREATED SIZEgaofan1225/php v0.1 9bb6f6ec5b7c 15 seconds ago 1.53GBgaofan1225/mysql v0.1 7abe6fc81912 2 hours ago 3.81GBgaofan1225/nginx v0.1 453bfb1a13ae 2 hours ago 575MBcentos latest 5d0da3dc9764 2 months ago 231MB使用container模式网络模式
[root@localhost ~]# docker ps -aCONTAINER ID IMAGE COMMAND CREATED STATUS PORTS NAMES// 启动nginx容器[root@localhost ~]# docker run -dit --name nginx -p 80:80 453bfb1a13aea8ff680fc2bb61118d10ab1926fffed9c4975f72834d1628bf0cfff851bd7935[root@localhost ~]# docker psCONTAINER ID IMAGE COMMAND CREATED STATUS PORTS NAMESa8ff680fc2bb 453bfb1a13ae "/usr/local/nginx/sb…" 16 seconds ago Up 14 seconds 0.0.0.0:80->80/tcp, :::80->80/tcp nginx[root@localhost ~]# docker exec -it a8ff680fc2bb /bin/bash[root@a8ff680fc2bb /]# ss -antlState Recv-Q Send-Q Local Address:Port Peer Address:Port Process LISTEN 0 128 0.0.0.0:80 0.0.0.0:* // 启动mysql容器[root@localhost ~]# docker run -dit --name mysql --network container:a8ff680fc2bb 7abe6fc81912e776f9e93c6ca0d8fba53957cfa9e85105913fcbe53a9400c2657127eb049c2d[root@localhost ~]# docker psCONTAINER ID IMAGE COMMAND CREATED STATUS PORTS NAMESe776f9e93c6c 7abe6fc81912 "/bin/bash /start.sh" 9 seconds ago Up 8 seconds mysqla8ff680fc2bb 453bfb1a13ae "/usr/local/nginx/sb…" 2 minutes ago Up 2 minutes 0.0.0.0:80->80/tcp, :::80->80/tcp nginx[root@localhost ~]# docker exec -it e776f9e93c6c /bin/bash[root@a8ff680fc2bb /]# ss -antlState Recv-Q Send-Q Local Address:Port Peer Address:Port Process LISTEN 0 128 0.0.0.0:80 0.0.0.0:* LISTEN 0 80 *:3306 *:* // 启动php容器[root@localhost ~]# docker run -dit --name php --network container:a8ff680fc2bb 9bb6f6ec5b7c e80155914f858910ffb678a7d294e68804f735bf9a52efd21a036f7abee23bbe[root@localhost ~]# docker psCONTAINER ID IMAGE COMMAND CREATED STATUS PORTS NAMESe80155914f85 9bb6f6ec5b7c "/bin/bash /start.sh" 4 seconds ago Up 3 seconds phpe776f9e93c6c 7abe6fc81912 "/bin/bash /start.sh" About a minute ago Up About a minute mysqla8ff680fc2bb 453bfb1a13ae "/usr/local/nginx/sb…" 4 minutes ago Up 4 minutes 0.0.0.0:80->80/tcp, :::80->80/tcp nginx[root@localhost ~]# docker exec -it e80155914f85 /bin/bash[root@a8ff680fc2bb /]# ss -antlState Recv-Q Send-Q Local Address:Port Peer Address:Port Process LISTEN 0 128 127.0.0.1:9000 0.0.0.0:* LISTEN 0 128 0.0.0.0:80 0.0.0.0:* LISTEN 0 80 *:3306 *:*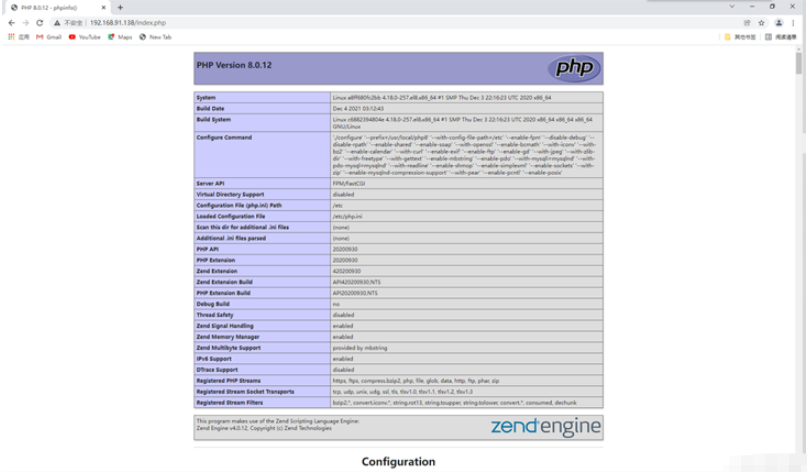
感谢各位的阅读,以上就是“Docker容器如何编译LNMP”的内容了,经过本文的学习后,相信大家对Docker容器如何编译LNMP这一问题有了更深刻的体会,具体使用情况还需要大家实践验证。这里是编程网,小编将为大家推送更多相关知识点的文章,欢迎关注!
--结束END--
本文标题: Docker容器如何编译LNMP
本文链接: https://www.lsjlt.com/news/301586.html(转载时请注明来源链接)
有问题或投稿请发送至: 邮箱/279061341@qq.com QQ/279061341
下载Word文档到电脑,方便收藏和打印~
2024-05-24
2024-05-24
2024-05-24
2024-05-24
2024-05-24
2024-05-24
2024-05-24
2024-05-24
2024-05-24
2024-05-24
回答
回答
回答
回答
回答
回答
回答
回答
回答
回答
一口价域名售卖能注册吗?域名是网站的标识,简短且易于记忆,为在线用户提供了访问我们网站的简单路径。一口价是在域名交易中一种常见的模式,而这种通常是针对已经被注册的域名转售给其他人的一种方式。
一口价域名买卖的过程通常包括以下几个步骤:
1.寻找:买家需要在域名售卖平台上找到心仪的一口价域名。平台通常会为每个可售的域名提供详细的描述,包括价格、年龄、流
443px" 443px) https://www.west.cn/docs/wp-content/uploads/2024/04/SEO图片294.jpg https://www.west.cn/docs/wp-content/uploads/2024/04/SEO图片294-768x413.jpg 域名售卖 域名一口价售卖 游戏音频 赋值/切片 框架优势 评估指南 项目规模

官方手机版

微信公众号

商务合作


0