这篇文章主要为大家展示了“SpringBoot+mybatis+Vue如何实现前后端分离项目”,内容简而易懂,条理清晰,希望能够帮助大家解决疑惑,下面让小编带领大家一起研究并学习一下“springBoot+mybatis+Vue如何实现前后
这篇文章主要为大家展示了“SpringBoot+mybatis+Vue如何实现前后端分离项目”,内容简而易懂,条理清晰,希望能够帮助大家解决疑惑,下面让小编带领大家一起研究并学习一下“springBoot+mybatis+Vue如何实现前后端分离项目”这篇文章吧。
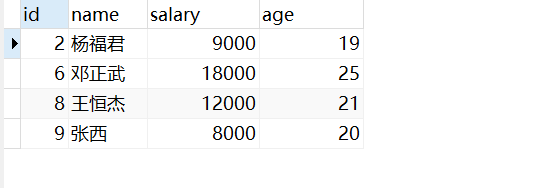
SET NAMES utf8mb4;SET FOREIGN_KEY_CHECKS = 0;-- ------------------------------ Table structure for t_emp-- ----------------------------DROP TABLE IF EXISTS `t_emp`;CREATE TABLE `t_emp` ( `id` int NOT NULL AUTO_INCREMENT, `name` varchar(20) CHARACTER SET utf8mb4 COLLATE utf8mb4_0900_ai_ci NOT NULL, `salary` double NOT NULL, `age` int NOT NULL, PRIMARY KEY (`id`) USING BTREE) ENGINE = InnoDB AUTO_INCREMENT = 8 CHARACTER SET = utf8mb4 COLLATE = utf8mb4_0900_ai_ci ROW_FORMAT = Dynamic;-- ------------------------------ Records of t_emp-- ----------------------------INSERT INTO `t_emp` VALUES (2, '杨福君', 9000, 19);INSERT INTO `t_emp` VALUES (6, '邓正武', 18000, 25);INSERT INTO `t_emp` VALUES (8, '王恒杰', 12000, 21);INSERT INTO `t_emp` VALUES (9, '张西', 8000, 20);SET FOREIGN_KEY_CHECKS = 1;<!--继承springboot的父项目 ,放在dependencies平级下--> <parent> <groupId>org.springframework.boot</groupId> <artifactId>spring-boot-starter-parent</artifactId> <version>2.2.5.RELEASE</version> </parent> <dependencies> <!--springboot依赖--> <dependency> <groupId>org.springframework.boot</groupId> <artifactId>spring-boot-starter</artifactId> </dependency> <dependency> <groupId>org.mybatis.spring.boot</groupId> <artifactId>mybatis-spring-boot-starter</artifactId> <version>2.1.2</version> </dependency> <!--引入springboot的WEB支持--> <dependency> <groupId>org.springframework.boot</groupId> <artifactId>spring-boot-starter-web</artifactId> </dependency> <!--Mysql--> <dependency> <groupId>mysql</groupId> <artifactId>mysql-connector-java</artifactId> <version>8.0.16</version> </dependency> <!--数据源连接池--> <dependency> <groupId>com.alibaba</groupId> <artifactId>druid</artifactId> <version>1.1.12</version> </dependency> <!--引入springboot的test支持--> <dependency> <groupId>org.springframework.boot</groupId> <artifactId>spring-boot-starter-test</artifactId> </dependency> </dependencies></project>server: port: 8080 servlet: context-path: /emsspring: datasource: type: com.alibaba.druid.pool.DruidDataSource #数据源类型 driver-class-name: com.mysql.cj.jdbc.Driver #加载驱动 url: jdbc:mysql://localhost:3306/ems?useSSL=false&serverTimezone=UTC username: root passWord: rootmybatis: mapper-locations: classpath:com/tjcu/mapper@Controller@CrossOrigin@ResponseBodypublic class EmpController { @Autowired private EmpService empService; @RequestMapping("/emp/queryall") public List<Emp> queryall(){ List<Emp> emps = empService.showEmp(); return emps; } @RequestMapping("/emp/delete") public void delete(Integer id){ empService.deleteById(id); } @RequestMapping("/emp/add") public void add(@RequestBody Emp emp){ if(emp.getId()!=0){ empService.updateEmp(emp); }else { emp.setId(null); empService.insertEmp(emp); } } @RequestMapping("/emp/queryOne") public Emp query(Integer id){ Emp emp = empService.selectEmpById(id); return emp; }}<mapper namespace="com.tjcu.dao.EmpDao"> <insert id="insertEmp"> insert into t_emp values (#{id}, #{name}, #{salary}, #{age}) </insert> <select id="showEmp" resultType="emp"> select * from t_emp </select> <update id="updateEmp"> update t_emp <set> <if test="name!=null"> name=#{name}, </if> <if test="salary!=null"> salary=#{salary}, </if> <if test="age!=null"> age=#{age} </if> </set> where id=#{id} </update> <delete id="deleteById"> delete from t_emp where id=#{id} </delete> <select id="selectEmpById" resultType="emp"> select * from t_emp where id=#{id} </select></mapper>gitee开源:https://gitee.com/wanghengjie563135/springboot_mybatis_vue.git

以上是“SpringBoot+mybatis+Vue如何实现前后端分离项目”这篇文章的所有内容,感谢各位的阅读!相信大家都有了一定的了解,希望分享的内容对大家有所帮助,如果还想学习更多知识,欢迎关注编程网精选频道!
--结束END--
本文标题: SpringBoot+mybatis+Vue如何实现前后端分离项目
本文链接: https://www.lsjlt.com/news/302380.html(转载时请注明来源链接)
有问题或投稿请发送至: 邮箱/279061341@qq.com QQ/279061341
下载Word文档到电脑,方便收藏和打印~
2024-05-15
2024-05-15
2024-05-15
2024-05-15
2024-05-15
2024-05-15
2024-05-15
2024-05-15
2024-05-15
2024-05-15
回答
回答
回答
回答
回答
回答
回答
回答
回答
回答


官方手机版

微信公众号

商务合作


0