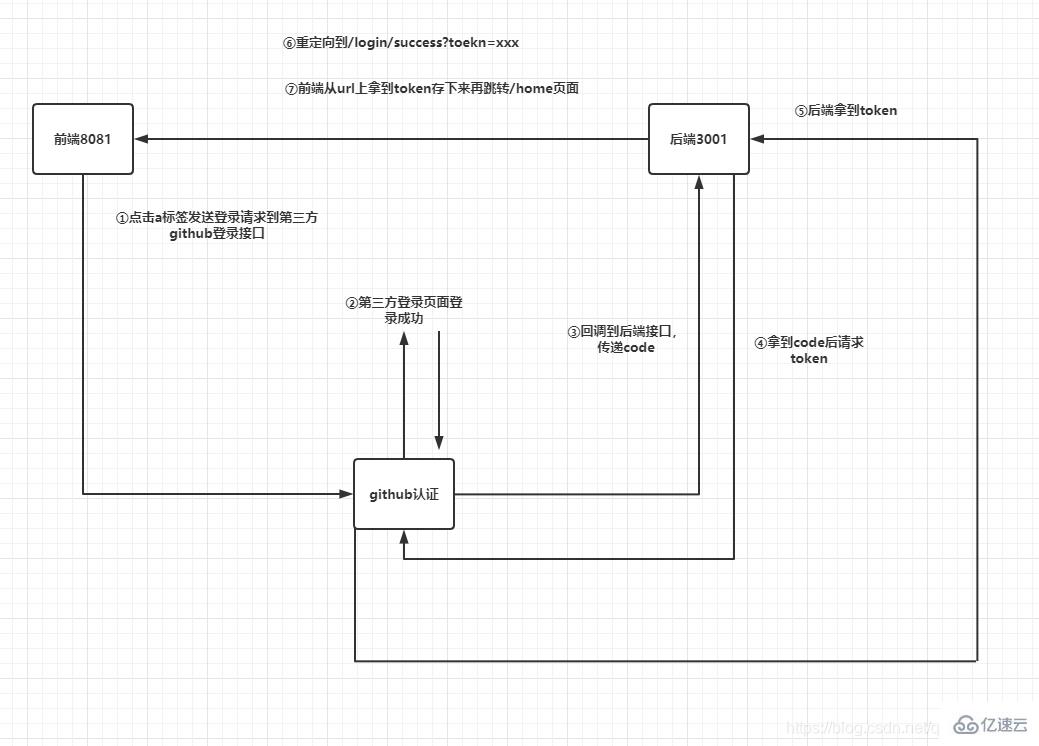
这篇文章主要介绍了node如何实现GitHub第三方登录的相关知识,内容详细易懂,操作简单快捷,具有一定借鉴价值,相信大家阅读完这篇node如何实现github第三方登录文章都会有所收获,下面我们一起来看看吧。一、详细流程二、具体流程1.注
这篇文章主要介绍了node如何实现GitHub第三方登录的相关知识,内容详细易懂,操作简单快捷,具有一定借鉴价值,相信大家阅读完这篇node如何实现github第三方登录文章都会有所收获,下面我们一起来看看吧。
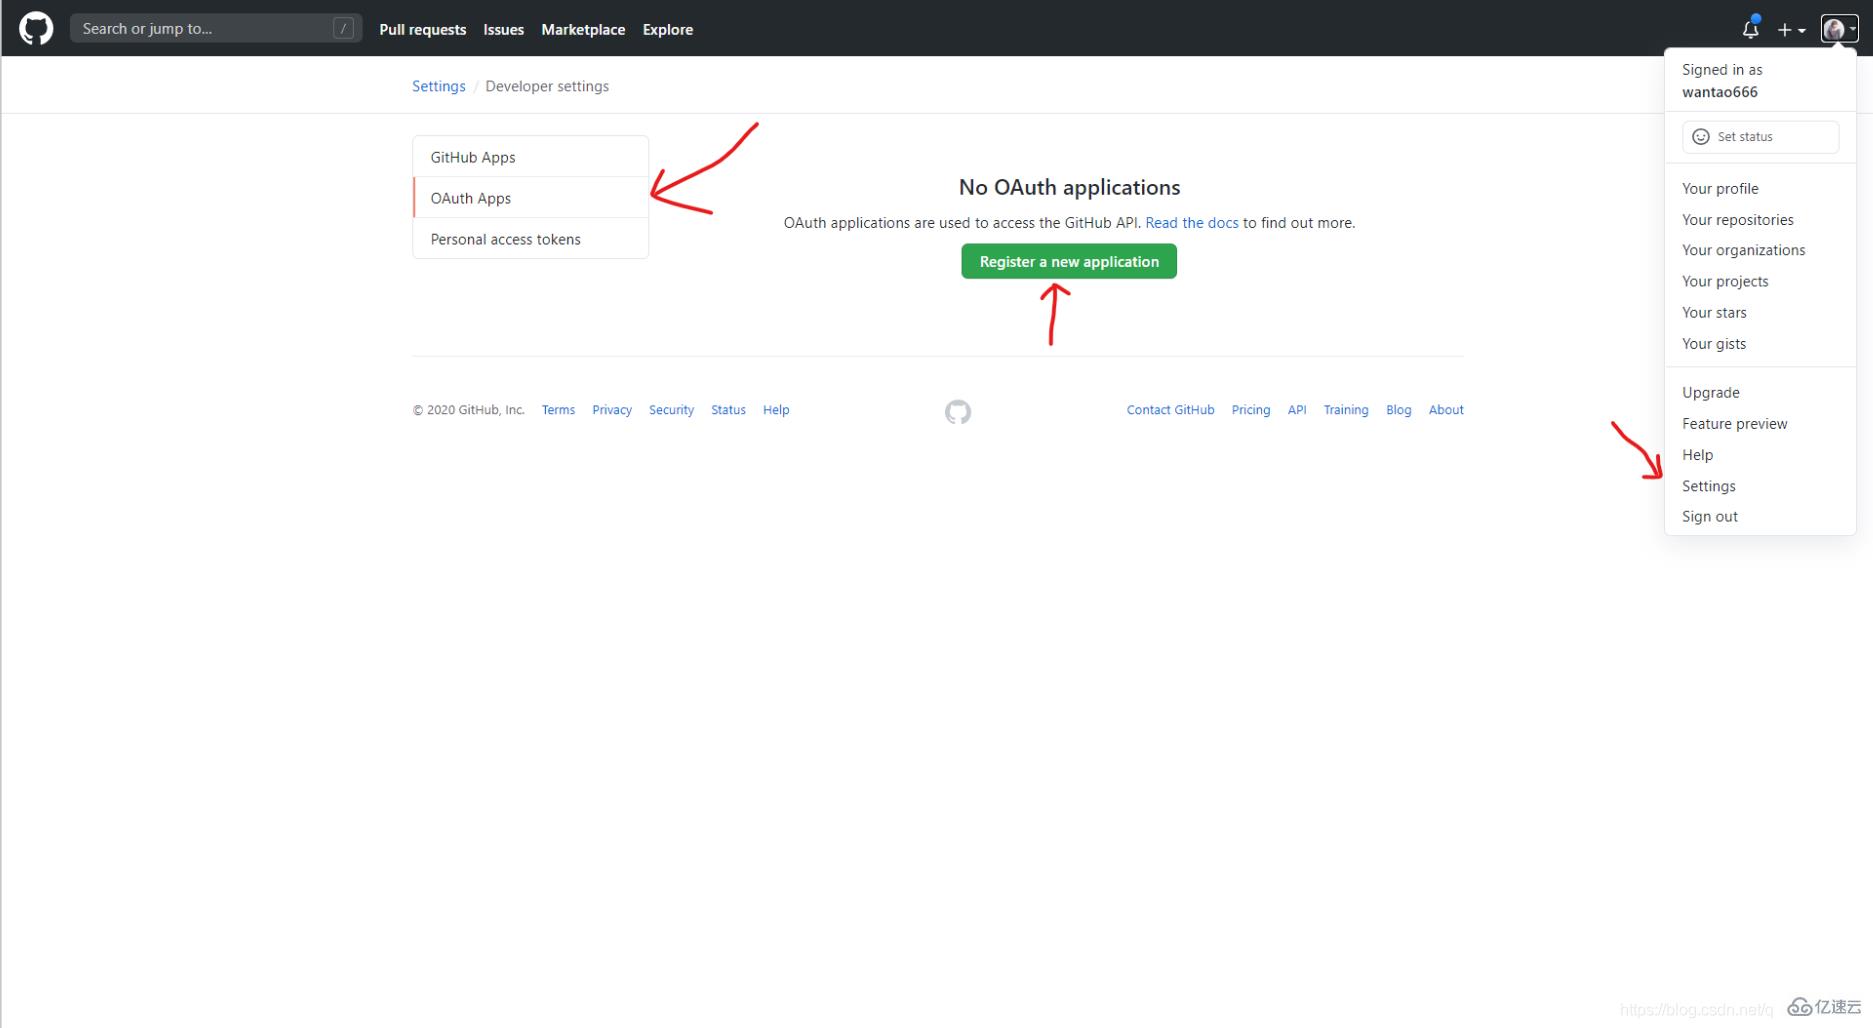
①登录github,Settings=>Developer settings=>OAuth Apps=>Register a new application

②填写应用信息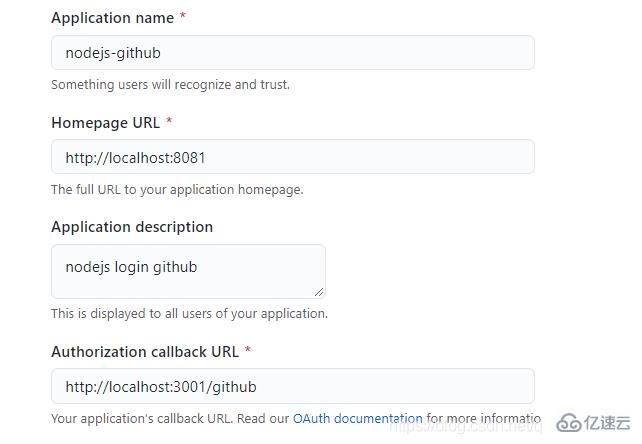
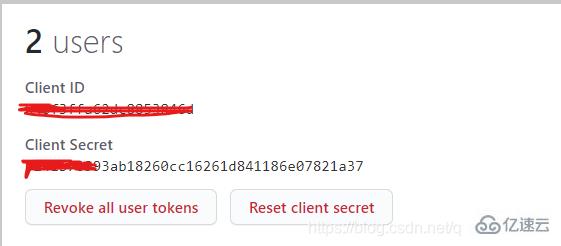
③注册完成,得到Client ID和Client Secret
<a href="https://github.com/login/oauth/authorize?client_id={你自己的cilent_id}&redirect_uri=Http://localhost:3001/github" class="iconfont ali-icon-github"></a>
router.get('/github',controller.auth.githubLogin)const axiOS = require('axios')const querystring = require('querystring')const config = { client_id: "你自己的client_id", client_secret: "你自己的client_secret"}class AuthController { async githubLogin(ctx) { const code = ctx.request.query.code const params = { client_id: config.client_id, client_secret: config.client_secret, code: code } let res = await axios.post('https://github.com/login/oauth/access_token', params) console.log(res) const token = querystring.parse(res.data).access_token ctx.cookies.set('token', token, { maxAge: ctx.config.Jwt.expire * 1000, }); res = { ...ctx.errCode.SUCCESS, data: { token } }; ctx.redirect('http://172.25.78.33:8081/login/success?token='+token) }}module.exports = exports = new AuthController();
临时页面会跳转的很快,基本上看不到。
<template> <h2>登录成功跳转首页</h2></template><script>import {setLoginedUser} from "@/http/axios";export default { mounted() { setLoginedUser("github", this.$route.query.token); this.$message({ message: "登录成功", type: "success", }); this.$router.push("/home"); },};</script><style></style>
关于“node如何实现github第三方登录”这篇文章的内容就介绍到这里,感谢各位的阅读!相信大家对“node如何实现github第三方登录”知识都有一定的了解,大家如果还想学习更多知识,欢迎关注编程网精选频道。
--结束END--
本文标题: node如何实现github第三方登录
本文链接: https://www.lsjlt.com/news/344689.html(转载时请注明来源链接)
有问题或投稿请发送至: 邮箱/279061341@qq.com QQ/279061341
下载Word文档到电脑,方便收藏和打印~
2024-05-13
2024-05-13
2024-05-13
2024-05-13
2024-05-13
2024-05-13
2024-05-13
2024-05-13
2024-05-13
2024-05-13
回答
回答
回答
回答
回答
回答
回答
回答
回答
回答


官方手机版

微信公众号

商务合作


0