为了支持长远的云原生发展,RocketMQ引入了一个全新的模块:Proxy,官方对RocketMQ客户端提供了独立的开源项目:https://GitHub.com/apache/rocketmq-cl
为了支持长远的云原生发展,RocketMQ引入了一个全新的模块:Proxy,官方对RocketMQ客户端提供了独立的开源项目:https://GitHub.com/apache/rocketmq-clients,如果要使用这个新的客户端,必须要使用Proxy作为endpoint。
Proxy有两种搭建方式:
本地模式更适合非正式的场景,如调试、开发,线上环境还是推荐集群模式,本文基于集群模式进行部署验证。
启动proxy使用mqproxy命令:
[root@XXGL-T-TjsYZ-Redis-01 bin]# ./mqproxy -helpusage: mqproxy [-bc ] [-h] [-n ] [-pc ] [-pm ] -bc,--brokerConfigPath Broker config file path for local mode -h,--help Print help -n,--namesrvAddr Name server address list, eg: '192.168.0.1:9876;192.168.0.2:9876' -pc,--proxyConfigPath Proxy config file path -pm,--proxyMode Proxy run in local or cluster mode[root@XXGL-T-TJSYZ-REDIS-01 bin]# 需要编辑的文件有:
{ "rocketMQClusterName": "littleCat", "remotingListenPort":28080, "grpcServerPort":28081}完整参数见源码:org.apache.rocketmq.proxy.config.ProxyConfig
启动脚本:
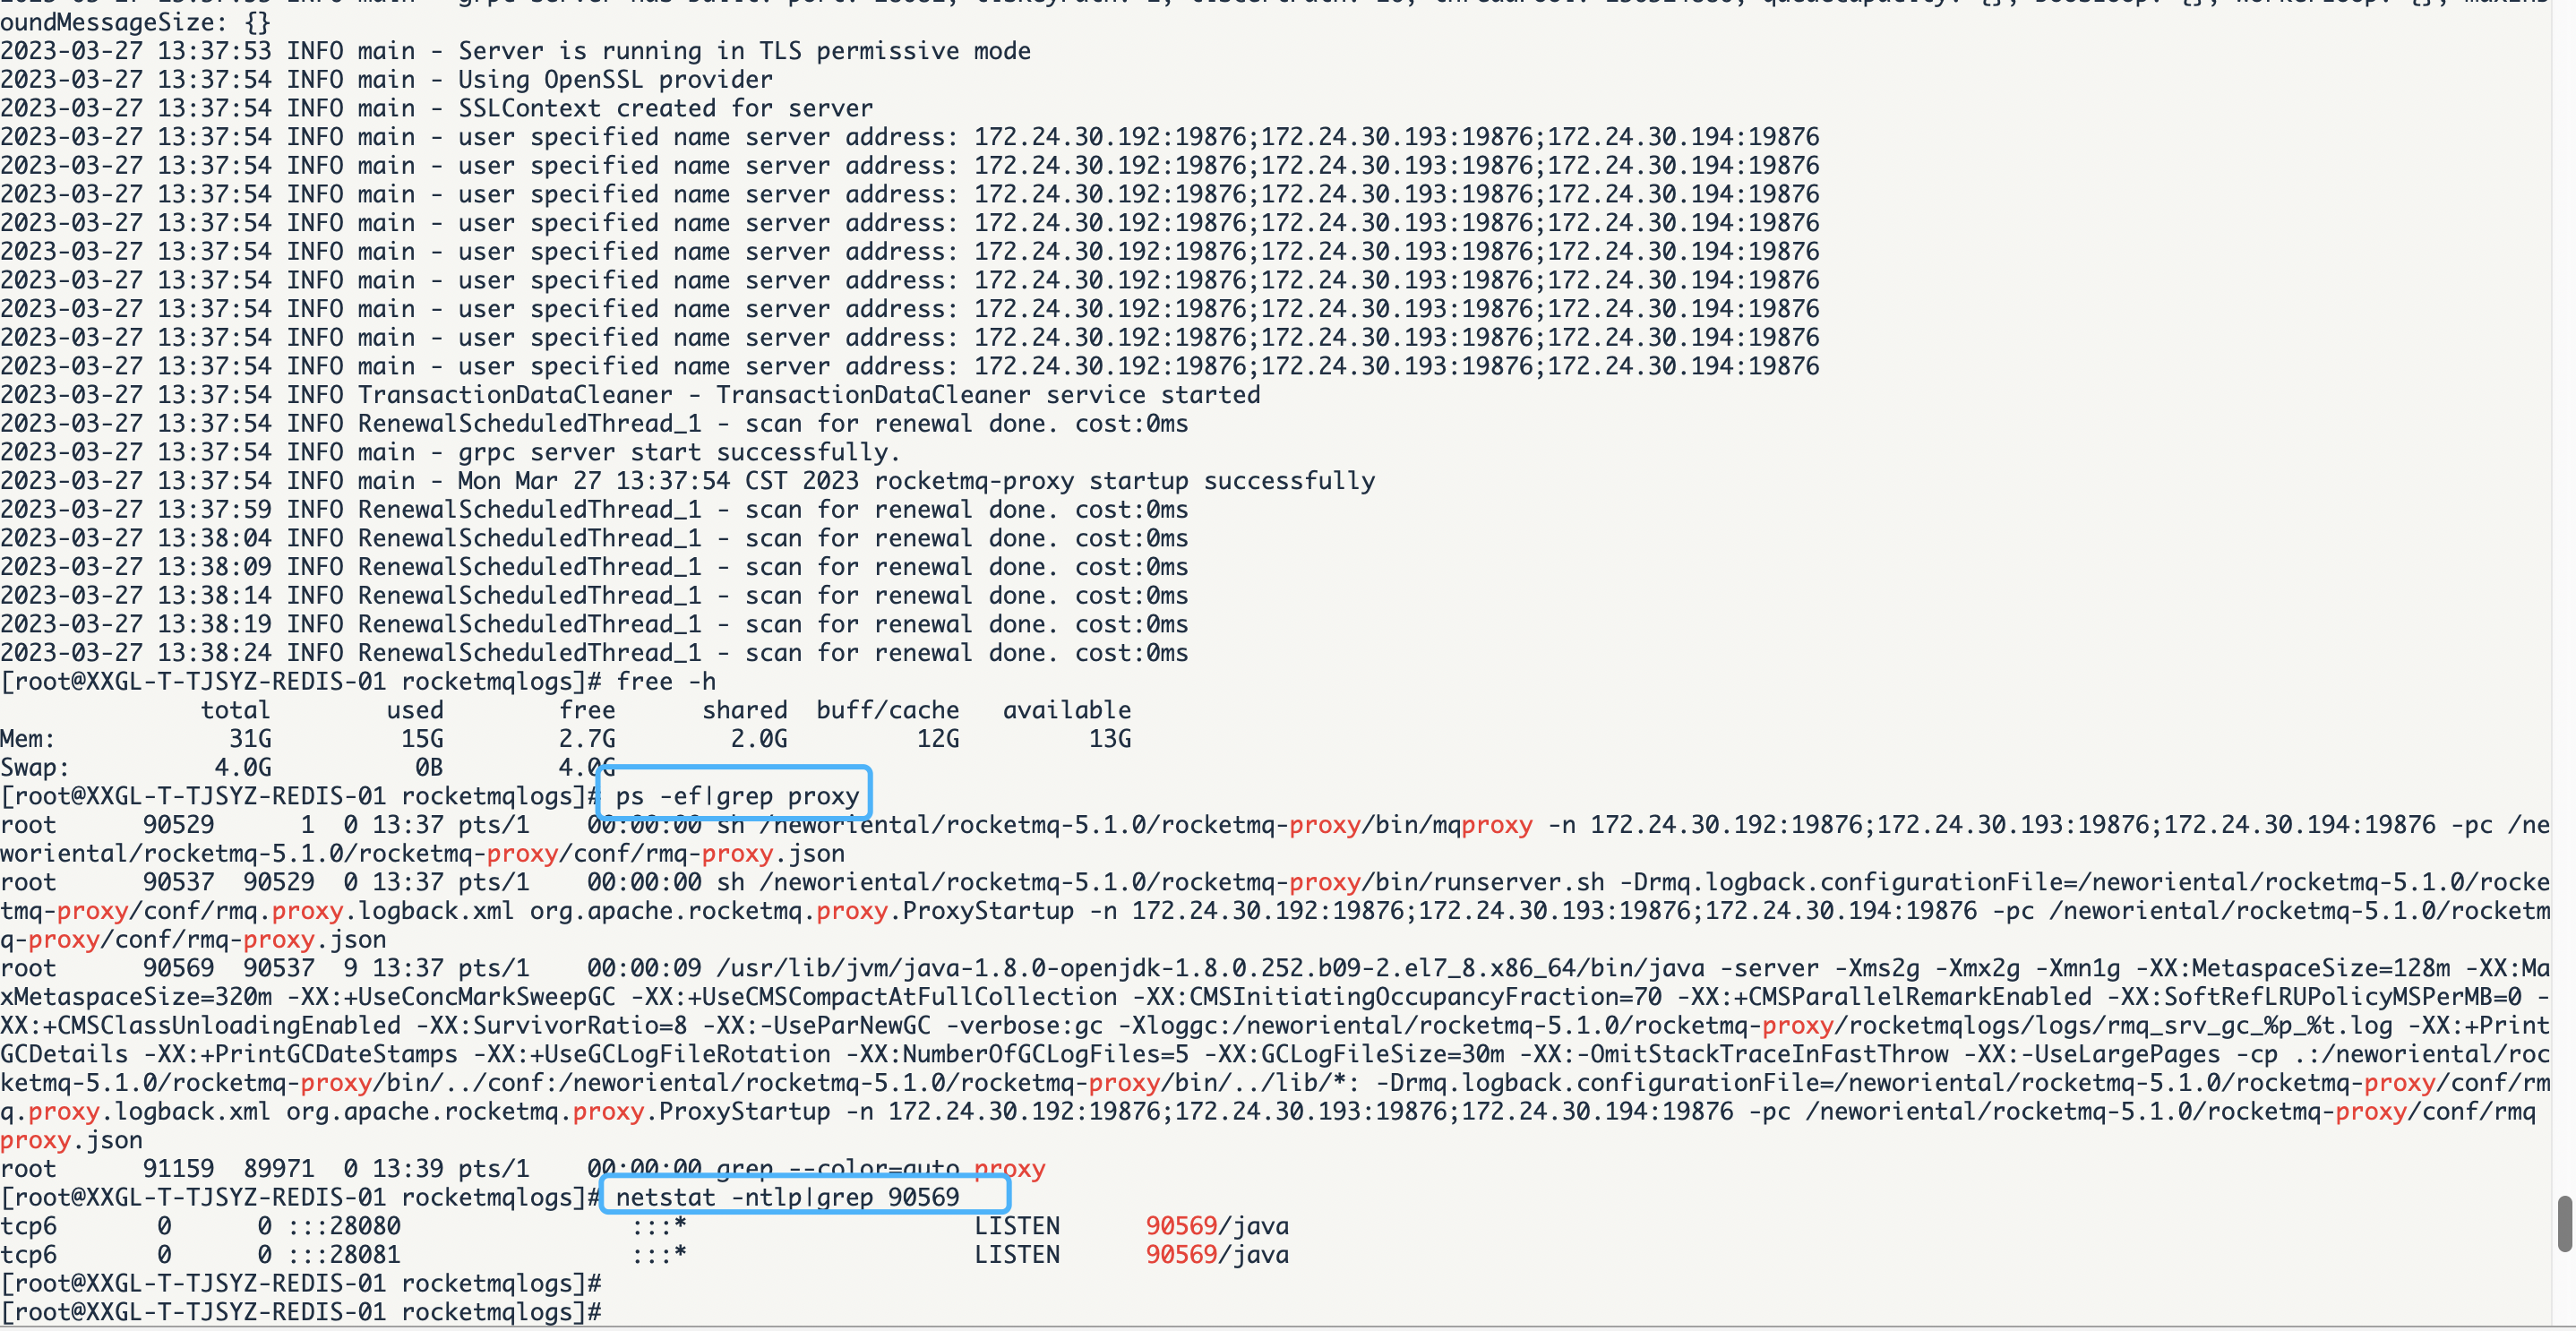
#!/bin/bash. /etc/profilenohup sh /neworiental/rocketmq-5.1.0/rocketmq-proxy/bin/mqproxy -n '172.24.30.192:19876;172.24.30.193:19876;172.24.30.194:19876' -pc /neworiental/rocketmq-5.1.0/rocketmq-proxy/conf/rmq-proxy.json >/dev/null 2>&1 &echo "deploying rocketmq-proxy..."停止脚本:
#!/bin/bash. /etc/profilePID=`ps -ef | grep '/neworiental/rocketmq-5.1.0/rocketmq-proxy' | grep -v grep | awk '{print $2}'`if [[ "" != "$PID" ]]; then echo "killing rocketmq-proxy : $PID" kill $PIDfi启动成功
客户端测试:
pom依赖:
<dependency> <groupId>org.apache.rocketmqgroupId> <artifactId>rocketmq-client-javaartifactId> <version>5.0.4version> dependency>生产者:
package cn.xdf.xadd.rmq.test.newclient;import org.apache.rocketmq.client.apis.ClientConfiguration;import org.apache.rocketmq.client.apis.ClientException;import org.apache.rocketmq.client.apis.ClientServiceProvider;import org.apache.rocketmq.client.apis.message.Message;import org.apache.rocketmq.client.apis.producer.Producer;import org.apache.rocketmq.client.apis.producer.SendReceipt;import java.io.IOException;import java.NIO.charset.StandardCharsets;public class ProducerNORMalMessageExample { public static void main(String[] args) throws ClientException, IOException { final ClientServiceProvider provider = ClientServiceProvider.loadService(); String endpoints = "172.24.30.192:28080"; ClientConfiguration clientConfiguration = ClientConfiguration.newBuilder() .setEndpoints(endpoints) .build(); String topic = "zhurunhua-test"; // In most case, you don't need to create too many producers, singleton pattern is recommended. final Producer producer = provider.newProducerBuilder() .setClientConfiguration(clientConfiguration) // Set the topic name(s), which is optional but recommended. It makes producer could prefetch the topic // route before message publishing. .setTopics(topic) // May throw {@link ClientException} if the producer is not initialized. .build(); // Define your message body. byte[] body = "This is a normal message for Apache RocketMQ".getBytes(StandardCharsets.UTF_8); String tag = "new-client-test"; final Message message = provider.newMessageBuilder() // Set topic for the current message. .setTopic(topic) // Message secondary classifier of message besides topic. .setTag(tag) // Key(s) of the message, another way to mark message besides message id. .seTKEys("test") .setBody(body) .build(); try { final SendReceipt sendReceipt = producer.send(message); System.out.println("Send message successfully, messageId=" + sendReceipt.getMessageId()); } catch (Throwable t) { System.err.println(t); } // Close the producer when you don't need it anymore. producer.close(); }}
消费者:
package cn.xdf.xadd.rmq.test.newclient;import org.apache.rocketmq.client.apis.ClientConfiguration;import org.apache.rocketmq.client.apis.ClientException;import org.apache.rocketmq.client.apis.ClientServiceProvider;import org.apache.rocketmq.client.apis.consumer.ConsumeResult;import org.apache.rocketmq.client.apis.consumer.FilterExpression;import org.apache.rocketmq.client.apis.consumer.FilterExpressionType;import org.apache.rocketmq.client.apis.consumer.PushConsumer;import org.slf4j.Logger;import org.slf4j.LoggerFactory;import java.io.IOException;import java.util.Collections;public class PushConsumerExample { private static final Logger log = LoggerFactory.getLogger(PushConsumerExample.class); public static void main(String[] args) throws ClientException, IOException, InterruptedException { final ClientServiceProvider provider = ClientServiceProvider.loadService(); String endpoints = "172.24.30.192:28080"; ClientConfiguration clientConfiguration = ClientConfiguration.newBuilder() .setEndpoints(endpoints) .build(); String tag = "new-client-test"; FilterExpression filterExpression = new FilterExpression(tag, FilterExpressionType.TAG); String consumerGroup = "new-client-test-group"; String topic = "zhurunhua-test"; PushConsumer pushConsumer = provider.newPushConsumerBuilder() .setClientConfiguration(clientConfiguration) // Set the consumer group name. .setConsumerGroup(consumerGroup) // Set the subscription for the consumer. .setSubscriptionExpressions(Collections.singletonMap(topic, filterExpression)) .setMessageListener(messageView -> { // Handle the received message and return consume result. log.info("Consume message={}", messageView); return ConsumeResult.SUCCESS; }) .build(); // Block the main thread, no need for production environment. Thread.sleep(Long.MAX_VALUE); // Close the push consumer when you don't need it anymore. pushConsumer.close(); }}
以上,搭建成功,消息生产消费成功~
遇到的问题:

找到rmq.proxy,logback.xml,批量修改对应的路径:

将${brokerLogDir}批量替换成自定义的路径即可。
dashboard目前还不能采集到客户端的信息:

来源地址:https://blog.csdn.net/sinat_14840559/article/details/129818187
--结束END--
本文标题: 【RocketMQ】RocketMQ 5.1.0版本Proxy集群模式部署实践
本文链接: https://www.lsjlt.com/news/400683.html(转载时请注明来源链接)
有问题或投稿请发送至: 邮箱/279061341@qq.com QQ/279061341
下载Word文档到电脑,方便收藏和打印~
2024-04-03
2024-04-03
2024-04-01
2024-01-21
2024-01-21
2024-01-21
2024-01-21
2023-12-23
回答
回答
回答
回答
回答
回答
回答
回答
回答
回答


官方手机版

微信公众号

商务合作


0