我在 《Android 动态分区详解(二) 核心模块和相关工具介绍》 介绍过 lpmake 工具,这款工具用于将多个分区镜像打包生成一个 Android 专用的动态分区镜像,一般称为 super.im
我在 《Android 动态分区详解(二) 核心模块和相关工具介绍》 介绍过 lpmake 工具,这款工具用于将多个分区镜像打包生成一个 Android 专用的动态分区镜像,一般称为 super.img。Android 编译时,系统会自动调用 lpmake 并传入相关参数来生成 super.img,不需要我们手动操作。但难免还是有朋友想深入研究下 super.img,希望自己手动生成 super.img。所以这里专门开一篇详解介绍下 lpmake 工具。
本文基于 android-13.0.0_r41 编译生成的 lpmake 介绍该工具的使用,但也适用于 Android 10(Q) 开始的其它 Android 版本。
《Android OTA 相关工具》系列,目前已有文章列表:
本文为洛奇看世界(guyongqiangx)原创,转载请注明出处。
文章链接:https://blog.csdn.net/guyongqiangx/article/details/132581720
lpmake 工具从 Android Q 版代码开始引入,源码位于 system/extras/partition_tools 目录下,默认编译 Android 后输出到 out/host/linux-x86/bin/lpmake ,第一次编译以后,通过 source 和 lunch 操作设置 Android 编译环境后就可以引用。
例如:
$ source build/envsetup.sh $ lunch aosp_panther-userdebug$ which lpmake/local/public/users/rocky/android-13.0.0_r41/out/host/linux-x86/bin/lpmake$ lpmake -hlpmake: option requires an argument -- 'h'Must specify --device OR --device-size.当然,也可以将 out/host/linux-x86/bin 添加到当前目录下使用:
$ echo $PATH/home/rocky/bin:/usr/local/sbin:/usr/local/bin:/usr/sbin:/usr/bin:/sbin:/bin$ export PATH=${PWD}/out/host/linux-x86/bin:$PATH$ echo $PATH/public/rocky/android-13.0.0_r41/out/host/linux-x86/bin:/home/rocky/bin:/usr/local/sbin:/usr/local/bin:/usr/sbin:/usr/bin:/sbin:/bin$ which lpmake/public/rocky/android-13.0.0_r41/out/host/linux-x86/bin/lpmake$ lpmake -hlpmake: option requires an argument -- 'h'Must specify --device OR --device-size.两种方式都差不多,不过个人推荐前者。
关于一个工具,最好的文档就是自己的帮助手册,我这里顺手将 lpmake 的 help 命令输出贴在这里。
android-13.0.0_r41$ lpmake helplpmake - command-line tool for creating Android Logical Partition images.Usage: lpmake [options]Required options: -d,--device-size=[SIZE|auto] Size of the block device for logical partitions. Can be set to auto to automatically calculate the minimum size, the sum of partition sizes plus metadata-size times the number of partitions. -m,--metadata-size=SIZE Maximum size to reserve for partition metadata. -s,--metadata-slots=COUNT Number of slots to store metadata copies. -p,--partition=DATA Add a partition given the data, see below. -o,--output=FILE Output file.Optional: -b,--block-size=SIZE Physical block size, defaults to 4096. -a,--alignment=N Optimal partition alignment in bytes. -O,--alignment-offset=N Alignment offset in bytes to device parent. -S,--sparse Output a sparse image for fastboot. -i,--image=PARTITION=FILE If building a sparse image for fastboot, include the given file (or sparse file) as initial data for the named partition. -g,--group=GROUP:SIZE Define a named partition group with the given maximum size. -D,--device=DATA Add a block device that the super partition spans over. If specified, then -d/--device-size and alignments must not be specified. The fORMat for DATA is listed below. -n,--super-name=NAME Specify the name of the block device that will house the super partition. -x,--auto-slot-suffixing Mark the block device and partition names needing slot suffixes before being used. -F,--force-full-image Force a full image to be written even if no partition images were specified. Normally, this would produce a minimal super_empty.img which cannot be flashed; force-full-image will produce a flashable image. --virtual-ab Add the VIRTUAL_AB_DEVICE flag to the metadata header. Note that the resulting super.img will require a liblp capable of parsing a v1.2 header.Partition data format: <name>:<attributes>:<size>[:group] Attrs must be 'none' or 'readonly'.Device data format: <partition_name>:<size>[:<alignment>:<alignment_offset>] The partition name is the basename of the /dev/block/by-name/ path of the block device. The size is the device size in bytes. The alignment and alignment offset parameters are the same as -a/--alignment and -O/--alignment-offset.虽然上面的 help 信息包含了所有的选项说明,但我相信读到这里的小伙伴只有少部分真正去阅读了工具选项和说明。主要有几点:
但我还是十分建议你花 5 分钟去仔细阅读一下工具所有选项以及相应的说明,主要理由有以下几点:
说到底,自带的帮助文档是第一手的资料,阅读第一手的资料,有助于你提高自己的学习能力。
除了帮助文档,看看 Android 里具体如何使用 lpmake 工具,对学习理解也有很大帮助。实在理解不了帮助文档,那照着别人的用法依葫芦画瓢总比较容易一点。
这里说说 Android 编译中对 lpmake 的调用。
Android 编译时,build_super_image.py 脚本会准备命令并调用 lpmake 生成 super.img,直接在 Android 编译的 log 中搜索 lpmake 就可以看到详细的命令。
这里以 Android 13 中编译参考设备 panther 为例,看看 build_super_image.py 是如何调用 lpmake 的:
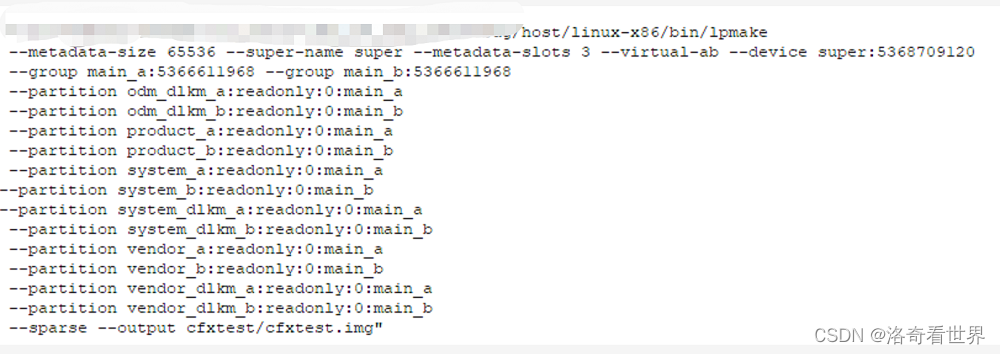
$ source build/envsetup.sh $ lunch aosp_panther-userdebug$ make dist -j80 2>&1 | tee make-dist.log$ grep -ni lpmake make-dist.log56:2023-08-30 02:26:10 - common.py - INFO : Running: "/public/rocky/android-13.0.0_r41/out/host/linux-x86/bin/lpmake --metadata-size 65536 --super-name super --metadata-slots 3 --virtual-ab --device super:8531214336 --group Google_dynamic_partitions_a:8527020032 --group google_dynamic_partitions_b:8527020032 --partition system_a:readonly:886816768:google_dynamic_partitions_a --image system_a=out/target/product/panther/obj/PACKAGING/target_files_intermediates/aosp_panther-target_files-eng.rocky/IMAGES/system.img --partition system_b:readonly:27312128:google_dynamic_partitions_b --image system_b=out/target/product/panther/obj/PACKAGING/target_files_intermediates/aosp_panther-target_files-eng.rocky/IMAGES/system_other.img --partition system_dlkm_a:readonly:348160:google_dynamic_partitions_a --image system_dlkm_a=out/target/product/panther/obj/PACKAGING/target_files_intermediates/aosp_panther-target_files-eng.rocky/IMAGES/system_dlkm.img --partition system_dlkm_b:readonly:0:google_dynamic_partitions_b --partition system_ext_a:readonly:301395968:google_dynamic_partitions_a --image system_ext_a=out/target/product/panther/obj/PACKAGING/target_files_intermediates/aosp_panther-target_files-eng.rocky/IMAGES/system_ext.img --partition system_ext_b:readonly:0:google_dynamic_partitions_b --partition product_a:readonly:368046080:google_dynamic_partitions_a --image product_a=out/target/product/panther/obj/PACKAGING/target_files_intermediates/aosp_panther-target_files-eng.rocky/IMAGES/product.img --partition product_b:readonly:0:google_dynamic_partitions_b --partition vendor_a:readonly:621752320:google_dynamic_partitions_a --image vendor_a=out/target/product/panther/obj/PACKAGING/target_files_intermediates/aosp_panther-target_files-eng.rocky/IMAGES/vendor.img --partition vendor_b:readonly:0:google_dynamic_partitions_b --partition vendor_dlkm_a:readonly:43040768:google_dynamic_partitions_a --image vendor_dlkm_a=out/target/product/panther/obj/PACKAGING/target_files_intermediates/aosp_panther-target_files-eng.rocky/IMAGES/vendor_dlkm.img --partition vendor_dlkm_b:readonly:0:google_dynamic_partitions_b --sparse --output out/target/product/panther/obj/PACKAGING/super.img_intermediates/super.img"这里因为分区很多,所以 lpmake 的命令参数非常长,手动对这个 lpmake 命令整理一下会清楚很多:
/public/rocky/android-13.0.0_r41/out/host/linux-x86/bin/lpmake \--metadata-size 65536 \--super-name super \--metadata-slots 3 \--virtual-ab \--device super:8531214336 \--group google_dynamic_partitions_a:8527020032 \--group google_dynamic_partitions_b:8527020032 \--partition system_a:readonly:886816768:google_dynamic_partitions_a \--image system_a=out/target/product/panther/system.img \--partition system_b:readonly:27312128:google_dynamic_partitions_b \--image system_b=out/target/product/panther/system_other.img \--partition system_dlkm_a:readonly:348160:google_dynamic_partitions_a \--image system_dlkm_a=out/target/product/panther/system_dlkm.img \--partition system_dlkm_b:readonly:0:google_dynamic_partitions_b \--partition system_ext_a:readonly:301395968:google_dynamic_partitions_a \--image system_ext_a=out/target/product/panther/system_ext.img \--partition system_ext_b:readonly:0:google_dynamic_partitions_b \--partition product_a:readonly:368046080:google_dynamic_partitions_a \--image product_a=out/target/product/panther/product.img \--partition product_b:readonly:0:google_dynamic_partitions_b \--partition vendor_a:readonly:621752320:google_dynamic_partitions_a \--image vendor_a=out/target/product/panther/vendor.img \--partition vendor_b:readonly:0:google_dynamic_partitions_b \--partition vendor_dlkm_a:readonly:43040768:google_dynamic_partitions_a \--image vendor_dlkm_a=out/target/product/panther/vendor_dlkm.img \--partition vendor_dlkm_b:readonly:0:google_dynamic_partitions_b \--sparse \--output out/target/product/panther/super.img这里我把
--image的路径进行了简化,将类似下面这样的完整路径:
out/target/product/panther/obj/PACKAGING/target_files_intermediates/aosp_panther-target_files-eng.rocky/IMAGES/system.img使用另外一个比较简短的路径替代:
out/target/product/panther/system.img
上面这个 lpmake 命令的参数重点:
--metadata-size 65536
指定单个 metadata 数据的大小,通常为 64K,即 65536。
--super-name super
指定了 super 设备的设备名称。
--metadata-slots 3
每一个 metadata 的 slot 数量,关于这个数值为什么是 3,而不是 2 在 《Android 动态分区详解(一) 5 张图让你搞懂动态分区原理》有过疑惑,后面看情况是不是要单独写一点东西来说明分析这个。
--virtual-ab
用于设置 metadata 头部的 VIRTUAL_AB_DEVICE 标识,解析这个标识需要 liblp 能够解析 v1.2 版本的 metadata header 数据。
--device super:8531214336
指定 super 设备的大小,可以指定具体的大小数值,也可以通过 --device super:auto 自动计算所需的最小 size。
--group google_dynamic_partitions_a:8527020032
设备 super 内的分组信息,使用 GROUP:SIZE 格式指定具体的 group 名称,以及最大大小。
--partition system_a:readonly:886816768:google_dynamic_partitions_a
设备 super 内的分区信息,使用
--image system_a=out/target/product/panther/system.img
指定分区需要写入的 image 路径。
--sparse
指定生成的 super.img 是否是 sparse 格式,如果指定则输出 sparse 格式的 super 镜像。
--output out/target/product/panther/super.img
指定输出的 super 镜像文件路径和文件名。
根据前面的提示,以下参数是必须的:
--device-size=[SIZE|auto]--metadata-size=SIZE--metadata-slots=COUNT--partition=DATA--output=FILE主要就是用于生成 super 头部的 metadata,缺少任何一个都会影响 metadata 数据的生成,所以是必须的。
上面的命令中,Android 参考设备 panther 上面的分区比较多,分区信息通过 --partition 指定,具体包含的镜像通过 --image 指定。
至于 --group 以及 --image 参数都不是必须的。理论上你可以不用再 super 上创建分组,在制作 super 时也可以不用传入具体分区的镜像数据,这样生成的 super 就是一个只有 metadata 描述数据,而没有任何分区镜像数据的空的 super.img,相当于 Android 编译生成的 super_empty.img
另外,文章《Android 动态分区详解(二) 核心模块和相关工具介绍》 中也介绍过 lpmake 工具的另外一个例子,可以参考上面的参数执行分析这个命令:
lpmake --metadata-size 65536 --super-name super --metadata-slots 3 \ --device super:3028287488 \--group bcm_ref_a:1509949440 --group bcm_ref_b:1509949440 \--partition system_a:readonly:1077702656:bcm_ref_a \--image system_a=out/target/product/inuvik/system.img \--partition system_b:readonly:0:bcm_ref_b \--partition vendor_a:readonly:104992768:bcm_ref_a \--image vendor_a=out/target/product/inuvik/vendor.img \--partition vendor_b:readonly:0:bcm_ref_b \--sparse --output out/target/product/inuvik/super.img这里再提供一个 Android 文档中介绍 lpmake 时使用的例子:
lpmake --device-size 10240000000 \ --metadata-size 65536 \ --metadata-slots 2 \ -o /tmp/super.img \ -p "cache:2da85788-f0e1-4fda-9ee7-e5177eab184b:none:67108864" \ -i "cache=out/target/hikey960/cache.img"这个例子中,创建了一个 10GB 的 super 动态分区,里面只包含了一个 64M 大小的 “cache” 分区。
现在,你可以手动自己使用 lpmake 来生成 super.img 了吗?
到这里差不多应该结束了,给大家留三个思考题:
问题1:system.img 和 system_other.img
仔细观察上面第 3 节生成参考设备 panther 的 super.img 的命令中,system_a 分区和 system_b 分区传入的镜像文件竟然不一样:
/public/rocky/android-13.0.0_r41/out/host/linux-x86/bin/lpmake \--metadata-size 65536 \--super-name super \--metadata-slots 3 \--virtual-ab \--device super:8531214336 \--group google_dynamic_partitions_a:8527020032 \--group google_dynamic_partitions_b:8527020032 \--partition system_a:readonly:886816768:google_dynamic_partitions_a \--image system_a=out/target/product/panther/system.img \--partition system_b:readonly:27312128:google_dynamic_partitions_b \--image system_b=out/target/product/panther/system_other.img \...--sparse \--output out/target/product/panther/super.img其中:
system_a 的 image 为: out/target/product/panther/system.imgsystem_b 的 image 为: out/target/product/panther/system_other.img按照我的理解是 system_a 和 system_b 分区,制作镜像时可以提供一样的文件,或者像其他分区一样,system_b 不提供任何文件,仅保留一个空分区记录。
但为什么这里会传递 system_other.img 给 system_b 分区呢?
镜像文件 system_other.img 和 system.img 有什么区别?
问题 2:按照我上面的方法,研究下 super_empty.img 是如何生成的?
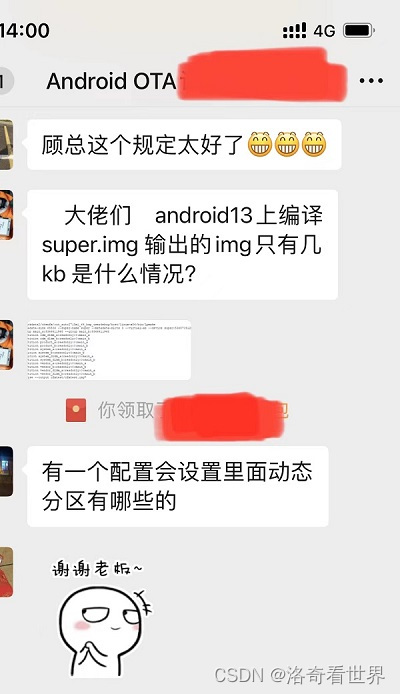
问题 3:为什么我 OTA 讨论群里的这位群友反馈他生成的 super.img 只有几十 K?
更多这些关于 Android OTA 升级相关文章的内容,请参考《Android OTA 升级系列专栏文章导读》。
如果您已经订阅了动态分区和虚拟分区付费专栏,请务必加我微信,备注订阅账号,拉您进“动态分区 & 虚拟分区专栏 VIP 答疑群”。我会在方便的时候,回答大家关于 A/B 系统、动态分区、虚拟分区、各种 OTA 升级和签名的问题,此群仅限专栏订阅者参与~
除此之外,我有一个 Android OTA 升级讨论群,里面现在有 400+ 朋友,主要讨论手机,车机,电视,机顶盒,平板等各种设备的 OTA 升级话题,如果您从事 OTA 升级工作,欢迎加群一起交流,请在加我微信时注明“Android OTA 讨论组”。此群仅限 Android OTA 开发者参与~
公众号“洛奇看世界”后台回复“wx”获取个人微信。
来源地址:https://blog.csdn.net/guyongqiangx/article/details/132581720
--结束END--
本文标题: Android OTA 相关工具(六) 使用 lpmake 打包生成 super.img
本文链接: https://www.lsjlt.com/news/424107.html(转载时请注明来源链接)
有问题或投稿请发送至: 邮箱/279061341@qq.com QQ/279061341
下载Word文档到电脑,方便收藏和打印~
2024-01-21
2023-10-28
2023-10-28
2023-10-27
2023-10-27
2023-10-27
2023-10-27
回答
回答
回答
回答
回答
回答
回答
回答
回答
回答


官方手机版

微信公众号

商务合作


0