本篇文章为大家展示了怎么在Android中使用LinearLayout设置边框,内容简明扼要并且容易理解,绝对能使你眼前一亮,通过这篇文章的详细介绍希望你能有所收获。定一个underline的xml文件,把它放到drawable下under
本篇文章为大家展示了怎么在Android中使用LinearLayout设置边框,内容简明扼要并且容易理解,绝对能使你眼前一亮,通过这篇文章的详细介绍希望你能有所收获。
定一个underline的xml文件,把它放到drawable下
underline.xml
<?xml version="1.0" encoding="UTF-8"?><layer-list xmlns:android="Http://schemas.android.com/apk/res/android" > <!-- 连框颜色值 --> <item> <shape> <solid android:color="#DDDddd" /> </shape> </item> <!-- 主体背景颜色值 --> <item android:bottom="1dp"> <!--设置只有底部有边框--> <shape> <solid android:color="#ffffff" /> </shape> </item></layer-list>然后在LinearLayout中引用该布局。就会出现下边框
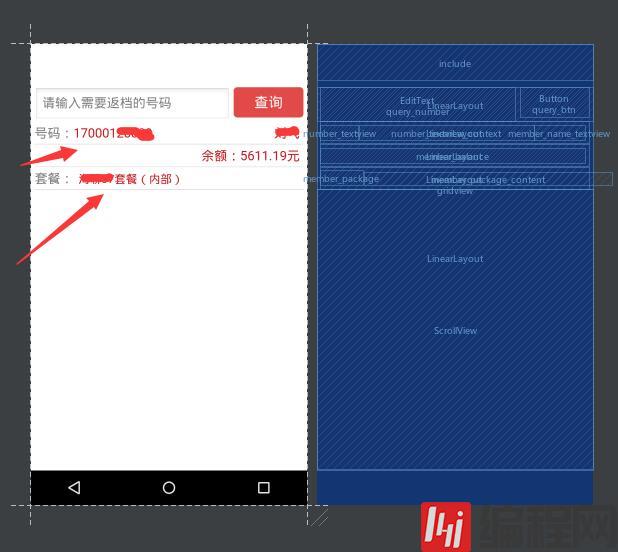
<LinearLayout android:orientation="horizontal" android:layout_width="match_parent" android:layout_marginRight="5dp" android:layout_marginLeft="5dp" android:paddingBottom="5dp" android:paddingTop="5dp" android:paddingRight="5dp" android:background="@drawable/linearlayout_underline" android:layout_height="wrap_content"> <TextView android:text="余额:5611.19元" android:layout_width="wrap_content" android:layout_height="wrap_content" android:textColor="@color/red_font" android:textSize="18dp" android:id="@+id/member_balance" android:layout_weight="1" android:textAlignment="textEnd"/> </LinearLayout>实现的效果图如下:
上述内容就是怎么在Android中使用LinearLayout设置边框,你们学到知识或技能了吗?如果还想学到更多技能或者丰富自己的知识储备,欢迎关注编程网精选频道。
--结束END--
本文标题: 怎么在Android中使用LinearLayout设置边框
本文链接: https://www.lsjlt.com/news/221025.html(转载时请注明来源链接)
有问题或投稿请发送至: 邮箱/279061341@qq.com QQ/279061341
下载Word文档到电脑,方便收藏和打印~
2024-05-16
2024-05-16
2024-05-16
2024-05-16
2024-05-16
2024-05-16
2024-05-16
2024-05-16
2024-05-16
2024-05-16
回答
回答
回答
回答
回答
回答
回答
回答
回答
回答


官方手机版

微信公众号

商务合作


0