要想让您的控件水平居中或垂直居中其实很简单,只要在控件的上一级中设置【Android:gravity="center"】属性即可 如: <LinearLayout xm
要想让您的控件水平居中或垂直居中其实很简单,只要在控件的上一级中设置【Android:gravity="center"】属性即可
如:
<LinearLayout xmlns:android="Http://schemas.android.com/apk/res/android"
  android:orientation="vertical"
  android:gravity="center"
  android:background="#000000"
  android:layout_width="fill_parent"
  android:layout_height="fill_parent"
  >
  <ImageView
  android:id="@+id/loGo"
  android:src="@drawable/logo"
  android:layout_width="wrap_content"
  android:layout_height="wrap_content"
  />
</LinearLayout>
这样一个ImageView控件就乖乖的待在你选定区域的正中间了。 gravity的属性值还有很多,可以单独设置水平或垂直居中。大家可以查看相应的文档,或使用Eclipse的提示功能快速查看。
我们来看一个实例,如果你想实现这样的布局,两个按钮居中,该怎样做?
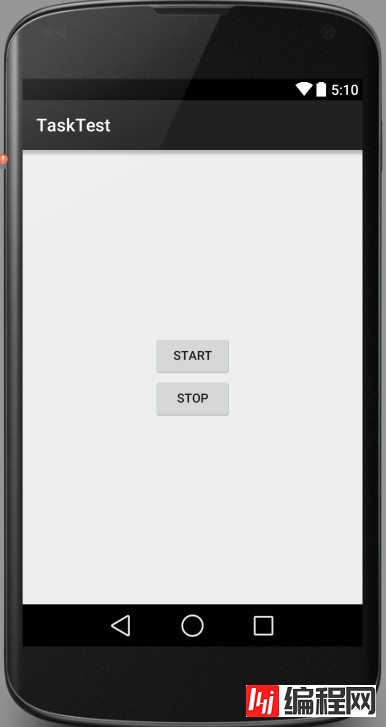
比较容易实现的是LinearLayout布局,当然如果换成RelativeLayout同样也可以实现。
这里简单说一下用RelativeLayout布局如何实现,首先需找中心点,然后以这个中心点为参照物即可实现。接下来看一下更容易实现的LinearLayout布局的实现。
<?xml version="1.0" encoding="utf-8"?>
<LinearLayout xmlns:android="http://schemas.android.com/apk/res/android"
       android:orientation="vertical"
       android:layout_width="match_parent"
       android:layout_height="match_parent"
       android:gravity="center">
  <Button
      android:layout_width="wrap_content"
      android:layout_height="wrap_content"
      android:id="@+id/start_server"
      android:text="Start" />
  <Button
      android:layout_width="wrap_content"
      android:layout_height="wrap_content"
      android:id="@+id/stop_server"
      android:text="Stop" />
</LinearLayout>
如果现在需求改变了,中间只需要一个Button即可,那么实现起来很简单,只需要将上面的其中一个Button标签删除即可,但是有些人这么去实现
<?xml version="1.0" encoding="utf-8"?>
<LinearLayout xmlns:android="http://schemas.android.com/apk/res/android"
       android:orientation="vertical"
       android:layout_width="match_parent"
       android:layout_height="match_parent">
  <Button
      android:layout_width="wrap_content"
      android:layout_height="wrap_content"
      android:id="@+id/start_server"
      android:layout_gravity="center"
      android:text="Start" />
</LinearLayout>
这么实现显然不能居中,虽然在Button标签指定了android:layout_gravity="center"但是貌似布局不领情,为啥?
原因很简单,LinearLayout只能有一个方向,要么Vertical,要么Horizontal,完全不会领layout_gravity这个属性的情,所以上面的实现只有这么一个结果
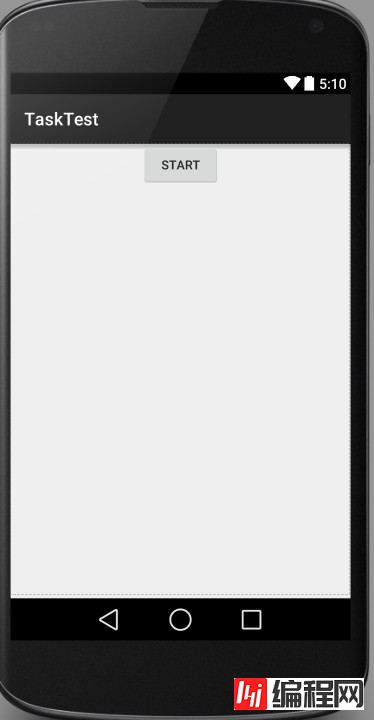
如果改成水平方向的布局
<?xml version="1.0" encoding="utf-8"?>
<LinearLayout xmlns:android="http://schemas.android.com/apk/res/android"
       android:orientation="horizontal"
       android:layout_width="match_parent"
       android:layout_height="match_parent">
  <Button
      android:layout_width="wrap_content"
      android:layout_height="wrap_content"
      android:id="@+id/start_server"
      android:layout_gravity="center"
      android:text="Start" />
</LinearLayout>
会变成这样的结果

按照上面的理论也就能想通了,所以android:layout_gravity="center"这个属性虽然LinearLayout也具有,但是却虚晃一枪,真正其作用的还是其本身的属性android:gravity="center",当然如果想一探究竟,为啥不起作用,可以从LinearLayout这个布局的源代码看起,这里不再赘述。
您可能感兴趣的文章:android LinearLayout和RelativeLayout组合实现精确布局方法介绍Android应用借助LinearLayout实现垂直水平居中布局Android中LinearLayout布局的常用属性总结android 线性布局LinearLayout实例代码Android 布局控件之LinearLayout详细介绍android LinearLayout 布局实例代码Android App中的多个LinearLayout嵌套布局实例解析Android自定义控件LinearLayout实例讲解Android应用的LinearLayout中嵌套RelativeLayout的布局用法Android使用LinearLayout设置边框
--结束END--
本文标题: Android App中使用LinearLayout进行居中布局的实例讲解
本文链接: https://www.lsjlt.com/news/25282.html(转载时请注明来源链接)
有问题或投稿请发送至: 邮箱/279061341@qq.com QQ/279061341
下载Word文档到电脑,方便收藏和打印~
2024-01-21
2023-10-28
2023-10-28
2023-10-27
2023-10-27
2023-10-27
2023-10-27
回答
回答
回答
回答
回答
回答
回答
回答
回答
回答


官方手机版

微信公众号

商务合作


0