Python 官方文档:入门教程 => 点击学习
目录一、新建一个工程二、xxx-sprig-boot-starter-configure模块自动配置编码2.1 服务层编码2.2 属性配置类编码2.3 starter自动配置类编码2
工程由xxx-sprig-boot-starter和xxx-sprig-boot-starter-configure两个模块组成;

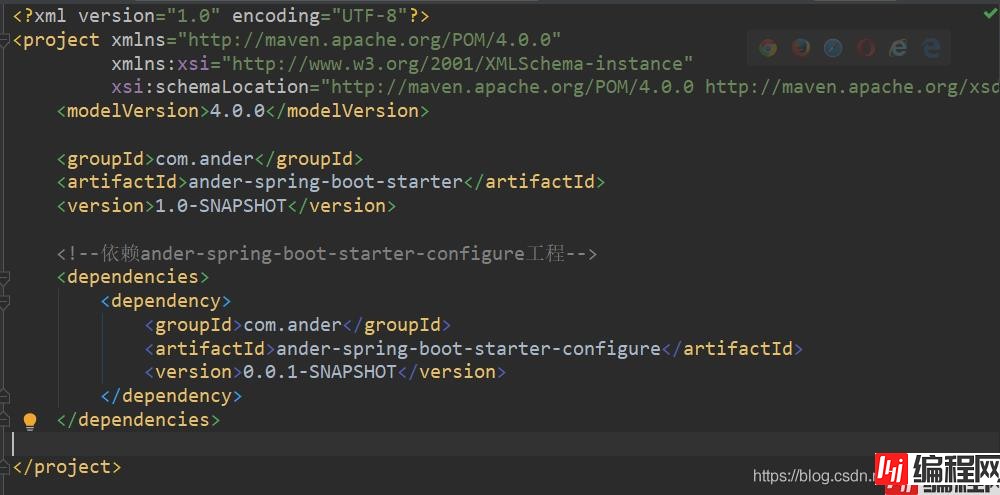
xxx-sprig-boot-starter模块
xxx-sprig-boot-starter-configure模块,没有实际代码
<?xml version="1.0" encoding="UTF-8"?>
<project xmlns="Http://Maven.apache.org/POM/4.0.0"
         xmlns:xsi="http://www.w3.org/2001/XMLSchema-instance"
         xsi:schemaLocation="http://maven.apache.org/POM/4.0.0 http://maven.apache.org/xsd/maven-4.0.0.xsd">
    <modelVersion>4.0.0</modelVersion>

    <groupId>com.ander</groupId>
    <artifactId>ander-spring-boot-starter</artifactId>
    <version>1.0-SNAPSHOT</version>

    <!--依赖ander-spring-boot-starter-configure工程-->
    <dependencies>
        <dependency>
            <groupId>com.ander</groupId>
            <artifactId>ander-spring-boot-starter-configure</artifactId>
            <version>0.0.1-SNAPSHOT</version>
        </dependency>
    </dependencies>

</project>
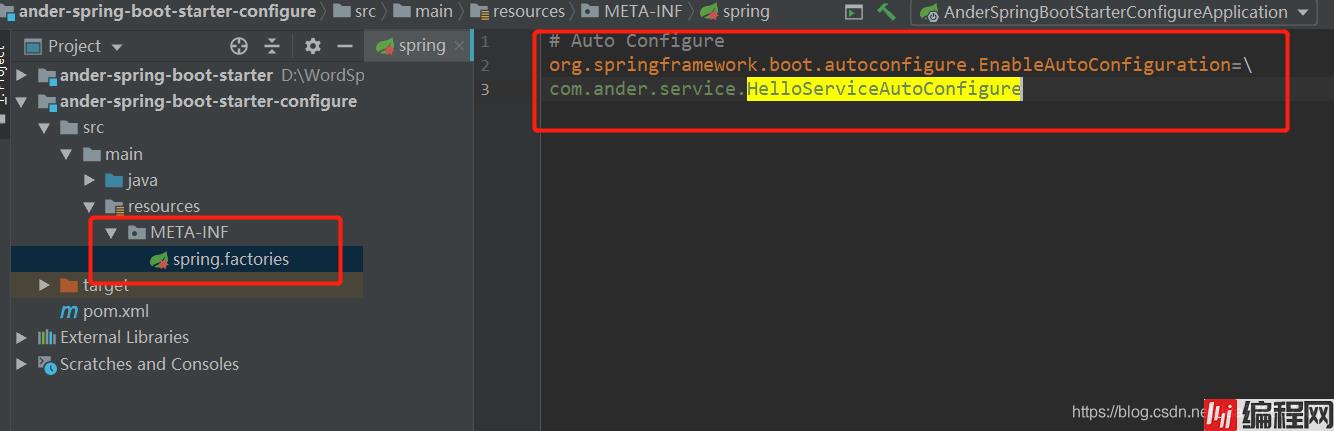
xxx-sprig-boot-starter-configure模块
spring-boot-starter-WEB
<?xml version="1.0" encoding="UTF-8"?>
<project xmlns="http://maven.apache.org/POM/4.0.0" xmlns:xsi="http://www.w3.org/2001/XMLSchema-instance"
         xsi:schemaLocation="http://maven.apache.org/POM/4.0.0 https://maven.apache.org/xsd/maven-4.0.0.xsd">
    <modelVersion>4.0.0</modelVersion>
    <parent>
        <groupId>org.springframework.boot</groupId>
        <artifactId>spring-boot-starter-parent</artifactId>
        <version>2.3.10.RELEASE</version>
        <relativePath/> <!-- lookup parent from repository -->
    </parent>

    <groupId>com.ander</groupId>
    <artifactId>ander-spring-boot-starter-configure</artifactId>
    <version>0.0.1-SNAPSHOT</version>
    <name>ander-spring-boot-starter-configure</name>
    <description>Demo project for Spring Boot</description>

    <properties>
        <java.version>1.8</java.version>
    </properties>

    <dependencies>
        <dependency>
            <groupId>org.springframework.boot</groupId>
            <artifactId>spring-boot-starter-web</artifactId>
        </dependency>
    </dependencies>

</project>

public class HelloService {

    private HelloServiceProperties helloServiceProperties;

    public String helloService(String name) {
        return helloServiceProperties.getPrefix() + " "+ name + " " + helloServiceProperties.getSuffix();
    }

    public HelloServiceProperties getHelloServiceProperties() {
        return helloServiceProperties;
    }

    public void setHelloServiceProperties(HelloServiceProperties helloServiceProperties) {
        this.helloServiceProperties = helloServiceProperties;
    }
}
@ConfigurationProperties(prefix = "com.ander")
public class HelloServiceProperties {

    private String prefix = "hi";
    private String suffix = "hello world";

    public String getPrefix() {
        return prefix;
    }

    public void setPrefix(String prefix) {
        this.prefix = prefix;
    }

    public String getSuffix() {
        return suffix;
    }

    public void setSuffix(String suffix) {
        this.suffix = suffix;
    }
}
@EnableConfigurationProperties({HelloServiceProperties.class})作用:让xxxProperties生效加入到容器中
@Configuration
@ConditionalOnWebApplication // 指定web应用才生效
@EnableConfigurationProperties({HelloServiceProperties.class})
public class HelloServiceAutoConfigure {

    @Autowired
    private HelloServiceProperties helloServiceProperties;

    @Bean
    public HelloService helloService() {
        HelloService helloService = new HelloService();
        helloService.setHelloServiceProperties(helloServiceProperties);
        return helloService;
    }
}
注意先安装xxx-spring-boot-starter-configure,再安装xxx-spring-boot-starter

@RestController
public class StarterTestController {
@Autowired
private HelloService helloService;
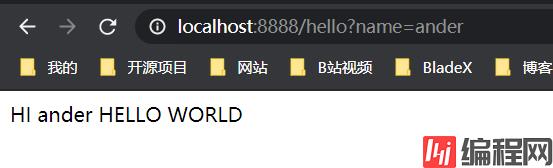
@GetMapping("hello")
public String hello(String name) {
return helloService.helloService(name);
}
}
server.port=8888
com.ander.prefix=HI
com.ander.suffix=HELLO WORLD

到此这篇关于使用Spring Boot自定义starter详解的文章就介绍到这了,更多相关Spring Boot自定义starter内容请搜索编程网以前的文章或继续浏览下面的相关文章希望大家以后多多支持编程网!
--结束END--
本文标题: 使用SpringBoot自定义starter详解
本文链接: https://www.lsjlt.com/news/125529.html(转载时请注明来源链接)
有问题或投稿请发送至: 邮箱/279061341@qq.com QQ/279061341
下载Word文档到电脑,方便收藏和打印~
2024-03-01
2024-03-01
2024-03-01
2024-02-29
2024-02-29
2024-02-29
2024-02-29
2024-02-29
2024-02-29
2024-02-29
回答
回答
回答
回答
回答
回答
回答
回答
回答
回答


官方手机版

微信公众号

商务合作


0